A private house built of wood cannot always be considered a complete structure, since in many cases it requires an external and interior decoration walls. There are many different options, but not all of them are suitable for cladding this kind of buildings. In this article, we will look at how you can sheathe a wooden house inside and out and how best to do it yourself.
To begin with, it is worth highlighting those buildings that initially does not make sense to somehow sheathe the outside, and even more so - to make insulation. Whichever finishing option you choose, it will not be cheap and therefore impractical for wooden houses summer or periodical residence. As for finishing the home from the inside, it is more a matter of design and the wishes of the homeowner than a necessity. After all, wooden walls made of timber or rounded logs always look attractive.
Now we will give the cases when wooden houses are cladding from the outside:
Quite often there are log houses that have stood for more than 50 years and are ready to serve the same amount. Additional cladding from the street will not only allow you to change the appearance of the home for the better, but also protect the wood from precipitation and in this way extend its service life. The same protection will not interfere with walls in need of insulation. Since it is customary to carry out thermal insulation outside, and not inside a wooden house, the insulation must be hidden behind a hydro-barrier and revetted, which will be discussed below.
Advice. The exterior decoration of a newly built wooden house is carried out after 1 year. The shrinkage of buildings of this type is quite significant, as a result of which the external design of the finished walls may suffer and everything will have to be redone.

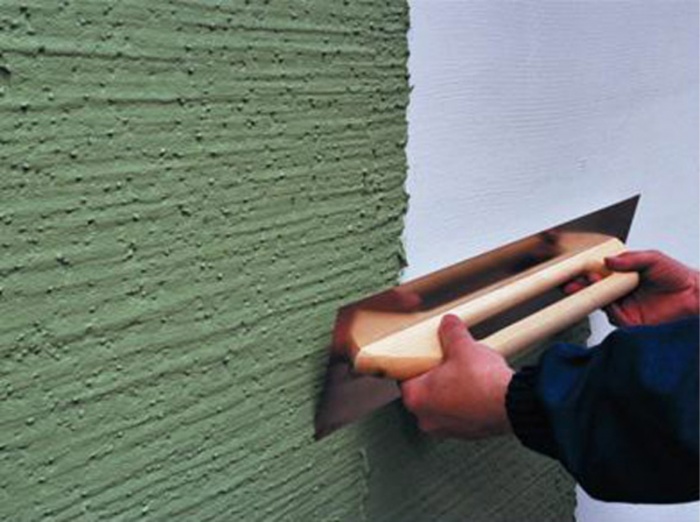
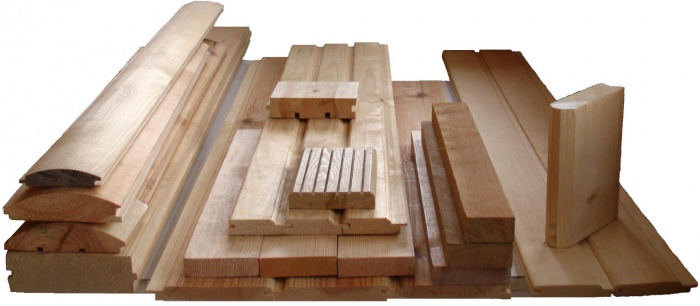
Despite the wide selection of facing materials, their list for wooden houses is somewhat limited for various reasons. For example, it is relatively inexpensive to decorate a house with plaster, but this method is only suitable for frame buildings, sheathed from the outside with OSB sheets, as shown in the diagram below. Plastering a log cabin or a dwelling from a bar will be problematic.

As you can see in the diagram, the basic mineral wool insulation located inside the wall is supplemented with a layer of polystyrene or expanded polystyrene attached to the OSB plywood sheathing sheets. And after that, tinted decorative plaster is applied. But such a facade finish is a rarity for a wooden house, the following materials for external cladding are more common:
For reference. It is cheaper and faster to sheathe the walls of the house with painted corrugated board, this practice also takes place. But at the same time, the design of the building looks completely cheap and resembles manufacture building... In addition, the corrugated board quickly fade in the sun and loses color. Unless you get an expensive material coated with a pattern, as in the photo:

Vinyl siding is a very popular material, it is relatively inexpensive and retains its appearance for a long time, moreover, with its help it is quite possible to sheathe a wooden house on your own. It will be more expensive to decorate the walls with another siding - imitation of a bar and a rounded log called "block house".

This is a very attractive and pretty material, but it requires maintenance, like a regular lining made of wood.

If we talk about what is the best way to sheathe a wooden house without reference to the cost of materials, then the “ventilated facade” system is beyond competition. It is a frame made of galvanized profiles, inside of which insulation is attached, and outside - finishing elements. Moreover, the latter can look like siding, brick or natural stone - to choose from. True, the system can hardly be called cheap, and not every homeowner can handle the installation.

It is easier to solve the problem than to decorate the walls of a wooden house from the inside. For this purpose, the following are most often used:
Drywall and OSB are an excellent basis for any finishing layer - various wallpapers, tiles and other materials. Moisture resistant gypsum boards are perfect for interior cladding bathroom, and the lining is for the bath built into the house. OSB boards are not used very often inside buildings, since drywall is much more environmentally friendly.
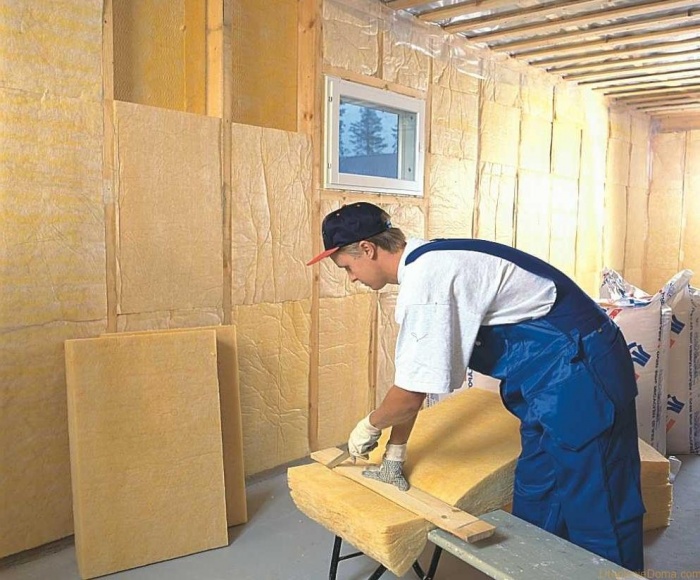
A few words about the insulation used. It is common knowledge that houses built of wood must "breathe". This means that the material of the walls is transparent to vapors, due to which moisture from the inside of the premises is removed to the outside, passing through the wood. If a vapor-tight barrier is placed in their way, then moisture will condense in front of it, which will lead to the gradual destruction of the fence. Therefore, it is not recommended to use water-repellent polymers such as penoplex or penofol.
The best solution for insulation when decorating a wooden house is mineral or basalt wool... It is vapor-permeable and absolutely not subject to combustion.

The exception to the rule is frame building, where the mineral wool layer is part of the enclosing structure, but there is no main wall. Here, the insulation is protected from vapor penetration by a film on the one side and waterproofing on the other, as shown in the diagram:

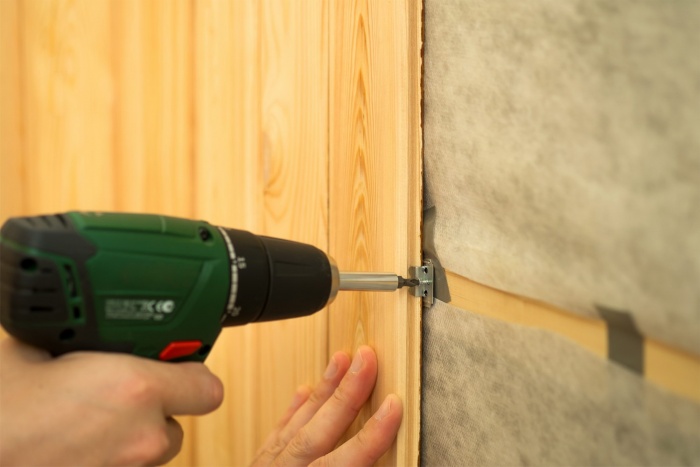
This exterior decoration of the house can be carried out with or without insulation, if necessary. But in any case, it is necessary to provide an air gap for ventilation between the vinyl siding and the wall. Its task is to remove moisture that gets from the outside onto a diffusion membrane, which plays the role of a hydro and wind barrier. This is why the canvases vinyl siding do not attach directly to the walls, no matter how smooth they are. First you need to assemble the crate from wooden beams, less often - from galvanized profiles.

Advice. Before sheathing an old chopped house, you should thoroughly dig in the cracks between the logs, using natural materials for this - felt, tow or moss.
The width of the bars for the lathing with the device exterior decoration without insulation, it should be from 3 to 5 cm to provide an air gap. The interval between the slats is 40-50 cm. But first of all, a diffusion membrane is laid, it is capable of transmitting vapors, but reflecting water. Membrane sheets are laid horizontally, starting from the bottom, with an overlap of 10 cm and gluing at the joints with tape. After that, it is pressed with bars or sheathing profiles, installed vertically.

Note. If you plan to install vertical siding, then the beams should be fixed horizontally. They should be pretreated with an antiseptic composition.
Also, lathing strips frame all openings - windows and entrance doors... At the same time, it is better to nail wooden elements to the wall with nails, and not fasten them with self-tapping screws. The latter do not give structures the ability to move during shrinkage or thermal expansion. An important point: the surfaces of all bars must be strictly vertical and aligned in one plane. Now you can start installing the siding using the starter and other types of planks shown in the figure:

When adjusting the siding, it is important to take into account its thermal elongation, therefore, the ends of the vinyl strips should not rest against the slots of the corner strips on the sides (meaning horizontal installation). The strips must be cut off and inserted between the planks with a gap of 3-5 mm, and the nails must not be driven in until they stop. For this, oval holes are made in the siding so that the strip can move a little. By the way, the installation is carried out from the starting bar - from the bottom up.

When the length of 1 strip is not enough to cover the entire wall of a wooden house, then you need to put one or more connecting strips, placing them as aesthetically as possible. Although siding is allowed to be laid with an overlap (without a plank), such a connection looks unpleasant, and therefore it is worth using it as a last resort. Well, there are special vinyl strips for framing windows and doors.
If it is decided to combine the finishing process with insulation, then laying is also included in the work procedure. thermal insulation material... Given its thickness (not less than 100 mm, and in the northern regions and all 150 mm), it is necessary to take bars for the lathing of the corresponding width. Moreover, the membrane is not applied immediately to the wall, but already on top of the insulation. It is fastened by nailing on top of the strips of a counter lattice with a thickness of 30 mm. Further work is carried out in the same way as described above.
In essence, a block house for cladding a house is the same siding, only made of wood, and the algorithm for carrying out the work is the same.

True, there are a number of differences that we will focus on:

One of the most difficult knots is the adjoining of the cladding in the form of an inner corner. Of course, you can ignore the resulting gap and sheathe the corner with a shaped element. But in order for the cladding of a wooden house block house, made by hand, to be of high quality, it is worth cutting out an arched cutout in the adjoining part, as shown in the photo:

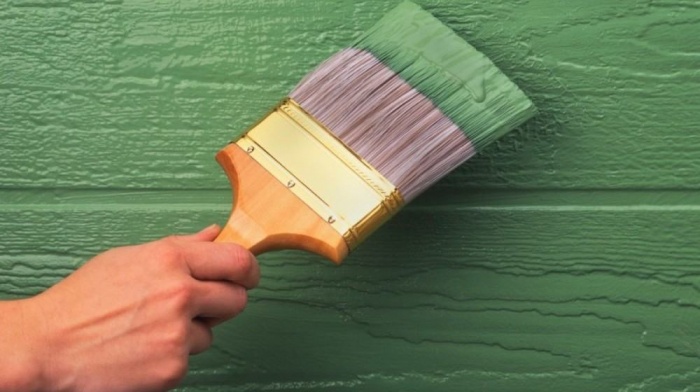
At the end, an antiseptic primer is applied to the finished surface, after which it is finished with several layers of varnish or paint.
This is one of the most popular methods of cladding private wooden houses from the inside, used in almost all rooms, and especially in the steam room. At the moment, there are several types of lining on sale:

The technology of wall cladding inside the house is the same for all types, and work begins with the device of a vapor barrier made of film and installation of the lathing. The film is laid out with an overlap of 10 to 15 cm, after which the joints should be carefully glued with double-sided or ordinary tape. From above, it is pressed against the wall with battens, the thickness of which is 20 mm. The slats are nailed to the wall vertically (when horizontal installation facing) with an interval of 40-50 cm.
Important. All battens of the battens should be brought out into one vertical plane by means of various shims or mounting wedges.

The first board is fixed with self-tapping screws at a distance of 40-50 mm from the floor, taking into account the subsequent installation of the plinth. All subsequent planks are most correctly fixed with the help of metal elements - clamps, put on the previous board and nailed to the lathing bars with carnations. It is not recommended to fasten the cladding by driving nails into the grooves of the lining.

As with the exterior cladding of a house with a block house, all joints and corners should be revetted with shaped parts or a wooden plinth. After that, it remains to treat the wood with an antiseptic and cover it with several layers of varnish. A more detailed finishing technology is shown in the video:
Drywall is an excellent material for rough finishing of any interior surfaces of a wooden house, including the ceiling. Also, moisture-resistant gypsum board is indispensable in rooms with high humidity - in bathrooms and dressing rooms. Subsequently, you can put on it tile or apply liquid wallpaper. The technology here is simple: first, galvanized profiles are attached to the wall or ceiling so that their shelves are in the same plane. To strengthen the structure, jumpers from the same profiles are placed between the vertical profiles.

Sheets of drywall are screwed to the shelves of the profiles with self-tapping screws so that their caps are flush with the surface of the gypsum board. The step between adjacent self-tapping screws is 10-15 cm. Where it is impossible to fasten a whole sheet, it is necessary to accurately measure and cut off a part of it. This is done with a sharpened knife or specialized tool. When the wall is completely sewn up, then the joints and the caps of the self-tapping screws must be leveled with a putty, which, after drying, should be wiped with sandpaper. At this point, the surface is ready for further cladding.

Thanks to the existing cladding materials, it is possible to give any wooden house a presentable appearance, and even "turn" it into stone with the help of external cladding. In addition, finishing will save wood longer and increase the life of the building as a whole. It will not be superfluous to insulate the house from the outside, as a result of which the cost of heating it will decrease.
Many will agree that nowadays the construction of wooden houses is a very demanded, popular direction. Of course, modern wooden dwellings are much more comfortable and attractive when compared with their predecessors. This is largely due to the level of interior decoration of such housing - we will talk about this in more detail. How to decorate a wooden house inside so that the housing is as cozy and comfortable as possible - this question is far from idle interest.
It should be noted that there are many options for finishing a wooden house - there is a wide choice here. Thus, it is important to decide whether you want to do everything to preserve the natural charm of a wooden structure, or whether it does not really matter to you.
If you decide to decorate a wooden house inside, remember - this work has several features, it is important to take them into account. If you miss something at this stage, various problems may arise in the foreseeable future - wood rotting, dampness, fungus and mold also often make themselves felt.

Typically, thermal insulation is necessary for those structures that are already dilapidated. The fact is that the tree is already magnificent thermal insulation characteristics... Thus, it is better to concentrate on providing thermal insulation of interfloor ceilings, roofs, floors.
The fact is that natural materials are ideally combined with each other - which cannot be said about any combinations with materials of artificial origin.

The peculiarity of wooden houses is that it is not necessary to make special efforts in order to get a beautiful, impressive interior - this is due to the beautiful texture of the material, its magnificent color. Thus, if you are planning interior decoration, it is important to carefully think over every little thing - so that this feature of your home is preserved.
It is best to decide in advance on the materials that will be used in the interior decoration of a wooden house - then you will be able to do all the calculations without any problems.
Please note: for the completion of finishing are accepted only if when the arrangement of all communications in a wooden house is completed- this applies to water supply, sewerage.

Interior decoration in houses (a wooden structures- not an exception) it is customary to produce from the ceiling surface. This can be explained by the fact that in the course of ceiling work, the covering of walls and ceilings can be stained or even damaged.
In general, finishing the ceiling inside a wooden house is much more difficult than any other surface - it's just that the materials are not very convenient to apply, this is the main difficulty.
Of course, you can always hire a team of skilled craftsmen for such work, but many people can be scared off by the cost of such work. In general, decorating a wooden house inside is sometimes not as cheap as many homeowners would like. That is why many decide to work with their own hands - it is not only profitable, but also in a businesslike way.
So, how to decorate the ceilings in a wooden house? As you know, the ceiling contains boards and beams. This greatly facilitates the master's task - insulation and electrical wiring are often laid directly between the beams.
To make the headliner such materials are often chosen:
A more aesthetic way is ceiling boards are sanded, then they are varnished.

If it is decided that the interior decoration of the house must be done with clapboard, then the ceiling that was sheathed with veneer panels will look best (in this situation, the surface of the ceiling will perfectly match the walls). However, you can limit yourself to simple painted boards or a simple clapboard - many people also do this.
When the lining is being installed when finishing a wooden house inside, it is customary to make a small gap between the walls and panels - this is necessary for ventilation. The optimal size of such a gap is 5 mm, it is no longer needed.
Installation of the lining is carried out on the ceiling, this work can be done using the following instruction:
For this, water-dispersion coatings are ideal, the whole natural texture of wood after applying such a composition will not go anywhere - it will be in sight. Also, keep in mind - any wooden materials that are used in interior decoration, it is important to treat them with fire retardants and antiseptics before installation.
How to decorate the ceiling in a wooden house - we offer you photos and videos on the topic below. Be sure to check out these additional resources to avoid mistakes and achieve impressive results.

How to decorate the walls in a wooden house inside? Now we will consider this process in detail. When its cladding is made, it's time to start actions aimed at decorating the walls.
If you want the natural appearance of these surfaces to be preserved, the ideal choice for cladding is to apply a protective compound to the walls, then to dig them with a decorative rope.
As mentioned above, if they do interior decoration in an old wooden house, then during this process they also provide wall insulation, without it anywhere.
What materials are suitable for solving such problems? It's simple:
You will only get a beautiful appearance of a wooden house inside if you choose lining from all of the above materials for cladding. With the help of modern lining, it is very easy to achieve imitation of logs, beams, etc.
Let's talk about how the walls of a wooden house are trimmed with clapboard. Here everything is as follows:
Sheathe the walls of a wooden house with plasterboard is also a fairly popular type of decoration. Of course, in this case, your walls will lose their spectacular appearance (there will no longer be a wonderful woody structure), but this solution also has its advantages:
What is the best way to install drywall on the walls inside a wooden house?

You can as topcoat choosing wallpaper is a very good solution, including for interior decoration of the walls of a wooden house.

Now let's talk about how you can decorate the floors in a wooden house, because we have already figured out the facing of the ceiling and walls above. It is not difficult to guess that flooring is already the final stage.
Since logs and beams are laid even at the construction stage, the owner needs to do only one thing - sheathe the floor in a wooden house with boards, equip the finishing coating.
What are the topcoats can be called the most popular today?
In about this order the floor is being finished in a wooden house:
If you are going to lay carpet on the floor in a wooden house, then it is best to use a special installation system for optimal results.
In principle, within the framework of this material, we examined all the main tips on how to decorate a wooden house from the inside.

Within the framework of this article, we have considered all the basic points that the owners are forced to face when performing finishing work in their wooden houses. Of course, besides all of the above, there are others. important details however, even a novice specialist can easily cope with them. Be sure to check out the video - finishing a wooden house from the inside - this will help you cope with the upcoming work.
Obviously, interest in suburban housing, in general, and in wooden houses in particular, has grown. We can say that wooden houses are experiencing a rebirth. If you used to buy houses built many years ago, and then remake them for yourself, now a lot of houses are being built "from scratch" and it is from wood. And this fact cannot but rejoice. Where, if not in Russia, you would like to see beautiful wooden houses, in which you can immediately guess the famous traditions of Russian architects, and not a senseless and ugly heap of bricks with which we were "littered" in the 90s. Where else but in Russia it is nice to see modern and - ordinary and rounded, as well as from a bar, which have preserved traditions and are made with the use of new technologies.
Observers are interested in seeing the external beauty of a wooden house, and their owners also want to see the internal beauty of their homes. And at the same time, one does not want to give up the benefits of civilization, and why? Therefore, finishing a wooden house inside is a complex and multi-level process, which is designed to become a kind of bridge in time. A bridge between centuries-old folk traditions and modern benefits of civilizations. At the same time, neither one nor the other side should be infringed upon. Is it possible? Practice shows that yes!
Wood is a unique natural material that will never be surpassed by any artificial one, to which they are trying to give the properties of what Mother Nature created. It is not for nothing that so many floor and wall coverings are made "wood-like". Wood-like laminate, wood-like MDF panels, wood-like ceramic tiles and many other things made for this material. Why is this done? Can't you just apply this very tree and do nothing at all. Of course! A person will always build wooden houses, but one must understand that in addition to the obvious advantages, wooden houses also have weaknesses.
The fact is that the tree is loved not only by us people. It is also loved by other inhabitants of our planet, who perceive it as food or arranging a home in it. We cannot but take into account their needs, therefore we have to reckon with this. For this, certain barriers are made in the form of chemicals that will repel unwanted animals. And measures for the biological protection of a wooden house are made precisely at the stage of interior decoration.

The tree loves one of the most beautiful and powerful elements of our world - the element of Fire. And there is no getting away from this either. We, as people, cannot make Fire stop loving a tree. We can only take measures so that there are no conditions for its uncontrolled occurrence in our house. That is, we can also "come to an agreement" with Fire if we take certain measures. The first measure is to reduce the likelihood of its development, and the second is that even when it appears, you need to resist to the last, you need to prevent it from burning unhindered. Fire protection measures are also carried out at the stage of interior decoration of a wooden house.

A modern wooden house is very different from its "distant ancestors", where from the engineering systems there were only a stove and lamps. The power supply of housing in our time is very large. These are electrical wiring, and the heating system, and the water supply system, and the sewerage system, and computer networks, and the telephone, and video surveillance, and television. All these engineering systems require a place for their placement, they must be calculated and made in such a way as to perform their functions and be safe for the house and the people living in it. And all these activities are also done at the stage of interior decoration of a wooden house.
If earlier wood was the most common and affordable building material, now it has become elite and building a wooden house is far from cheap pleasure. For all the undoubted advantages in the form of environmental friendliness, hygiene, aesthetics, you have to pay a lot of money. And, of course, when decorating a wooden house inside, only those materials should be used that will only emphasize all its advantages.
Taking into account all of the above, you can present a set of requirements for the interior decoration of a wooden house:
A feature of wooden houses is that they shrink, and this process can last for several years. This should be taken into account when interior decoration, so it is done in stages. Let's call these stages:
As mentioned earlier, wood needs protection, both from adverse environmental factors, and from various representatives of the world of plants, fungi and animals. Of natural influences, wood least of all loves exposure to ultraviolet rays, which are present in the solar spectrum and destroy lignin - a compound that is basic in the structure of woody wood cells. It is this that determines the ability of wood to withstand static and dynamic loads. When it is destroyed, we can observe how the surface of the logs or timber becomes dry, rough and loses its natural color.

The worst thing for wood is a fungal infection, and it can be wood-staining or wood-destroying. If the first only creates spots on the surface, but does not affect the physicochemical properties, then the second leads to the destruction of the structure. This process is known to us as decay. And if someone claims that it is possible only with high humidity, it will turn out to be wrong, since already at a level of 18-20%, destructive fungi can develop quite successfully. Primary moisture and lack of air exchange will only contribute to their growth, since further moisture will be obtained from decay products.

Some fungi are capable of infecting a tree only during its life, while others, more dangerous for us, develop already in cut trees. Therefore, in good industries, timber is protected immediately, in order to provide protection during storage, transportation and construction. But such protection is short-lived and lasts from 2 to 6 months, which, in principle, is sufficient for construction. But only then should a longer-acting composition be applied. What to look for when choosing.
Let us give short review one of the most common antiseptics in Russia, produced by the Senezh Preparations company, which are known under the Senezh trademark. These drugs have proven to be excellent in Russian conditions.
| Image | Name | Description |
|---|---|---|
 | "Senezh Aquadecor" | Designed for long-term protection from precipitation, UV radiation, woodworm insects and various fungi. Has a toning effect, made on an acrylate base. |
 | "Senezh Ecobio" | Designed for indoor use. Protects against insects and all types of fungi. Protection period up to 25 years. Water based composition. |
 | "Senezh Ultra" | A versatile water-based protective compound that can be applied both inside and out. Validity period - up to 30-35 years. Gives the processed wood a pistachio hue. |
 | "Senezh Bio" | Universal preservative water-based antiseptic, difficult to remove, for severe operating conditions. Valid for 30-35 years. Gives the wood a greenish tint. |
 | "Senezh Ognebio Prof" | Designed for comprehensive protection inside and outside under a canopy from insects, fungi, as well as from ignition and spread of fire. Water based composition. |
 | "Senezh Tor" | Designed to protect the ends of large logs from uneven drying, cracking and biological damage. It can be used to protect the ends inside structures. Water-borne polymer based composition. |
The table shows only some of the drugs of protection from the range of "Senezh Preparations", which, in principle, show the area of application. In addition to this manufacturer, there are other well-known world brands Tikkurila, Belinka, Pinotex and others. For each house, depending on the operating conditions, specialists select exactly those who will fulfill their task. Water-based formulations can be used as primers before finishing varnish or paint, which increases their protective properties and service life.
The compositions are applied to dry wood, free from dirt and dust. Application methods are standard: brush, roller or spray. Autoclaving is only carried out in an industrial environment. Usually any composition is applied in at least two layers. The consumption of a particular drug depends on its specific brand and the condition of the wood. In any case, you must use the instructions for use attached to each tool.
 One of better ways applying protective compounds is spraying
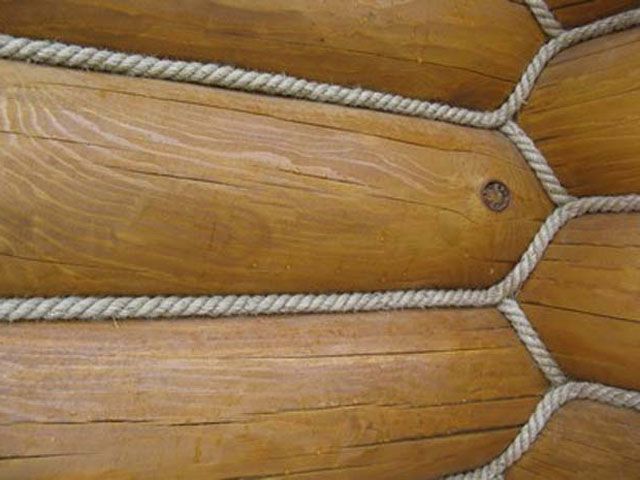
With all its advantages, wooden houses have a significant drawback - they shrink, and quite long in time and still experience seasonal fluctuations in geometric dimensions. This can lead to cracking of the solid wood, and also leads to the fact that the seams between logs or timber also change in size and you cannot do without compaction.
From time immemorial, architects naturally knew about this problem and took measures to seal the seams, which they called caulking or caulking. Three main materials were used for these events:

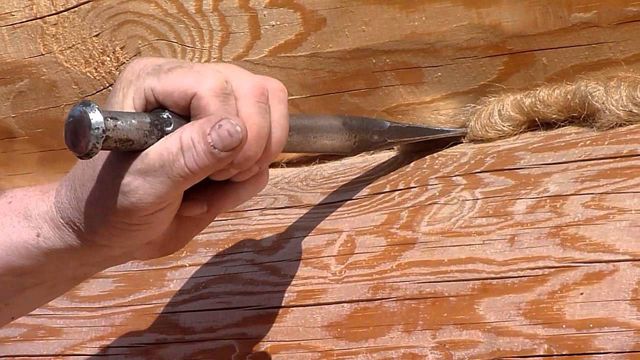
The primary caulking is always done during the erection of the log house or immediately thereafter. The secondary is done after the final one, after its shrinkage, that is, after 18-24 months. Although these works seem simple, they require special care, since caulking is done first from the outside, and then from the inside, and it is necessary to move one crown after another from the bottom up and nothing else. In no case should you close up the seams on a single wall, since the frame can greatly change its geometry - it can be skewed.
For these works, a very simple tool, proven over the centuries, is used. This is a set of special caulking blades and a wooden mallet. Caulkers are often made of wood so as not to damage the logs or beams during insulation. Dried natural insulation is twisted into bundles and neatly hammered into the gaps between the joints. You can watch the caulking technology in the video.

Natural materials for caulking, of course, have advantages in the form of their naturalness. But it would be foolish in the 21st century not to consider other options for sealing inter-crown joints, especially since science and production technology have advanced a lot since our distant ancestors had no choice but moss or hemp. Weak points natural insulation materials are:
 Filming from the scene of the "crime". Theft of tow by birds on an especially large scale
Acrylic is rightfully considered the first place among synthetic sealants for wooden houses. And this happens for explainable reasons:
mezhventsovy sealant

The high price of acrylic sealants is more than offset by their unconditional operational advantages.
Polyurethane-based sealants have also found application in caulking joints with synthetic compounds. Although they have good adhesion to wood, their thermal conductivity and thermal expansion differ from wood. That is why it is better to still use acrylic sealants.
On our portal, the process of choosing a mezhventsovy sealant and its correct application described in sufficient detail in the corresponding. We will just give a few examples of acrylic based sealants, and also provide readers with the ability to calculate an approximate number of them depending on the width and depth of the joint.
| Image | Name | Brief description of the sealant |
|---|---|---|
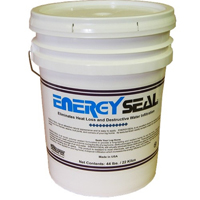
 | Acrylic sealant Energy Seal, packing - 325, 840 ml cartridges, 19 l bucket. Country of origin - USA. | Designed for sealing narrow and normal joints, as well as cracks up to 2.5 cm wide. Can be used both indoors and outdoors. Available in 12 colors. |
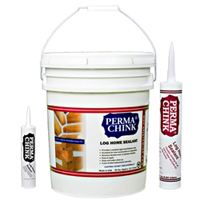
 | Perma-Chink acrylic sealant, packing - 325, 840 ml cartridges, 19 l bucket. Country of origin - USA. | Designed for sealing wide joints - from 2.5 to 15 cm for indoor and outdoor use. Available in 8 colors. |
 | Acrylic sealant Therma Chink, packing 600 ml, 7 kg, 15 kg. Country of origin - Russia. | For sealing the seams of wooden houses both outside and inside the house. Available in 5 colors. |
 | Acrylic sealant Eurotex, packing 600 ml, 3 kg, 6 kg, 25 kg. Country of origin - Russia. | For sealing the seams of wooden houses both outside and inside the house. Available in 4 colors. |
The table deliberately lists two flawless US-made sealants and two sealants. Russian production also of very good quality. For comparison, let us give the order of prices for imported goods and import-substituted ones and make sure that the domestic manufacturer should still be trusted. For example, a bucket of 19 liters of Energy Seal will cost 33,000 rubles as of the summer of 2016, and 15 kilograms of the Russian Therma Chink will cost 7,500 rubles. If you count in kilograms, then 1 kg of imported sealant will cost 1,089 rubles, and 1 kg of Russian - 500 rubles. Therefore, the choice is yours, our dear readers.
For an approximate calculation of the amount, we present a calculator with which you can calculate the approximate amount of sealant. It is very difficult to calculate the exact amount, since the seam between the logs or a bar rarely has a strict geometry, and the consumption depends very much on the skill of the master.
Nowadays, wooden houses seem to be reborn, as they are becoming more and more popular. Although before buying old wooden houses, everyone tried to remake them, and make them comfortable for themselves. Now the opposite is true, since more and more people are starting to build a wooden house. Well, you must admit that where else but in Russia we want to see those built of wood. It is in such buildings that we can all see characteristic Russian traditions. They should not be considered old-fashioned, since a house made of wood in our time is not at all the building that our grandfathers and great-grandfathers did. After all, a log or rounded house is built according to modern technologies, thanks to which he will have a decent appearance, and all the necessary for good home properties, both heat and waterproof.
But, after construction, how to make the house attractive not only outside, but also inside. Finishing finished walls in a wooden house from the inside requires special attention. Since having completed the construction of a semi-antique house, we do not want to give up the modern benefits of civilization.
On the contrary, we want a home that will have all the amenities we need. In this article, you will learn practical advice, which will help you choose materials for interior wall decoration.
You need to start interior wall decoration only after the house has completely shrunk. If your house is built of laminated veneer lumber, then you will have to wait at least three to four weeks. In other cases, complete shrinkage of the house will occur in a few months, or even years. It all depends on the climatic conditions of the territory, construction time, moisture content of raw materials, etc. In any case, it is not worth starting finishing earlier than a year later. During this period, the wood shrinks actively, due to which the logs decrease in size. You should not rush, because if you attach the finish during the shrinkage of the house, it can be skewed or it will fall off altogether, which will lead to the fact that you will carry out such a finish again. In addition, you will already have a lot of work, since you need to prepare everything, for example, seal all the cracks, thereby achieving the tightness of the joints.

As a rule, the caulking of a log house is carried out in two stages. The primary one is performed a few weeks after the installation of the material, the secondary one is performed six months or eight months later. The slots of the log house are filled with insulation: tow, jute. The work is performed in the following order: they begin to fill the slots from the bottom row of the timber along the entire perimeter, and on both sides of the house, so that the building does not warp. After each caulking, the timber rises to seven centimeters, however, when shrinking, the house will press this distance. Such work is very important, because it depends on how warm your house will be in the future.

After you complete the second caulking step and the house has completely settled, you can start decorating the walls of the wooden house. In order to determine whether the house has completely shrunk or not, it is periodically measured using a simple tape measure. If no significant changes occur within three months, then you can safely proceed to interior and exterior decoration.
Before you start decorating the walls, you need to assess the condition of the tree from which the house is built. To do this, you need to find suspicious spots and poke around with a chisel or other handy tool. Spots can appear in a darker or lighter shade. If the logs are dense, then there are no signs of destruction of the material, you can safely proceed to finishing. And in order to preserve the wood for several more decades, apply a protective impregnation to the surface. However, this option is not suitable for everyone, since such impregnation is not environmentally friendly. You decide.
If, from your efforts, the logs begin to crumble, then you will need a consultation with a good specialist. Only after his instructions, you can carry out the finishing. After all, the reason that the material began to deteriorate can be many, therefore, before fixing the problem, you need to know what to fight against, which can be microorganisms, fungi, insects, etc.

After eliminating all problem areas, you can safely proceed to updating the surface of the room. The decoration of the old house is no different from the decoration of the houses mentioned above. There is only one difference - the shrinkage of the house should not be taken into account. And if the house has an old finish, then it needs to be removed.
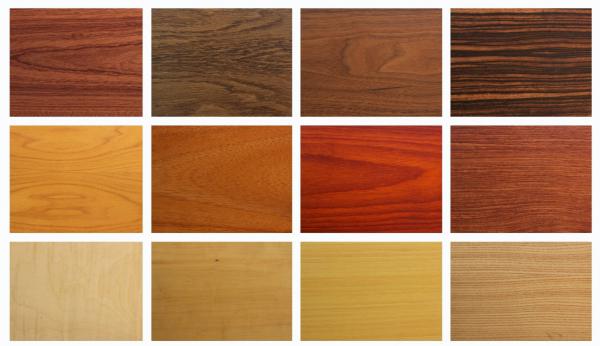
Materials for interior decoration are produced on a natural basis. Often they include: natural synthetic resin, chemical impregnation, dyes, polymers. The favorite among such finishing materials is high-quality natural wood, which is preliminarily subjected to high-tech processing. Wood is environmental material, which is considered one of the most affordable natural materials for wall decoration. This material has many options for shades and textures. Nowadays, manufacturers offer such types of decorated wood: fairly light and dark, almost chocolate, with minimal or pronounced patterns, rich in pale, reddish or other shades.
The disadvantage of such a finishing material is its high price, as well as the fact that you are unlikely to be able to easily find it on the construction market. However, unique patterns natural wood, you can see on others, not so expensive, building materials for wall decoration such as: panels, wood wallpaper, wall paneling, etc.
In this form, they are used in the interior decoration of the premises - photo:
The decoration of the walls of the house made of wood is carried out:

There are two finishes you can choose from:
All materials listed above are dry finishes. A wet finish is the application of a putty or plaster to the surface, which must first dry before applying the decorated elements to the surface. For example, gluing wallpaper, painting walls or laying ceramic tiles.
Dry repair has many advantages, since when doing such work, you and your family will not have to leave the house for a while due to the dust and dirt that is inherent in decorating a wooden house. This job is clean and fast enough. All that is required of you is to vacate the room in which the dry material for the house is being finished.
Advice! In order to prevent rodents from getting inside the cladding, no gaps should be left behind the panels. This space needs to be filled with mineral wool, which will not only be an obstacle for rodents, but will serve as sound insulation and insulation material for a wooden house.
Let's talk about some dry options for decorating the walls of a wooden house. The tips you read will help you when choosing wall finishes for your home. And also you will learn about the advantages and disadvantages of each of the presented types of coverage.
For interior decoration this option you should choose a paint that does not have a harmful, toxic odor. The hardware store will provide you with enough big choice such paint, since this material for decorating the walls of the house is quite popular. Especially popular eco-friendly paint based on natural resins. Also, this method of finishing is practical, since you have a fairly large selection of colors. You can even create your own unique color by adding the shade you like best to the white paint, or experiment and add a few pigments to the paint.
However, when finishing, you may want to leave the natural texture of wood, but make it more expressive and rich. What to do in this case? For this you need a stain. Before applying the compound to the surface, you must finish with all the roughing and sanding of the wood. It is not worth applying a primer for painting, so that it is not absorbed into the fibers of the wood, which could lead to its swelling. Cherry or red stain, when finished, will imitate expensive wood. And when applying a substance of different shades, you will receive graphic contrast or mosaic patterns, which will make your surface more original.

If desired, the smooth surface can be coated with a protective varnish:
The photo shows how the wall decoration looks in a wooden house of a bar with a stain.

Perhaps one of the most common wall decoration options is clapboard. The fact is that this option is considered non-toxic and safe for your and your family's health. Lining is a wood structural panel, which is a “tongue-and-groove” fastening system.
The lining does not have a standard size. Like other finishing materials for the home, lining is presented in several types. They differ in width, thickness, board profile, front side. Let's talk about the most common types of such finishes:

The lining can be divided into four types in terms of quality: Extra, A, B, C.
Order from best to worst. The type of wood also plays an important role.
When performing finishing work with clapboard, you will need the following tools:
If your house or summer cottage is built of wood, this does not mean that they should be the same inside as outside. Wooden elements in the decoration of the room really look very beautiful, however, not everyone may like this finishing option. It also happens that old wooden walls do not want to be updated, but simply sewn up. It is in such cases that work with drywall is provided. This material can be installed on almost any type of surface.
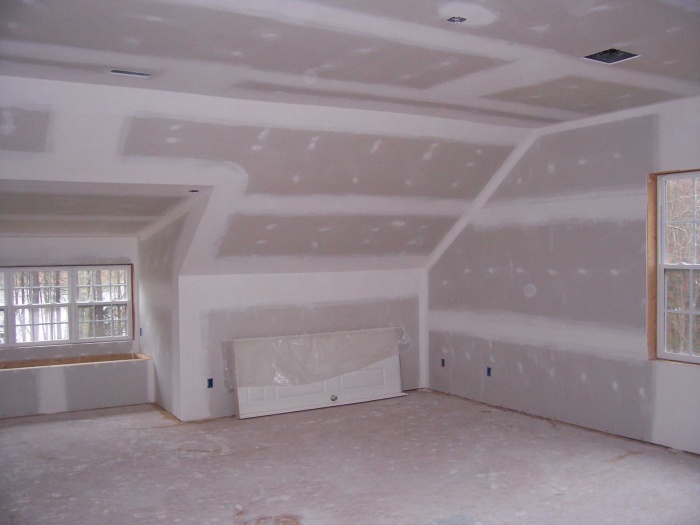
To decorate a wooden house with plasterboard, you will need to make a not too intricate structure from profiles or wooden slats. Then it remains to attach drywall to the structure using self-tapping screws. That's all the work. Now you can apply whatever finish you like. It can be: wallpaper, decorative painting, ceramic tiles, plaster, etc.
By applying the tips in this article, you can decorate the walls yourself in your home. The good news is that there are a lot of materials for high-quality finishing of wooden walls.
Interior decoration of a wooden house is one of the integral components construction works... The installation of internal surfaces is important not only from a practical point of view, but also for the entire design of the room. If you have certain skills, it is quite possible to carry out all the work with your own hands.
Features of finishing wooden surfaces are associated with the nature of the material itself: along with the unconditional environmental value, the ability to store heat, wood is highly susceptible to decay processes. It is negatively affected by temperature extremes, exposure to moisture and the activity of various microorganisms. All this is important to consider before starting the interior decoration of a wooden house.
The whole finishing process can be divided into 4 stages:
Each stage will be discussed in detail and provided with examples. ready-made solutions and step by step instructions work.
Walls are one of the main sources of heat loss (up to 30% of the total). Accordingly, it is important not only to process the wooden floors themselves well, but also to install a layer of insulation, which is optimal for this case.

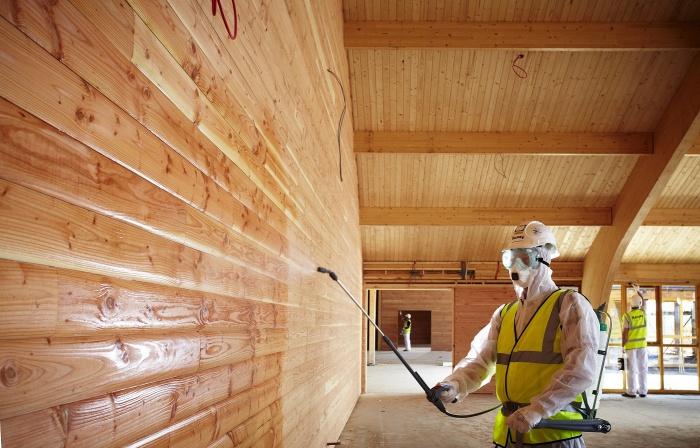
Before carrying out all the main work, it is important to carefully treat all internal and external wooden surfaces with a special antiseptic.

An antiseptic is a liquid agent that performs several functions at once:

There are a lot of options for all kinds of antiseptics on the market, and in principle they can be divided into several groups:
The treatment solution can be cancer, paint, primer, and other agents. A description of their purpose and advantages are presented in the table.
scuba diving  |
prevent the development of bacteria and mold; colorless; do not give off odors, therefore they can be used indoors |
varnishes for wood  |
well protect from moisture due to the creation of a dense layer |
oils  |
they penetrate very deeply into the thickness of the wood, ensuring the protection of the inner layers; do not emit strong odors, can be used indoors |
paints  |
are used both as an independent agent and as an auxiliary one after processing with the main composition; paint wood in different colors |
| antiseptic primers |
universal products that are applied directly to raw wood |
waxes  |
viscous materials that are applied to prevent swelling and mechanical damage to wood |
In more detail about the rules for choosing a wood preservative:
An antiseptic is applied using a regular paint brush or spray, if the volume of work is quite large. When working with organic materials, it is best to wear safety glasses and a bandage.

In this case, you should take into account a few simple rules:
NOTE. Do not impregnate with an antiseptic if the wood is very damp or cold, since in this case it will not be able to saturate the material sufficiently.
The next important stage in the interior decoration of a wooden house is sealing the cracks to ensure the complete tightness of the room.

You can choose different materials for this work:
According to the technology of work, there are 2 finishing methods:
The caulking technology is simple and consists of the following steps:
You can also perform the so-called decorative caulking. It is more accurate and is performed in new log houses in which large renovation works to create a beautiful interior. The technology is as follows:

NOTE. It is advisable to carry out such work immediately after the end of construction, since wooden beams give strong shrinkage in the first year.
This is the most time-consuming and very crucial stage, since its ability to keep the temperature in winter and how neat the appearance of the walls will be depends on the quality of insulation and decoration of the room.
The sequence of works is carried out according to the following technology:
The corresponding sectional diagram of the wall is shown in the figure.

The following materials are used as vapor barrier (waterproofing) materials:

Insulation materials are most often mounted on wooden frame or metal (aluminum profiles).

Schematically, the methods of fastening the insulation with the help of wooden beams are shown in the figure.

In the southern regions, it is possible not to use insulation, since wood itself stores heat enough. However, in most cases, the installation of such a layer is an absolutely integral part of the work on the interior decoration of the wall of a wooden house.
There are several popular insulation materials:


Among the most popular materials that form the basis of interior wall decoration in a wooden house, the following stand out:
Drywall is a material that will provide a smooth inner surface, the ability to glue wallpaper or PVC panels to create a beautiful interior.

The undoubted advantages of this material include the following:
The disadvantages of the material include:
NOTE. Drywall does not hold well any weights that are supposed to be kept suspended (shelves). Therefore, if you choose it for decoration, you should think in advance about all the features of the interior interior and decide in advance on the places for shelves, niches, etc.
Drywall comes in very handy when you need to make a false wall to create another small room. It is mounted very simply - on the basis of aluminum profiles.
Another popular material for interior decoration of the walls of a wooden house is lining.

It is the most environmentally friendly material, and at the same time, it is very affordable. The lining has other obvious advantages:
The only significant disadvantage of the lining is its rotting ability and high flammability. However, processing with the previously considered means significantly reduces such risks.
And one more interesting stuff, which appeared relatively recently, is a block house. Basically it is a wooden board that has two different surfaces:
Since the material is woody, it has about the same pros and cons. However, it is distinguished by its great visual appeal - in fact, it already creates a unique country-style design by itself, which can be preserved in its original form.

Finishing work on warming the inner surface of the ceiling and giving it an attractive look is a very important stage, since heat loss through the roof is no less than through the walls (all the heat rises up).

In addition, it is important to ensure that the roof is completely watertight. If in attic it is supposed to equip a living room (attic), respectively, it is necessary to provide sufficient noise insulation and the strength of the floor.

Most often, environmentally friendly wood materials are selected for these purposes. They create pleasant, clean air at home, moreover, on their basis, you can create a lot of design options for every taste.
The use of wood cladding is the most natural and logical option in the case of interior decoration of a house made of wood. The material options are as follows (in order of increasing service life):
Structurally, there are 2 technologies:


The finishing methods are very simple, while the possibility of attaching them to the supporting beams allows you to complete all the work quite quickly. Some design options are presented in the video.
Of course, along with wood materials, there are other technologies for manufacturing the inner surface of the ceiling in a wooden house. The most common option is to create a stretch ceiling.

Along with the obvious advantages in terms of the possibility of creating your own design and high operational durability of the material, in the case of wooden houses, there are significant disadvantages:
NOTE. This problem is most likely for old houses with worn out foundations and roofs, as well as for newly built structures, which will inevitably shrink during the first years.
The final stage of finishing work is associated with insulation and flooring of the floor surface.

In general, its structure does not fundamentally differ from the wall - it also contains insulation, a layer of waterproofing and the actual finishing material.

Several important requirements are imposed on the floor at once:
Structurally, the floor can be made in two ways:
Both options have their pros and cons, and you need to choose based on the specific object. Concrete is durable, tightly blocks the access of insects and rodents to the house, moreover, it is very durable to prolonged mechanical stress and is not subject to decay.
At the same time, wood is not so durable, but it is warmer and does not heat up the house in hot weather. The best option in many cases - a concrete floor with a thick layer of insulation and wood flooring. In this case, an extremely reliable design with additional thermal insulation properties is obtained.
The technology for installing a wooden floor is simple:

NOTE. If the floor is mounted on the basis of wooden beams, then special attention should be paid to their treatment with an antiseptic. It is better to do several approaches of 2-3 layers.
In the case of the construction of a concrete floor, the material is poured in two options:
The concrete is reinforced, after which a layer of waterproofing is required, and then a wooden floor is laid using the same technology.
The interior decoration of a wooden house should be carried out with preliminary design planning. Conventionally, 2 groups of design can be distinguished:
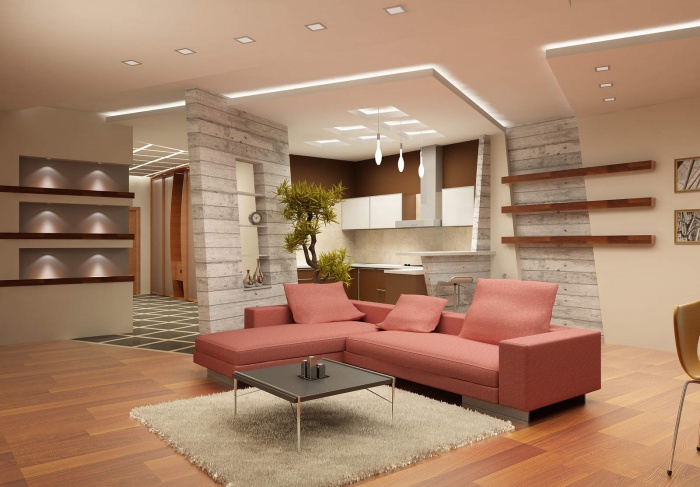
The use of country music is especially successful in the case of spacious rooms with 2 or more floors, spacious living rooms, since a wood wall creates the effect of space and provides fresh air due to the characteristics of the material.

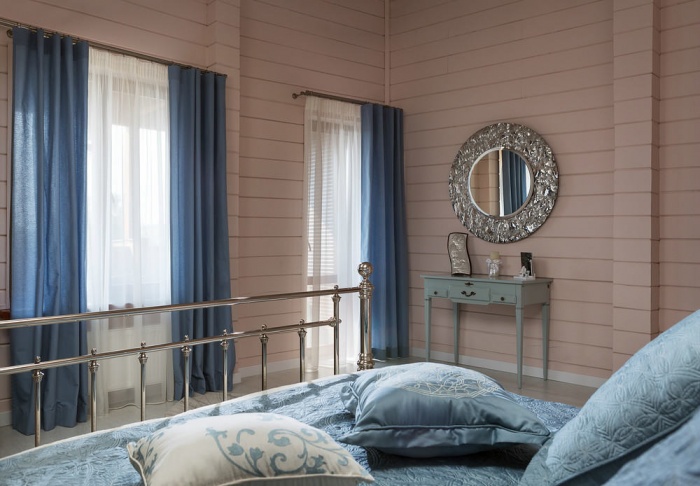
Light colors are perfect for a bedroom or children's room.


In the kitchen, warm, rich colors are appropriate, which create a cozy atmosphere for pleasant family evenings.


The wood surface is a versatile design element, as it also fits perfectly in rooms such as a bathtub.


Interior decoration of a wooden house is a work that is quite realistic to carry out on your own. It is only important to think over all the details in advance and take into account how design features, the quality of the material and its design possibilities.


