Today, the installation of interroom doors is done in most cases. Manufacturers seek to simplify the installation of their products as much as possible, so it can be cope with almost any person. We will later consider in detail this procedure.
Before installing yourself interroom doorYou will need to choose a suitable model. By the opening method, they are divided into the following categories:
Installation of the first two varieties is made according to various methods that have significant differences. At the same time, a carpenter will be required from the masters, otherwise it will not be possible to achieve a positive result. Therefore, our step-by-step instruction will consider the installation of the hinting doors.
Specifications need to be chosen based on the room conditions. First, we are determined with the size of the canvas, so we measure the opening. Do not forget about the need to leave a gap. Between the racks and the source surface 10-12 mm, between the web and the timber is 3-5 mm. This is necessary in order to avoid the jamming of the door. It may appear due to the swelling of the canvas (from temperature fluctuations and high humidity). Standard width hesitated within 60-100 cm, height 180-220 cm.
Remember: the finished canvas cannot be corrected, and expand (narrow) the opening of the work. Therefore, select the sizes as rather as possible - the complexity of installation will depend on it.
From the size of the opening, technical gaps (12-15mm), the width of the box and multiply on 2. The resulting number is subtracted from the width of the opening. Example of calculation:
The standard door length is 200 cm, so you have to customize the opening for it. To calculate the necessary height, to two meters (or other digit, if we are dealing with a non-standard model) add the thickness of the box, the size of the technical clearance and 1 cm (the distance between the web and the floor). If the installation of the threshold is assumed, then add its thickness.

In addition to the sizes, it is necessary to take into account the features of the material from which the canvas is made. This is not so important, but you should not bypass this aspect. Remember several simple recommendations:
Tip: If there is a need to install such a variety, leave a technological gap 2 times more, because such a canvas is much faster and will be sweended.
Another important moment - for newly built wooden houses When installing the box, it is recommended to screw the screws until the end. This will make it easily survive shrinkage.
Initially, you will need to produce several time-consuming and important operations.
Tools for the installation of interroom doors do not differ high cost and complexity. To fulfill all manipulations, you will need the following:

It is the hardest, and the main dirty stage of work. Independent installation of interroom doors begins with dismantling old. Consider everything in stages:
Tip: If the old web you do not plan to use anymore, it can be simply taken off if there is enough strength. This is the most radical and fast way.

The next step will be required to lead the opening in the proper look. Work is made in such a sequence:
After such procedures, most likely evenness and integrity of the surface will break. Therefore, it will be necessary to make it align. There are several ways to exist, but the easiest is plastering.
If, after cleaning manipulations, the width of the opening increased (for example, the surface layer of the plaster opal), then the installation of a problem will help. These are such wooden (in most cases) a strip of 6-30 mm wide. They are installed in the case when the size of the opening is needed. A more durable option is a cement solution.

The order of the installation of interroom doors must be strictly observed, so all further manipulations are presented in the correct sequence.
Once again, making sure in the evenness of the source surface, proceed to the collection of the box. It is sold in the form of bars of various lengths. Of these, it is necessary to make a P-shaped design (if the installation of the threshold is assumed, then rectangular). The second option is used mainly for toilets and bathrooms.
If you ordered a box with the door, then, most likely it will be ready - it will only be necessary to collect it (with long screws or nails). With a separate purchase it will have to be adjusted in size. This is the most difficult process that will require maximum accuracy, because in the case of the slightest inaccuracies, the door will receive a slope, which will affect its operational characteristics.
Consider the assembly of the P-shaped structure:
Attention! Watch out for the vertical location of the self-pressing during twisting, because with the slightest deviation, it will switch the rack.
For rectangular design, the assembly will be identical, only with the addition of the second horizontal rack.

From the canopies will depend on how comfortable will be closing and opening, therefore, ideal accuracy is required. Most believe that two hinges for normal operation are sufficient. We recommend using three (one is put exactly in the middle). In this case, even with long-term operation, you will avoid distortion. So, you will need to be needed:

The next step is to install the door frame. We do everything in such a sequence:
Making sure the perfect evenness, produce final manipulations. Initially, the installation of the handle on the door is carried out. To do this, a through hole of the corresponding diameter is drilled in the canvas (if you purchased a complete set, then this does not have to do). Then two parts of the handle are connected. In most cases, this is not difficult.
At the end, platbands are exhibited - decorative elements that hide all irregularities and forming the integrity of the design. They are glued throughout the perimeter on special liquid nails. The jokes are also drawn up with the help of Stusl.
Installation can be performed with your own hands if you know how
Read in the article
Manufacturers offer products of various widths and heights, which allows you to choose a suitable model for anything. The canvas for swing structures manufactured in Russia and most EU countries may have a width of 600 mm that increases with a 100 mm increment. The minimum width of French doors is 690 mm. The step of resizing is 100 mm.

When choosing a door canvase, the dimensions of the door frame should be considered. If the open geometric shape is discarded, the minimum width is taken into account. Otherwise, it will have to be expanded, which will complicate assembly work.
Attention!The standard height of interior doors is 2 m.
When choosing a suitable product, you should also focus on the purpose of the room for which they are intended. For residential rooms, cloths are 60-120 cm wide, for the kitchen - at least 70 cm, for a bathroom or toilet - from 60 cm.

Getting Started to install the sash, it should be lifted to a small height and lay the board from below. We combine elements first top, and then the bottom loop. After installing how to install yourself, it is worth paying attention to that this work is better to perform together. In this case, it will be possible to perform the installation better.

Video, how to correctly install interior doors on your own, will help to understand the nuances of replacement of the door leaf.
If you plan to install your own hands, step-by-step instructions will help to better figure out the process. We offer to learn the nuances that will help qualitatively perform installation.

List of tools, equipment and supplies will depend on constructive features The system mounted, and how it is planned to put interroom doors. As a rule, it is necessary to prepare:
 The list of the tool used may differ
 Installation of interroom doors with their own hands should begin with dismantling the old design. Do it should be very careful not to damage doorway. For this:

After dismantling the door, it should be carefully inspecting the disc. The remains of the old material should be completely removed. In the presence of mechanical damage, the geometry of the day is to restore. This can be done with.

If it is necessary to install in the apartment with a heavy interior door, you may need to strengthen door Pieceincluding:

After the open is fully prepared, we suggest to figure out how to install the door frame of the interior door. The procedure will depend on the form of delivery of this element. Manufacturers offer a box:
Consider the last installation option in more detail.

We measure the parameters of the doorway using the roulette of sufficient length. When determining the height of vertical racks and lengths, the gaps between the box and the door canvase should be taken into account. They are chosen from the range of 5-10 mm. Between the floor and sash, the clearance may be greater.

Comment
Head of the Brigade of the repair and construction company "House Premium"
Ask a Question« Measurements of the same parameter should be done at several points. "
| Illustration | Description of action |
 | Cut the elements by providing the formation of the selected angle. Box elements can be located at right angles or 45 °. Other more complex options, which should not be resorted by performing installation with your own hands. They better entrust the master. |
 | Perform markup elements. |
 | Cut the elements using a tool with small teeth. |
 | We form the landing grooves and connect the elements among themselves. Check the correctness of the work performed by putting the sash to the collected box. From all sides they must work out the same gaps. |
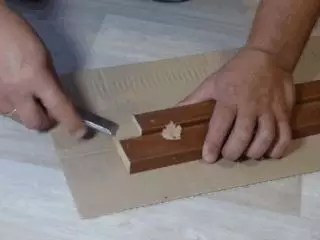
We celebrate the place where the loops will be located. It is usually 20-25 cm above the lower edge of the sash and below the top. We remove the material layer on the width of the accessories. In this case, the mount will be flush. It is possible to do this with a chisel or a special tool.
Attention! When forming a seat under the loop of the interior door, it is possible to work extremely gently so as not to damage the decorative layer.

The collected box is installed in the doorway:
| Illustration | Description of action |
 | We provide the desired spatial location using pegs or timber. Auxiliary elements can be fixed in levels before installing the box at the level of future loops. |
 | We screw the box using a suitable fastener. The space between the box and the wall can be filled with foam. |
A sufficiently responsible moment for those who find out how to install interroom doors. Previously to the doorway should be screwed off the looping of the loops or outline the landing holes, if it is decided to use non-separable accessories. How to insert the interroom door? Just just put it on the loop. After that, you should make sure that it opens well and closes.
 Fresh loops to the door canvase Dobra help beautifully arrange
 Content:
Interior doors are one of the most notable elements of the apartment. They must be functional and aesthetically attractive.
Photo 1 - Interior door photo
In order for the installation process to be successful, you must have:

Preparation is B. thorough measurement measurement. It is necessary to choose the door of suitable dimensions.

Photo 3 - measurements before installing interroom doors
At the same time, the verticality of the wall door walls is checked using level. If this indicator is far from being perfect, you will have to level the surface. Otherwise, a significant disk of the door and a violation of its functionality is possible.
That interroom door Installed correctly, you can only speak if. When the cloth still at any position.
For the installation of loops are needed special Selflessnesshaving cutting to the head itself. The hole below them should be 0.75% of the base diameter and have a slight offset to the cut-cut.

Photo 4 - Features of installing loops on the door of the formo
When choosing accessories, it should be remembered that products are better suited for manual inserts that have a form rectangle. If the contour has roundings, it is quite difficult to perform a cut-in with high accuracy. However, it is possible to refer to the specialists who will perform such work mechanically using a special milling mill.
When installing interroom doors, at least minimal skills of working with a carpense tool are required.
First remove the door leaf, platbands, then remove screws, nails. It remains only to extract the door frame and better do it together.

Photo 5 - Dismantling Door Box Photo
However, if the doors are very old and their material is already unsuitable for further use, then you can do otherwise. On the sides of the boxes are made from the corner of 45 degrees, which are located in the middle. It remains only to pick it up and take out parts.
When it is installed, you need to follow the recommended parameters:
Important!
On the loop, you need to designate the top and bottom using the marker applied to reverse side. Thus, it can be accurately installed, even if there is a slight asymmetry.

Photo 6 - installation of loops on the interroom door
Measuring the desired distance, the loop is applied and the pencil will be burned, and then this place is deepened using the chisels or cutters. The depth depends on the thickness of the metal loop. Next, the hole is drilled under the self-tapping screw.
By installing the loops in the nests intended for them, we put on the second half of the product, and the box is applied, and the actions described above are repeated again.
To embed the lock, the canvas doors turn over and outlines the place of their installation. All other operations are similar to installing loops. The shut-off bar is set after installing the door to the place.
Important!
The location of the shut-off strip is simply determined - the lock tongue is painted easily with a removable material. By imprinting on the box make rectangular shape.
On the floor, you need to decompose the door frame and cut off her bars in such a way as to the side and from above the gap of 3-4 mm remains. This is very important for proper work Doors. Depending on the thickness of the floor coating, the door is left to 10 mm.

Photo 7 - Building Door Box
Powered up the top bar on both sides, and vertical - only on top, at an angle of 45 degrees using a stub, you need to connect them with self-draws.

Photo 8 - installation of a box for interior door
Now you need to install the finished box and consolidate it in the opening, using klinia. Using the level, the correct position in two planes is found, adjusting the position of the wedges and spacers. Then, in places where the loops are installed, as well as the lock you need to screw the screws, strengthening the door.
Important!
The length of these screws is selected in such a way that they are in the wall to the depth of no less than 30 mm.

Photo 9 - Fatings of seams when installing interroom doors
The process is sufficiently responsible because it may be squeezing the door frame expanded foam. To prevent this, the foam is applied by a thin layer. For this, the pieces of plywood, wood, drywall are inserted into empties.
To clutch with the wall it is better, you need to wet her surface before dips water.
Important!
The elements included in the polyurethane foam can spoil the door, hitting it, so all the surfaces need to be in contact with it, puncture with painting scotch.

Photo 10 - Marking of platbands on the interroom door
Platbands - element of the decor that masks the gap between the door sampling and the box. Applying vertical pieces of platbands to the doorway, you need to note the necessary length and make a cut at an angle of 45 degrees. Very neatly install them so that you can insert the top of the platband, which you need to trim under the same angle. Install them on liquid Nailsor used finish nails - 3 pieces on each side.

Photo 11 - Installing platbands on interroom door
Another way to install interroom doors
Despite the set of operations that need to be performed, independent installation Doors fee. Perhaps it will take more time than specialists, but in the end you will get exactly what you wanted.
From the quality of installation of interroom doors depend functionality Designs and aesthetic appeal: in any house or office with door openings The inspection of the premises begins. Experienced specialists will quickly measure, will offer the most optimal optionswill be installed in accordance with the design features.
It is important that the elimination of gaps due to the marking by high-quality sealants, alignment of the walls at the initial stage of installation and the choice of a suitable model of domestic or foreign production.


Installation of door frames is performed at the final stage of repair. After sticking the wallpaper, work is carried out on the installation of the door frame in accordance with technical Regulations and safety requirements. Installing the door in a large opening without anchors and challenges requires a professional approach: Specialists recommend not to carry out this work independently. Once as door structures used dampers, preventing inserting cold air and moisture.
Nowadays, the doors are not only the entrance and exit zone, but also a spectacular addition to the interior design that can serve long decades during competent operation.


Knowledge of technology allows you to organize an installation at a high technological level.
To install the design, it will be necessary:


In the opening, the block is mounted on which the canvas is placed. Specialists are recommended to pre-perform the adjustment of the mechanism. Finishing with platbands - a great way to give the design style completion and constructive unity, while it is advisable to apply modern materials and the latest technology. Events are carried out in strict sequence: when installing the action, coordinated according to the construction standards.
Plastic and metal-plastic installations are implemented in complementary form prepared for the fastening process. The box is a collection of wooden bars of different parameters, door canvases and special parts (strips) for platbands.


Boxing is a process requiring a professional approach:
For this purpose, bars (stand, looping timber) are used. The base with the threshold requires the installation of the lower material of a certain thickness, while the block in the assembled form should have a strictly geometric configuration. The masters are determined with the dimensions of the doors, fix the format of racks and perts, taking into account voids, cut down and design special bars.


The dimensions of the box material should differ from the size of the canvas. Measurements are made by simple tools, most often ruler. The measurement of the web is made around the perimeter: you should not count on the external effect, because in the process of shrinkage is observed. Deviations play a big role when measurements.
The sequence of work is as follows.

When installing glass structures, measurements of decor parameters are additionally carried out, drawing is carried out using modern methods, if provided for. Installation of retractable and double door settings is made in accordance with technical requirementsfixed in GOSTs. Doors on the rollers will require additional eventsassociated with the choice of a suitable model, installation of a design that meets standards and design requirements.
Swing and sliding options - excellent option For those who are used to saving space and bet on modern design. Experts will conduct preliminary measurements, will select the most spectacular models and will quickly hold all the installation stages. At the request of the customer, the installation of non-standard door structures and classical bivalves is performed.
With these models you can create original design interior, equip the room of any type (office, residential, warehouse). When complying with the installation parameters in the apartment, room or office, you can put overall furniture, always looking fashionable and stylish.


Boxes with threshold acquire slots holes around the perimeter in the plane door Block Without a threshold. The wizards will calculate the points to eliminate vertical racks provide sufficient parameters for the opening.
When arranging the box, pay attention to the following points.


The tracing machine is effective when creating acknowledged, they often use manual hacksaw or self-tapping screw. When installing doors, innovative technologies are applied: the method of vertical racks assumes a support of the parameters of parts and perts, while strict rules are followed, the design is adjusted under the angle of 45 degrees.
Competently spent docking of parts gives the installation necessary external format. The holes must be through, perpendicular to the cut.


When installing interior blocks, the question often arises how to calculate swing doors for a niche. With small silence, similar to the parameters of the door frame, finishing work Conducted using platbands. The formed kit is installed on the boxes of the box. This installation is designed to mask the stamped seam. Wooden or laminated platbands, if they are not processed, are installed at the expense of hardware, after which they resort to painting. The platbands may differ with a touch of the plank, because contrast options are always in trend.
The door frame from wood is drawn up in accordance with the requirements in the field of construction using cement-sand plaster. Wood canvas are not recommended to be installed together with dvp-boxes: different levels of moisture resistance can lead to deformations and cracking.


Constructive blanks for screws in the installation of MDF are made at the preparatory stage, the drilling is produced by a tool with an optimal diameter. The size of the internal vertical bar level is calculated as the sum of the dimensional function of the web (as a rule, 3 * 3 mm), if the design with the threshold. Popular item is installed to special devices.
The use of self-samples provides high performance. Parameters are determined by indicators as preliminary and looping materials, the distance is defined as the sum of the parameters used for the side emptiness.
The timber is manufactured in accordance with technical parameters At right angles, since this requires the arrangement of the threshold. The block is formed on a direct base (for example, on the floor).
The arrangement of door accessories should be performed in such a way as to ensure evacuation measures. You can choose universal door loops with the right or left mount. Devices with a laminated surface are manufactured taking into account the loop parameters. Usually, 20 cm from the upper and lower edges are left as an indent. The loop installation zone to the box design is determined with the technological voids.


Door products are presented extensive model near. Modern interior doors are manufactured using MDF panels, progressive materials (DPK, EcoChppon, natural wood).


All-glass doors, metal-plastic structures, steel parts belong to non-standard products requiring an individual project.


Reference door plants It is placed in a robust box, the durability and reliability of the entire design depends on the quality of which.


The doorway can be subjected to pre-processing. This determines the specificity of the opening, its parameters, features of the interior of the room. Processing can be carried out at the expense of a good part and platbands.
Installation of the door requires the use of certain knowledge and techniques: the vacuum cleaner and the tracing saw are considered indispensable attributes of the kit. Experts recommend at the initial stage to consider the plan of events: it will be necessary to organize the applying of marking, carrying out the liner, the arrangement of door slopes.
Manual equipment and electrical equipment are applied at the main stages of work. To the question of how to use the mill, experienced masters with many years of experience will be answered, under the guidance of which all major events will be held.


Using the perforator, work surfaces are equalized and expanding the opening. This tool allows you to make special recesses for a dowel. Drill helps drill the deepening of the required parameters for fasteners. The beginning of the work is accompanied by checking equipment. The drill fixation density is very important, because the item can fly during the work and damage the work surfaces of the doors.
The screwdriver allows you to reliably fix hardware in the loops. Electrolzik are processed complex surfaces, hard to reach for sawing. Manual electric power helps to install a locking mechanism and embed a loop. Pencil allows you to make special marks in places requiring processing. For the same purpose, the marker is used (provided that it will not retire on the surfaces).
The three- and five-meter roulette or steel line together with the calibration of the carbon provide accuracy of measurements. With the help of the caliper, the depth of the inset is measured, which is performed by the chisel.


The slope of the surfaces must be measured using the bubble level with parameters within 50 cm. With the help of a screwdriver kit, loops and canopies are attached, castles are placed.
Fantasy saw is an excellent means for sawing structural parts - bars and platbands at an angle of 45-90 degrees. The disk saw helps to format the dimensions of the door cloth. The gun can charge high quality sealant to eliminate gaps.


Self-tapping screws allow you to record the elements of the device (mounting planks, loops, platbands, locking mechanism). The kit also includes liquid and finish nails and microclines, fixed using a pneumaticistole. Using these devices, the fastener acquires superplication and reliability. The mounting microclemp is a compact hardware element without rivets, which ensures the production of a solid surface. You can measure the length and width using a roulette or metal line.
Interior doors are implemented without accessories, which is known in the domestic and foreign manufacturer.


Experts will help choose high-quality systems (loops and locks), not subject to mechanical effects and corrosion deformations. Controlling the loops with fasteners and screwdrivers while working with slopes provides a high density of the adjustment of the web to the box, while use special devices that allow you to perform measurements of parts, insert constructive elements at a high professional level.
The solution for the solution is performed from a special material that provides the optimal format for mixing construction mixtures and the ease of cleaning after work. The kit includes brushes and rollers, allowing finishing work. Set for grouting provides the reference view of the surface of the door block.


Interior structures are installed from scratch using step-by-step recommendations posted on Internet portals. Experts recommend not to make events with their own hands, if you do not have sufficient knowledge and experience.
Experienced masters They will prompt at what stage the preparatory activities should be carried out, and on what the design of the structure is occurring.

Vitely installation process, see the next video.
Experts do not recommend independently carrying out work on the installation of the door design, replacing the castle and the arrangement of the thresholds, as these activities require high professionalism. Experienced masters will help to acquire a set of high-strength materials, determine the order of work, they will install the design correctly, insert the door frame in the opening. Collect the design, ensuring high quality assembly, you can using special devices.
Insert the elements of the fittings are needed using modern technologies and installation methods with preliminary measurements with a roulette or ruler. A high-quality hardware is used as fixtures. At the initial stage, a scheme for conducting work is formed, a set is made. required toolsThe insertion of the boxes in the opening is ensured, installation of hidden loops.


Before you start setting the door installation, you need to familiarize yourself with successful examples and design options. On the sites of companies engaged in licensed activities, samples of doors in Khrushchev, a modern apartment equipped with a kitchen are presented. At the same time, it is important to pay attention to a high-quality installation, made in accordance with technical prescriptions: holes were neatly conducted in the wall, the structural parts are inserted under the desired angle.


Is it terrible to install interroom doors with their own hands, how are it present? In fact, this is not the most difficult repair operation. It certainly requires a high degree of concentration on the process, but even a beginner is capable of mastering it when performing the recommended sequence of actions.
The prosperous final result will be achieved if every step of work is attentive. The entire process of installing the door between rooms can be divided into sequential steps:
If only one interroom door will be updated inside your home, and you have no installation experience, it makes sense to refer to specialists - it will be faster. If you have to establish their greater number, it is better to do it with your own hands - in this case, a decent cost savings, time, as well as the acquisition of useful experience is possible.
To independently install the interroom door, you should be in advance with such instruments:
From fasteners, you will need:
Required accessories and components:

Having come to the furniture store, the potential buyer amazed the variety of models. Externally, the doors look perfect, but there may be serious shortcomings inside it. We are talking about geometric parameters. Even a minor difference between the lengths of the side of the canvas in 1-2 mm can seriously complicate the installation of the door. If you are expensive time and invested money, do not be lazy to measure the canvas right in the store. It is also important to trace so that the measured door is immersed.
The next step is to purchase a door frame. Some of them make up a single kit with doors, but some are sold separately. It is much easier to carry out the installation of interroom doors, if you purchase a canvas with a box of one manufacturer, and not to do the last independently.
If it is impossible to buy a box on financial or other considerations, you can create it with your own hands, purchasing a special bar (box). A homemade box will consist of two vertical racks and one horizontal from above (s). The buying bar should not have bones, irregularities, roughness. The thickness of the acquired timber is equal to the thickness of the door canvase, otherwise the installation will be impossible.
The purchase of a single block is easier to install, since the design can be fixed without helpers. However, one nuance is - after filling the block, the foam must need at least 6 hours not to produce any manipulations with the door. If possible, it is recommended to stop the choice on the bucket with the frame.
Installation of the door block is preceded by a pre-sample decoration of the room. It involves alignment of the walls that are put on and plastering. Works performed in wet environments are completed in advance, and the room is ventilated and dried, otherwise the frame "will lead" due to dampness.
Inside the rooms and between them should already be laid the draft and finishing floors. Thanks to this, the door frame will be correctly mounted in the height of the threshold. No need to transfer the floor if the block is only changing to the new one.
Originally collected frame. For this, the racks are traced that the gap between the floor or wall and the door of the door is about 10 mm, and are connected by self-draws. Then the width is checked, the height, the verticalness of the opening of the bubble level. Box ready.
On the bottom and on top of the frame is measured by 20 cm for future loops. Similar operation further performed on door canvas. The chisel selected places for fastening to install interroom doors (loops), a block is collected. Now it is fixed inside the opening with the help of clins. Again the level is controlled by geometry.

To preserve a small gap between the web and the frame, a thick cardboard is taken, it is twice as well, inserted into the gap. Such "extends" should be plugged every 10-15 cm around the perimeter of the frame.
The block is placed inside the opening. The mounted gap between the block and the wall is filled with foam without a residue of free space. After all the clins are removed.
Most types of mounting foam dries after 5-6 hours, but after this time it is still capable of expanding slightly. Therefore, it is better to leave the door closed for 10-12 hours. After this time, all spacers, wedges, insertions are removed. The final stage remains - the installation of the handles, the cutting of the castle, the plaster of the slopes, the installation of platbands. Obviously, the total installation time of the door does not exceed 2-3 hours of newbies, not counting the deadline for complete foam drying.
Some buildings ( country house, Bath) are created from logs or thick bars. The installation sequence is almost no different from the points listed above, but there is an important nuance - Wooden buildings from the cut give shrinkage. It is important to withstand the pause when installing the doors, because even six months later the house will take place only partially. After another year, the shrinkage will be maximum, and the next 3-4 years the design is still slightly too much.
For 1 year, the house is capable of decreasing at a height of 5 cm, so the installation of the door in the Siruba implies deviations from the generally accepted technology. In order to eliminate the occurrence of a skew or other negative impact of the house on the door block it is recommended to make a cock or simply install bars.
The casing is called an element having a longitudinal spike, inserted on the sides of the block. Further shrinkage will only affect him, while not affecting the frame. To do this, the sides of the opening pumped spikes with a height of 50 mm, a width of about 35 mm. Next, in the bar with a cross section of 100 × 100 mm, a groove is cut with a width of 50 mm, and a slightly more spike (about 40 mm) is slightly higher. The length of the bar on the sides should be 5 cm more than the height of the door block when mounting in a fresh log house and 2-3 cm - when installed in the established. The top of the covers will serve a 50 × 200 mm board, which is installed by the gun, fixed on the tapping screw.
Another way (installation of bars) is licensed only by material savings. Products with a cross section of 50 × 50 mm are placed inside the groove along the ends. Then the frame is attached to them in order: the side part is the horizontal upper strut - the second sidewall is the threshold below. The minus such a solution is that weakening the design may occur with the skewers or deformation of the block due to lack of wood inside the groove, therefore the first method (plaque) is more preferable.

Although the material is considered for building structures It is an excellent insulator and saves heat, it is also very fragile. With installed wide doors (from 85 cm), serious shock loads are inevitable at the locations of the door block. To prevent premature destruction, you need to make additional wood frames or mortgage bars from dry boards, plywood, glued wood. Pre-material is processed by antiseptics or thermal method. When using conventional wood, it is better to give preference to larch - resistant to rotting and economically indrawn.
The easiest way to harden the design to ruin the mortgage block inside the end surface. It is processed by a layer of special aerated concrete or tiled adhesive, and attached to anchors or self-tapping screws from 8 cm long. The short fastener (4, 5, 7 cm) can withstand a small load on the shift, so it is extended with time. The frame itself is also fixed on the self-tapping screw.
The second way to enhance the frame is to install panels - it assumes either a complete coating of the opening around the perimeter, or partial (segments are installed after 50-60 cm from each other). Free sections in the latter case are poured by mounting foam with a minor degree of expansion.
Both methods are equally good. At the expense of the holding forces of fasteners and the operating force of the mounting foam, a reliable installation of doors in aerated concrete is achieved, which allows them to serve not one decade.
After drying the foam after 12 hours it remains to install platbands. They are smoothly cropped with a circular saw, jerk at each other at an angle of 45 degrees, are attached to finish nails. Before their clogging in fixation places, holes are made in size, approximately equal to half the diameter of the fastener.
To increase the strength of the connection of the platbands, it is recommended:

The guarantee of successful work on the installation of interior doors is to control all geometric parameters before buying, external condition, configuration. After payment of the goods, no complaints will be accepted.
It is advisable to prevent strong temperature differences inside the rooms. Also observe regular ventilation of the premises - due to a lack of fresh air there is an increase in humidity leading to the spurry of wooden products.
If the door is set there, where the temperature or humidity periodically increases, it is necessary to thoroughly air this place until the regime is normalized (bath, sauna, bathroom).
The door should not shrink sharply, with a force or otherwise that causes disruption of the integrity of the block. At least most of the models have special coatings that prevent wear, it is worth avoiding the coarse mechanical effect on the canvas, platbands, a frame.
To regularly clean the wooden surface with a damp cloth, a napkin, a cloth. Such a simple way to maintain their aesthetic beauty.
Unwanted contact of wood with acids, alkalis, solvents, other chemicals. They destroy the integrity of the material.
Obviously, the above-step instructions for installing the interior door makes the entire installation process very much. Following the advice will allow us to competently cope with the task, and the timely care for new interior items will maintain their aesthetics and functionality for a long time.


