The Windows operating system allows you to customize the appearance of the desktop and panels in detail so that the user is most comfortable. This also applies to the taskbar, which you interact with all the time - the Start menu, running applications, open folders, time, running services, and more. In this article, you will figure out how to pin the taskbar to the bottom of the screen, and also consider the settings of this element in more detail.
First, let's look at the case in which the taskbar is not at the bottom of the desktop. Before you can fix it in one place, you need to drag it down.
This can be done with just the mouse. You need to put the cursor on any free place the taskbar and with the LMB held down drag the cursor down the screen. Together with the mouse, it will change the position and the interface element - you can check this by rearranging the panel on different sides of the desktop. After changing the side, the position of the shortcuts on the desktop will move slightly.
Now the Windows 10 interface needs to be fixed so as not to accidentally move it when working with a computer. To do this, right-click on the panel and in the menu that opens, select the item "Taskbar settings".
After that, a window with detailed settings for this interface element will appear on the screen. To make it impossible to accidentally move the bottom bar when manipulating the mouse, you must enable the "Dock the taskbar" item.
There are also many other settings here that allow you to pin the taskbar to the bottom of the screen. For example, in the "Position" column, you can select the side where the desktop interface will be located. You can use this function, and not move the panel with the mouse, as described in the previous paragraph of the instructions.
The Windows operating system has an option whereby an unused interface can be hidden automatically. If you move the cursor to the bottom edge of the desktop, the taskbar will automatically reappear.
If you want to pin the taskbar to the bottom of the screen on Windows 10 so that it doesn't disappear, follow these steps:

Besides the fact that you can pin the taskbar to the bottom of the screen via the GUI options, it can be done faster. It is enough to right-click on the panel and select the item "Pin all taskbars" from the menu. Along with the main strip at the bottom of the screen, the custom panels will also be fixed.
You can pin any items (programs, folders, files) to the taskbar and create subgroups. To add any program / folder to the interface, you need to right-click on the executable file or the shortcut of this utility and select the "Pin to taskbar" item in the menu. After that, the application icon will appear at the bottom. It will remain in place even after restarting the PC. You can unpin it by dragging it with the mouse or through the same menu.

We've covered all the steps that will help you pin the taskbar to the bottom of the screen on Windows 10. You can also explore other options in the options window and customize the interface to your liking.
Ceiling and wall cladding with PVC panels is becoming more widespread and popular. This is a simple, affordable and aesthetic option. In most cases, when installing such panels, a frame and lathing are used, but in some situations this can be avoided. If the panels are installed without lathing, a special glue comes to the rescue, which will act as an attachment between the wall and the panel.
Fastening PVC panels to the surface without the use of lathing is a process with correctly performed stages of work, a reasonable choice of glue.
In the process under consideration, glue plays an important role, and therefore its characteristics and properties will determine the quality of the repair as a whole.
It is quite simple to mount PVC panels without lathing on a wall or ceiling, and it is quite possible to cope with such a task with your own hands. This option requires the use of a minimum of tools, knowledge and effort. Among the main requirements are criteria for the condition of the wall, which must be dry and even, as well as the choice of adhesive. It is not recommended to use this option for specific rooms with temperature differences and non-standard operating conditions.
 There are a number of cases when certain restrictions are imposed in connection with which it is simply impossible to fasten plastic panels without a frame.
Among the main such cases are:
Of course, this is not a complete list, since in each individual situation and room conditions may be different.
In the case when wall panels are attached directly to a bare wall, the only option for fixing them without additional devices and damaging the wall is gluing. The choice of adhesive, as well as the preparation of the surface, must be taken responsibly. Depending on the quality of the materials used, as well as the thoroughness of the preparatory work, the final result will depend. In addition, the reliability and durability of the fastening can also vary depending on these aspects.
In the case when the installation of PVC panels is carried out without a crate, then a special glue acts as an attachment to the wall. Assortment of glue for modern market represented by a variety of brands and varieties. It is recommended to refer to the rating of individual brands and their manufacturers, choosing only the best products.

Among all the options offered for sale, it is recommended to pay special attention to the glue for gluing plastic.
 When choosing an adhesive, you should pay attention to some features:
It is not recommended to use hot melt glue for fixing the panels. When temperatures fluctuate, it can expand, up to the complete separation of the fragment from the wall surface. Liquid nails and polyurethane sealant are more effective.
In the case when the installation is carried out directly on a bare pre-prepared wall, the workflow will require:
In addition, do not forget about the materials that will be used for preliminary leveling, smearing and degreasing the surface.
Fastening wall PVC panels are carried out according to a certain algorithm. Wall-mounting without purlins is a simple process that anyone can handle.
Before proceeding with the installation of panels, you must first prepare the surface. For this, the wall is initially leveled, cleaned and degreased.
 The further order of work will be as follows:
In the event that liquid nails acted as an attachment to the wall, then after gluing it is recommended to tap the fragment evenly and tear it off. This is due to the fact that this type of glue needs five minutes of airing to acquire the necessary rigidity.
 Before you start attaching plastic panels to the ceiling without lathing, you should first determine the distance available between the panels and the ceiling. The mentioned gap depends on the type of lighting used or planned.
In the case when the lighting is carried out by built-in lamps, the gap should be at least ten to fifteen centimeters. This is necessary in order to completely and fully hide the wiring. It is recommended to mark in advance the locations of the lamps, cut holes for them and install the base of the lighting devices.
In addition to the above preliminary steps, in the case of the ceiling, as well as with the walls, it must be leveled and cleaned. In most cases, you can do without lathing, and the stages of work will coincide with the installation of panels on the walls. The only difference is that before attaching the fragments to the ceiling, you must immediately install on three walls ceiling skirting boards... In the process of work, it is recommended to regularly use the building level.
If assembly work are held in a bathroom or other room with high humidity, then the formed gaps in the wall decoration should be filled with silicone sealant. This will ensure the watertightness and durability of the ceiling finish.
The article examined the features and varieties of such a process as fastening PVC panels to a surface without a crate. In general, this is an unusual, but common method of installation, which in many respects is not inferior to the process using frames.
Surface finishing with plastic panels has become quite popular these days. Such repair looks quite presentable and does not require large expenses. However, not everyone knows how to fix PVC panels to walls and ceilings, and therefore everyone is trying to come up with their own way. In today's article, we will focus on the rules for finishing with such a material. We will try to figure out as much as possible what will be required for the production of work, how complex they are and whether it is possible to perform them without having certain experience.
Don't think that all PVC panels are the same. Between Chinese products and European manufacturers there are significant differences that should not be neglected. In order to purchase, it is worth paying attention to a few points. Not worth buying plastic panels, if:
Naturally, such a product will be sold at a discounted price, however, during the installation process, significant problems may arise. And the final result is unlikely to please the master. You should also pay attention to the strength. If you press your finger on a Chinese (cheaper) product, plastic breaks easily, while European panels are more resistant to mechanical damage. After pressing, the plastic immediately returns to its original state.

PHOTO: ru.made-in-china.com
Related article:
In the publication we will consider the sizes, areas of application, varieties, advantages and disadvantages, criteria the right choice panels, average prices, popular models, expert advice.
Differences between Chinese and European panels or PVC tiles for bathroom walls, kitchens, are significant. Among the main ones are (China / Europe):
There are also differences in external data, which do not speak in favor of the Chinese manufacturer.

This type of fixing of plastic panels is suitable if the walls and ceiling are sufficiently flat. However, it is not always possible to work with the ceiling in this way. If PVC panels are glued, the possibility of installing recessed spotlights is excluded. But more on that later.
For pasting surfaces with plastic, 3 main types of compounds are used - universal (for polyvinyl chloride), "moment-installation" or liquid nails of any manufacturer. The use of glue simplifies the work and reduces the time spent on it, however, subsequently replacing one of the strips separately will be problematic. In addition, difficulties will arise with a complete replacement of the plastic panels - the wall will have to be thoroughly cleaned.

PHOTO: remontik.org
Plastic panels are attached to the ceiling or wall both with adhesives and with the help of. But for the second option, it is necessary to assemble the crate. It can be wooden or metal, steel thin-walled profile... Also, plastic panels can be fixed to the crate with special clips, called clamps.
Way PVC installations panels in the bathroom or in the kitchen using lathing is more time consuming and takes more time, however, it allows you to replace individual lamellas in case they are broken. This happens when the plastic is touched by a hard object.

The most preferred tools for cutting plastic panels are a regular stationery knife and a hacksaw. The plastic is not too tough, so it can be cut easily. But if the panel can be divided along the length without additional tools such as a ruler (the blade goes along the stiffening rib exactly, without deviating), then a square must be used for a transverse cut.
Many people use or for these purposes. In this case, a long line along the lamella can be drawn using a steel guide for the PVC panel from which the frame is assembled.

Ceiling and wall plastic panels differ in structure. Despite the fact that according to outward appearance they are the same, their density, and hence their weight, are different. For the ceiling, softer plastic strips are used, which is not surprising. Because walls are more at risk mechanical damage... At the same time, the cost of PVC ceiling panels is lower by about 30%.
Here, the amount of work will depend on how you plan to fix the plastic tiles on the surface. In any case, it is better to remove all irregularities that may interfere with a snug fit. Installation of PVC wall panels on the ceiling is quite acceptable if it was not possible to find the right ones in color.
Before lining the ceiling, you should think about where the cables for supplying to the luminaires will be laid, if any are planned for installation.

With this method of cladding, the old coating and it should be removed from the ceiling. Previously, it is worth cutting the plastic strips to size and spreading them out in the next room. This is especially important if a patterned ceiling is laid. The adhesive is applied pointwise on both sides of the back of the strip, at intervals of 5-7 cm, after which the plastic panel is pressed against the surface for a short period of time. Such compounds, for example, liquid nails, set very quickly and are able to hold the PVC strip on the ceiling after 15-20 seconds.

If you plan to install spotlights, then you need to assemble a wooden or metal crate (frame), which is fixed to the surface with dowel-nails. In this case, self-tapping screws are screwed into the wood or steel profile through the inside of the groove on the plastic panel. After that, the spike of the next strip is inserted into the groove and the fastener is repeated. It is enough to fix one panel, and even a beginner master who has no experience of such work will understand how easy it is. The only thing that needs to be taken into account is the need to install the crate strictly according to the level. Here, both a conventional instrument and a laser one are suitable, although experts say that a liquid level copes with this task best of all. Therefore, before you start making a crate for plastic panels, you need to attend to the presence the right tool.

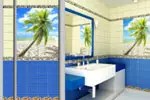
If House master figured out how the ceiling is finished with plastic panels, there shouldn't be any problems with the walls. Everything is much simpler here. Attention should only be paid to the location of the stripes. For the bathroom, it is better to choose a vertical arrangement - this way less moisture will seep between the panels. But for the kitchen, you have to proceed from the dimensions of the surfaces. It is necessary to calculate how much material will go away with vertical wall decoration with plastic panels, and how much with horizontal. Very often the difference is significant.

Paint step by step instructions DIY installation makes no sense, everything was described using the example of ceiling ones. For clarity, we suggest that you familiarize yourself with the photo examples of such a finish.


And now we will consider the options for installing PVC panels using adhesives:
 PHOTO: tvoidvor.com
  PHOTO: stroy-podskazka.ru
  PHOTO: repairflat.narod.ru
 Illustrative examples How the wall panels are attached to the adhesive, as well as the lathing for leveling the wall, can be seen in the photo gallery:
 PHOTO: strbuild.ru
  PHOTO: otdelka-expert.ru
  PHOTO: v-kvartiremont.ru
 The choice of the method of surface finishing with plastic panels is very simple - it is better to mount the ceiling on the lathing, the walls (if they are even) on adhesives. Each method has its own advantages and disadvantages. But what can be said with confidence, a properly executed finish will please the owner's eye for more than one year. And here bad smell that may appear in the room after removing the protective film should not worry the master. In a day or two, it will completely disappear. Of course, provided that the material is not purchased in a small shop on the outskirts at a super low price.
The taskbar is located at the bottom of the screen. That is why its location is traditional. But modern displays have become much wider, so it became possible to spare no space for additional "bars", and from time to time users have a question: how to position them on the side, that is, to the left or to the right.
Let us list the reasons why such an organization of the workspace can sometimes be considered effective:
If the picture is fixed on the wall, and it needs to be moved to another place, then the first step is to detach the picture from the wall and remove it. So it is with the Taskbar - first, make sure the Taskbar is pinned or not. If so, you need to unpin it.
Video version of how to arrange the taskbar to the side:
Let's take a look at a few other issues related to the Taskbar.
First unpin the taskbar. To do this, right-click on the Taskbar, in the menu that appears, uncheck the box next to the option “Dock the Taskbar”.
Then for Windows 7:
in the window "Properties of the taskbar and the Start menu" put a tick in front of the inscription "Automatically hide the taskbar" (number 2 in Fig. 2),
then click on the "Apply" button (number 6 in Fig. 2), and then click on "OK" (number 7 in Fig. 2).
For Windows XP, the same is true:
in fig. 3 in the window "Properties of the taskbar and the Start menu" put a check mark in front of the inscription "Automatically hide the taskbar". First, click on the "Apply" button, then on "OK".
After these simple actions The taskbar will not take up any screen space at all, and, if necessary, will automatically pop up when you hover over it.
It all depends on the check mark opposite the inscription "Use small icons" (number 3 in Fig. 2). If you put it, then click on the "Apply" button (number 6 in Fig. 2), then click on "OK" (number 7 in Fig. 2), then there will be small icons in the Taskbar.
If you uncheck the box next to the inscription "Use small icons" (number 3 in Fig. 2) and click on "Apply" and then on "OK", then the icons on the taskbar will be enlarged.
If you've installed a panel to the left or right of the screen, you can stretch it towards the center if there is free space on the screen. To do this, move the mouse cursor to the upper border of the Taskbar. Move the cursor around this border slightly up and down so that the cursor takes the shape of a double-headed arrow, at this moment click on left button mouse and drag the border to define right size taskbar.
This option is applicable for both Windows XP and Windows 7.
You can reduce the taskbar in the same way as described above in the question "how to increase the taskbar".
P.S. On computer literacy, you can also read:
Get trending computer literacy articles straight to your mailbox
.
Already more 3.000 subscribers


