The wall decoration of the MDF panels is becoming increasingly popular, due to the fact that with the help of them you can quickly bring the surface of a fairly large area. In addition, the installation of panels will not take much time, since it is not necessary to wait for the bread with numerous layers, such as in the case of plastering. It also plays the fact that the surface aligned with them does not require any additional finishes, as in the case of plasterboard. Another advantage of such a material can be called quite affordable price on him.
MDF panels wall mounting with their own hands, which can be carried out even if there is absolutely no experience in this work, is simple enough. The main thing is to understand the principle of such cladding, to prepare surfaces and pay special attention to accurate calculations and markup.
The abbreviation "MDF" is decrypted as a finely dispersive fraction, from which, and this finishing material is made, including wall panels. The production of MDF is in the process of dry pressing of fine masses from wood sawdust and chips, using high temperatures and pressure. For ligaments, the mass is added carbamide resins modified by melamine, which prevents the evaporation of formaldehyde, chemically associating it (class of formaldehyde emission - E1). MDF panels are considered an environmentally friendly material, so they are not forbidden to use for interior decoration premises. The principle of installation of panels is similar to the installation of natural wooden, but they have a lower price than the latter.
Installation of wall MDF panels can be carried out in two ways - fixing them to a frame crate or fixation to the wall of the wall with the help of the adhesive composition of the Liquid nails type. This adhesive is used not only for the installation of products from the tree and its products, but also for sealing the slots, since it includes a filler of wood sawdust. If the spreading of defects will be carried out on the remaining visible parts of the wall, then the adhesive weight should be selected in color so that the seats do not stand out on a general background.

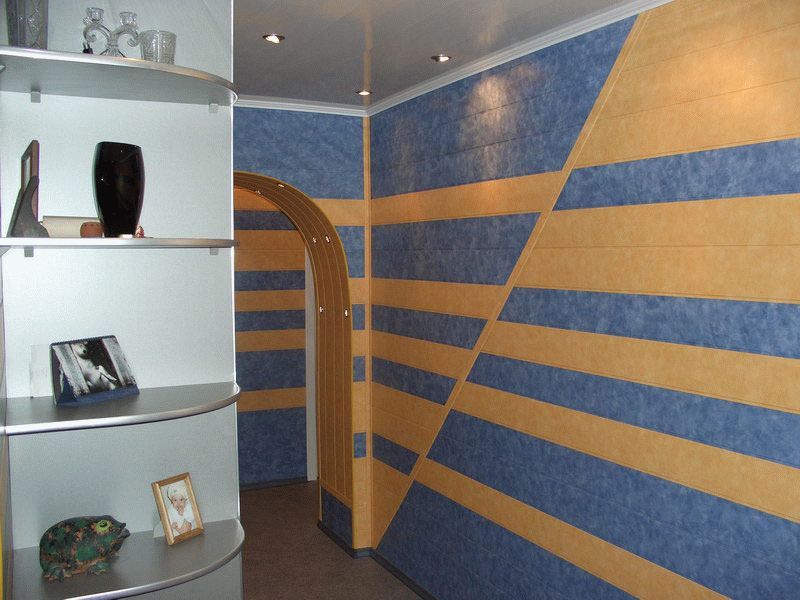
The MDF panels are produced in a wide variety of shades and may have a factory microrelief pattern that simulates various wood or stone breeds, so they can be selected for the design of any interior. In addition, the panels are easily combined between themselves and can be installed vertically or horizontally, depending on what the hosts want to achieve.
For example, if the ceiling is too high and makes an uncomfortable room, you can set the panels horizontally using different shades alternately. If you need to visually lift the wall, then the panels are installed vertically.

The panels are made of different lengths and widths, therefore, before choosing the color and shape of the material, you need to think about what effect will need to be achieved.
To work it was comfortable, you need to prepare tools in advance that will speed up finishing materialBy making it the most simple as possible. So, you will need from the tools:
For MDF installation, specific auxiliary materials will be required. Moreover, the purchase of some of them will depend on the choice of the fastening method.
Installation of panels on the walls can be carried out in two ways:
Both methods can be used to install panels both in a private house and in the apartment, but for adhesive installation it is necessary to observe the basic condition - the wall must be perfectly smooth. Therefore, if the panels are glued to the surface, it must be pre-aligned with plasterboard or plastering and spacing method.
To install panels, it will take quite some auxiliary materials to the glue - this is the composition of "liquid nails" and accessories.
If you need to align the uneven wall using the facing of the MDF panels, while hideing communications over it or carry out insulation and sound insulation, you will have to first install the framework that will bring the entire future surface into one plane.
The framework for the installation of panels can be made of wooden bar or metal profile. It must be said that MDF mount is easier to exercise on wooden MaterialSo for this it is suitable nails or even a staple bracket. When installing panels on a metal profile, self-mains will be needed, and in this case there will be no longer possible.
When using a frame, a gap is inevitably formed between the overhaul and facing, in which there will be no ventilation air circulation - such conditions are very "attractive" for mold and fungus. Therefore, before installing the crate, it is necessary to conduct a revision of the wall. If it is wet, it will be necessary first to dry, and then treat special antiseptic compositions. On the external thin walls, it is still better to install such a facing at all, as it will quickly come into disrepair, and in addition, an unfavorable microclimate will be created in the room with time, which can cause allergic reactions at the residents.
To install facing panels on the framework, the following materials will be required:


The surface preparation can be carried out only if it is dry. If there are signs of high humidity on it, it is necessary to initially determine the cause of such a phenomenon, and then try to eliminate it. I can not close the raw wall with any panels.
If there are no such obstacles to mounting the MDF panels, both under the frame system and under the sticking is approximately the same preparation of the wall surface. It consists of several operations:
If the wall is saved by wallpaper, then they must be removed completely, otherwise in a closed space, they can become a nutrient medium for mold or even insects. Qualitatively glued wallpapers, which are difficult to remove, you first need to wash with water or disappear using an iron, and then read the spatula. Sometimes you have to resort to the use of special compositions for.

If the wall is plastered and whiten, or qualitatively painted water-emulsion paint, Conduct it is optional.
In the case when the mold stains are present on the wall, the surface should be "perturbed" - to treat the special composition of "antiplest" or a conventional concentrated tool for bleaching linen - "whiteness". Before processing the surface is recommended for the maximum possible depth to clean the spatula. When the applied composition is absorbed and dried, the wall must be cleaned by a spatula, and then repeat the processing. It is advisable to clean the area affected by the fungus to the bottom, that is, to remove the plaster in this place completely and well treat the capital wall itself.
 "Treatment" of the affected sections of the wall by antiseptic compositions
 This work should be carried out with compliative security measures, in the respirator or in a special mask, in order to avoid inhalation of particles affected by fungus plaster.
If, after removing the wallpaper or "weak" plaster on the wall, cracks are found, then they are recommended to close, especially when planning accommodation under the MDF panels of thermal and soundproofing materials. Cracks need to be embedded so that they do not become the bridges of the cold, as well as the place where the dampness accumulates, can find a different insects or still the mold.
 Cracks are first seized by styling and deep into the ...
 To put the shunt or plastering solution well in the lumen of the crack, it must be expanded a little and deepen. Then it is purified from the residues of the old plaster and are treated with a brush.
 ... and then tightly filled with a repair solution
 After grappling the primer composition, the cracks are closed with a spacion mixture or plastering solution. At the same time, it is necessary to try so that the expanded clearance is filled to all its depths.
The next step is the primer of the entire surface of the walls. Moreover, it is necessary to choose the composition of the primer containing the antiseptic components that will oppose the occurrence and development of mold, as well as other malicious manifestations.
 Mandatory operation - Careful priming of the entire surface of the wall
 If wooden walls are planned to be planned, it is recommended to choose a soil, which includes not only antiseptics, but also flames - they will increase the fire resistance of wood.
The soil is applied to the wall using a roller with two - three layers, each of which should be thoroughly dry before applying.
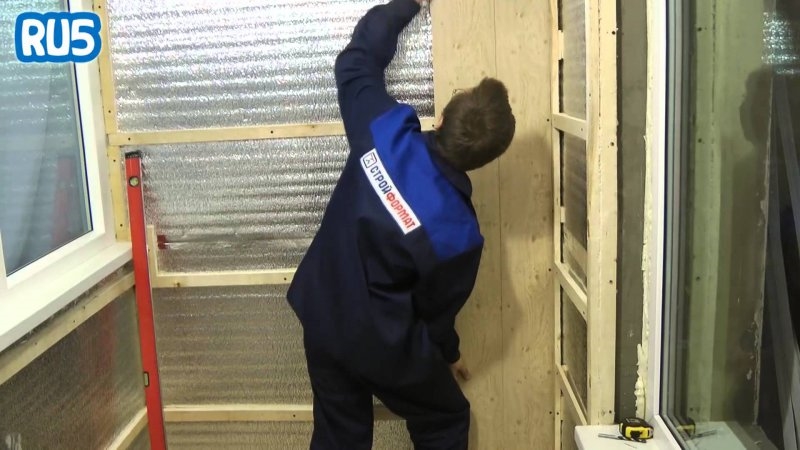
Next, in the event that the panels are mounted on the crate, you can move to the gluing of the insulation. For this purpose, the "foam" is well suitable, which is pasted on the primed surface.
 The most convenient in the work - "Penophol" on self-adhesive basis
 Today, you can find a self-adhesive "foam" - it is very easy to fix it on the wall of the foil towards the room, removing the protective film substrate. If there was no such material, the usual "foam" is acquired. It is rediscovered in height of the wall and glued to the glue "Thermal flex", applied to a smooth layer on the wall of the wall or directly to the insulation. The "Penophol" canvas are pressed against the surface, and with the help of a rubber spatula from under it, air is driven out.
 Skinning the junction of the adjacent strips of "foam" scotch
 Material sheets are mounted on jack, and then the adhesive must be allowed to dry, after which the joints are glued with a special foil tape.
If it is decided to mount the MDF panels to the framework, you first need to decide how items will be installed vertically or horizontally, since the location of the guide crates will depend on this factor. For horizontal orientation of panels, guide crates are mounted vertically. Conversely, if the panels are mounted vertically, the framework elements are mounted perpendicular to them, horizontally.
The frame is fixed on top of the insulating material. The step between the guides of the crates is usually chosen within 500 ÷ 600 mm from each other, and they must be installed perfectly smoothly.
To find the perfect vertical, you need to use a plumb with a painted cord, with which even lines are lit on the wall. If the lines are fighting off on a foil surface, then immediately after chopping, each of them is additionally released by a black marker using a ruler.

To determine the horizontal, resort to level assistance. The most accurate result will give laser or water. If there are no such tools, you can use the usual construction, which kicks out the middle with a special thoroughness. Signing currents, they are also connected by lines with a painted cord.
On the markup, it will be quite easy to secure the guides of the crates.
When marking, it should be borne in mind that the first guide frame is installed at the junction of two surfaces, that is, in the corner of the room or along the floor surface. The first racks will serve as a reference line for the remaining elements, with the setting step.

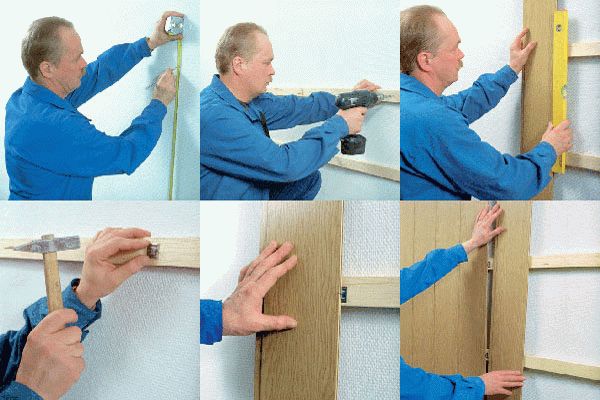
Wooden bars, despite the markup lines, when installing on the wall, they are still checked by the construction level on evenness. Then, they are attached to the wall with a dowel, for which the holes are drilled directly through the bars, in which the plastic dowels are clogged, after which the screws are screwed in them (or the scoring dowel-nails are used). Fasteners are installed at a distance of 350 ÷ 400 mm from each other. The length of the dowels or self-samples is chosen with such a calculation so that they go into the thickness of the wall at least 50 ÷ 60 mm, and the thickness of the lamp timing is added to this parameter, given that the self-containing hat is completely taken into the wood.

It is more difficult to bring all the racks of the crate to one level if the wall requires the alignment of the crate, and the bars themselves will have to fix the suspensions. In this case, the installation of the frame is made equally for wooden bars and metal profiles.

On the wall first on the lines of marking the suspensions are fixed. They fix on the wall with two dowels withstanding a step between adjacent in 350 ÷ 400 mm from each other. The shelves of the suspensions are rejected perpendicular to the surface of the wall.
Then installed, align in level and relative to the walls are two extreme on the wall of the bar. They are fixed on both sides by self-testers to the shelves. The protruding parts of the shelves are rejected back towards the wall.

The installed extreme guides are connected along the outer edge stretched cords on top and bottom (or on the right and left - with the horizontal orientation of the frame) - this will become the support lines (lighthouses) for proper Installation other guides in a single plane.
Prepared in size metal profiles are fixed on the wall on the same principle as wooden barsBut sometimes for the stiffness of the design in them there are liners from a bar. To secure the profile, suspensions are necessarily used, even if the wall is perfectly smooth and racks will fit close to it.

If the frame mounting is carried out on wooden wallMaintenance for fastening guide crates is fixed on the wall using wood screws. If it is necessary to install on a different wall base, then the suspensions are best fixed by clogged dowel-nails.
If the finish is fixed on a wall having a window or doorway, then the corresponding guides are necessarily installed on its edge, which will initiate cladding, and subsequently slopes and platbands.
Before starting installation, the cladding under the frame is carried out and fix all electrical or other cable communications, immediately determining the installation locations of the sockets and switches, if provided for on the wall.
Installation starts with the preparation of MDF panels - they need to be uncalled in height or length of the wall. The panels are placed using a roulette and a construction corner, the corresponding lines are carried out, according to which the steam is performed using an electrollized, manual vertical circular or even ordinary hacksaw.


The horizontal installation of panels is made in the flooring direction to the ceiling, and the first canvas must also be perfectly aligned in terms of level. Fastening to the crate passes exactly by the same principle as the vertical location.

The socket must be securely fixed, and do not be fed when an electric appliance plug is inserted. To ensure hard stop in the wall, it is recommended to fasten the wooden fragments of the appropriate thickness on the back of the wall. The front part of the socket and the switch is screwed to the facing panel or to the corresponding penetrate sockets.
Mailing the MDF panels on glue is somewhat easier than on the crate, but applying this method, the insulation cannot be installed.
When gluing, the panel position must be monitored by level.
- glue must remain quite plastic even after its initial frost, otherwise there is a risk of strain panels. Must get the composition that will not be subject to the influence of humidity and temperature differences.
- The glue must have a sufficiently thick consistency, so that it is possible to apply to a thick or thin layer, according to circumstances, as well as uniformly distributed over the glued surface.
 Optimal option - Glue type "Liquid nails"
 These requirements for the basic parameters are exactly the composition of "Liquid nails". The primer, which is treated in advance the walls, will create a good adhesion for glue on their surface, so the panels will be secure on it.
 Clay can be applied on the back side of the panels point or "snake"
 Therefore, to speed up the process of gluing, the composition is applied immediately by 8 ÷ 10 cloths, which are pressed against the wall, and then come off. Namazav, applying and taking out the last of 10 panels, produce gluing the first, second, and so on, until it comes to the latter. By installing the canvas, they need to be pressed very well to the surface of the wall, and for better fixation you can even grab yourself in two places in two places. They are screwed into the panel groove, and then the self-tapping screw is closed by a pinned spike.

Can be mounted in different ways, depending on the selected design - glued to the same glue, installed on special mounting or screwed by self-testers to the wall surface. Fix the plinth to the floor - it will be a very serious mistake.
Find out how to produce, having familiarized with step by step instructions In the article on our portal.
After reviewing S. technological process Mounting MDF panels, you can, summarize, formulate their main positive and negative qualities.

So, K. advantages Such finishing material includes the following quality:
Disadvantages These panels can be called the following points:
However, it can be noted that despite the above mentioned disadvantages, the MDF panels are only gaining popularity and fully compete with. Installation of such a cladding can easily carry out even one person without assistance, and, at all, not having experience in such work, unless, of course, will follow all technological recommendations.
And in conclusion - a small "visual manual" in the form of a video seater on the installation of MDF panels:
The walls of the MDF panels are a way that has many advantages over other types of construction work. The fact is that the technology allows installation in a fairly short time. Essential advantage is that there is no need to carry out additional coating processing. Facing conducted different ways: adhesive and frame. It is the last method that is considered the most time consuming.
This material has numerous advantages that make it indispensable at. These include the following indicators:
 MDF panels allow you to create a unique interior design, besides, it is easy to care for them
 On a note! Warfather material is covered with a decorative layer due to lamination or veneering. And often the problem arises that after removing stains with alcohol mixtures, numerous divorces remain on the surface. Get rid of them by re-applying the solution. The main thing is to continue rubbing - until the fluid is completely evaporated.
Naturally, such positive properties It is suggested that the MDF panels on the wall is an excellent option. But it is impossible to forget about some drawbacks:
Thus, it can be concluded that the finishing of MDF panels is advisable when it is planned to comply with the laying technology.
 Despite the simplicity of installation, MDF panels have their drawbacks
 For quick and comfortable work, you need to prepare a tool in advance and purchase materials. The event is performed using the following devices:
 Installation of MDF panels requires a special tool
 The frame method of fastening the panels on the wall requires more materials than glue, for which only a special mixture and self-tapping screw is necessary (for mounting the first element from MDF).
For cladding, the framework method will take:
In principle, the MDF panels will require a limited amount of funds. Of course, if you do not pay attention to products that are covered with veneer of valuable wood wood.

Before weching the walls, you need to prepare the surface. It consists of several stages, each of which begins only after the previous one was performed. The most important rule, the observance of which makes it possible to get the desired result, it is completely dry wall.
Work should not be carried out in the following cases:
If there are no such troubles, you can begin preliminary training. It is completely identical to all installation methods. wall panels MDF.
Often one rough mistake is performed - pasted wallpaper remains on the walls. This categorically cannot be allowed. They serve as an excellent nutritional medium for breeding bacteria. And in the adhesive method - you will not be able to securely secure the elements.
 Should be completely getting rid of old wallpaper and bliss
 The plain layer is also removed, although many masters claim that such a procedure is not obligatory. In fact, when the need to apply primer, it is the old layer that will interfere with it. Therefore, it is better to clean the wall completely.
Unfortunately, such a problem occurs everywhere, especially in new buildings and old wooden houses. It's quite difficult to fight her. There are recommendations that indicate that it is enough to treat damaged areas with special solutions. Many manufacturers even produce them in the form of spray.
 After removing the old coating, it is necessary to remove the fungus and mold
 Immediately it is worth a reservation that you can only defeat the fungus with all his fungouncing. Therefore, the output is only alone - removal of plaster to the base, careful impregnation with special solutions. Of course, the amount of work increases, but the likelihood of complete elimination of the threat to health appears.
On a note! Fighting with mold (fungus) is a very long event. It is necessary to eliminate the sources of constant penetration of moisture, as well as carry out the processing of all infected apartments in an apartment building. This will allow the MDF high-quality casing panels.
This procedure is necessary even in the case when the framework is planned. The fact is that any cracks are able to reduce the thermal insulation effect. Works are carried out on the following technology:
 Installation of MDF panels requires full tightness of the wall
 This event makes it possible to increase the adhesion of materials, as well as carry out the installation with your own hands better. For work, formulations that have deep penetration are selected. In order to further protect the surface - the mixture should contain antiseptics. The soil is applied in two layers, each of which successes well. Especially carefully impregnate walls before mounting MDF panels on glue.
On a note! Treatment of wooden surfaces should be carried out according to similar technology. But in the composition of the mixture should contain anti-airpoints, which will give lumber refractoriness.
 Surface Surface - Mandatory Stage of Preparatory Work
 Change the walls with MDF panels without well erected frame. Need to create reliable designwhich will withstand the load. Installation is made in several stages.
Before starting marking, you need to decide on the layout of the elements. They can be mounted: horizontally, vertically and diagonally. All positions can be combined, but for this you need to install separation decorative elements. For the horizontal location of the fragments - the lamp is stacked on the wall with their own hands vertically. Accordingly, for vertical cladding - On the contrary.
Marking is performed by this principle:
 To apply vertical marking, a construction plumb will need
 The walls of the walls of the MDF panels on the crate is made by two methods. The choice of a particular method depends on the basis of the basis.
Facing the walls of the MDF panels begin after full preparation. The shapper is once again checked for strength, the connection points are stretched. If necessary, communications are carried out, the locations and switches and switches are immediately marked. The cable is stacked into the cable channels, which are corrugated hollow tubes. They are fixed on the walls with their own hands.
Facing work begins with cutting products. But if there is a significant curvature of the ceiling and flooring, which was not previously corrected, then each element is cut after a thorough measure.
On a note! Facing material has decorative facialwhich can be significantly damaged when circumcised superfluous. Therefore, it is necessary to take into account the location of the teeth on the pubsika beer.
Installation of MDF panels on the wall has the following technology:

From the foregoing, it can be concluded that laying material from MDF - the procedure is unemployed, but requiring compliance with certain rules.
With the development of technologies on the market, more and more construction and finishing materials appear. At the end of the last century, we have MDF. There are MDF plates that use in construction work, There are finishing panels that can be separated by walls / ceilings or make furniture.
MDF in our market appeared in the last years of the last century, and invented it in the United States in the late 60s of the 20th century. It is possible to understand what MDF is if you translate its English-language name - MDF - Medium density fibreboard. It is translated into Russian as a "fiberglass of medium density". That is, a Russian-speaking name was formed using transliteration - instead of Latin letters put similar Russians. Normal, for our language, phenomenon.
MDF - Fibrous Middle Density Stove
MDF made of wood, grinding to a state of very fine chips, practically to the state of the fibers. Used, mainly woodworking waste, so that the release of this material harm forests does not cause.
Ground wood is purified from sand and other extraneous enclosures, washed, dried. The prepared mass is heated, form the ribbon of the required width from it, after which they are pressed. Under pressure from heated woody fibers, a natural binder is a lignin. It is he who is binding in this material. The final form of products betrayed in the finish press, which squeezes the residues of air from the mass, forming a homogeneous structure of MDF.

After pressing, the cooled material is fed to grinding, where the flaws on the surface are removed from MDF, the material is removed to the required thickness.
Not all wood breeds give a sufficient number of binding. Then add a similar, previously dedicated, lignin or other natural binder. Of all sheet wood materials, MDF is considered the safest, since the binder is natural, and the formaldehyde emission is comparable to wood indicators (F1 emission class, that is, the use of furniture for children's and medical institutions is allowed).
In the production of wood-fibrous plates, you can give special properties. Basically, the moisture resistance of the additive increases moisture resistance and reduce flammability.
In the "pure" form, the material has a grayish brown color, a homogeneous tight mass. The exact shade depends on the type of wood ground and the amount of bark. In this form, the material is used as a construction sheet - to erect light partitions, alignment of the walls.
The MDF surface can be "enlarged." It can be painted, seminate PVC film, sack veneer or plastic. This gives a fairly large number of design options, which is used in the furniture industry, in the production of finishing materials.

Production technology allows you to form products of various shapes, thickness, size. With finishing press, you can form a certain relief, which is used in the manufacture of furniture, doors. Also from MDF finishing materials - plates, panels. Make it from it the plinth, platbands, the other hand. All these materials can be used for interior decoration.
The structure of the MDF is fine-fiber, dust is formed during the milling, which allows you to make carvings. This is used in the manufacture of carved decorative elements - panels, decorative lattices, curly furniture facades.
Appearing on the market, MDF created competition. It was facilitated by its properties:

All this led to the growing popularity of the material. Even despite the fact that MDF is more expensive than chipboard. To some extent, MDF even amounted to wood competition. For example, plinths are increasingly used, platbands from MDF, finishing panels. This is due to the first, lower cost, secondly, greater practicality. Wood requires regular care - painting, varnishing. MDF does not require special care. It is simply wiped with a damp cloth, if necessary, using a liquid detergent.
MDF plate manufacturing technology allows you to vary the density wide limits: the minimum indicator is 760-780 kg / m 3, the maximum is 1100 kg / m 3 and even higher. Material with less density is used where the load on the abrasion is low: in the furniture industry, for decoration of walls and ceiling.

MDF plates of high density are used for floor finish. The material of this category has high resistance to abrasion: one and a half times higher than that of an oak (oak - 6.9, MDF - 10-11). If adding that the diagonal warp coefficient is only 1.2 mm per meter diagonally (at plywood 15 mm), the love of furnitureeers and finishers to this material becomes clear.
One of the most popular forms of release - plates of different thickness and format. They can be found with such parameters:

With MDF plates, it is convenient to work conveniently, since this material has very small tolerances from sizes:
When docking two sheets, the difference in thickness or sizes is very small or there is no one. Therefore, the MDF finish sheets or panels is moving quickly.
MDF plates are manufactured with different types Surface treatment:

If we talk about construction and repair, the MDF grilged plates are used in them. When aligning the walls or installation of light partitions, when aligning the floor and ceiling. Here is an approximate area of \u200b\u200bapplication.
If the surface of the wall or the ceiling is uneven (deviations more than 1 cm), the method of mounting the sheet MDF is the same as at drywall - on the frame. The frame is usually collected from wooden bars, but no one forbids to put profiles under plasterboard. The cross section of the bars is selected based on the irregularities of the wall - they must compensate for all the height difference. Most likely, you will need a 20 * 30 mm bars or something so. They are stuffing horizontally with a step of 40 cm. With this step of the sheets of sheets (they are, if the ceiling height is higher than 280 cm) comes to the bar.

Under the installation of leaf panels from the same bar, vertical jumpers are installed. They are put in increment:
The step of the vertical jumper installation depends on the thickness of the selected material. For thin sheets (3-4 mm), it should be less for thick (5-6 mm) can be made more.
TO collected carcass Muffins / MDF plates are attached. Feature (compared to drywall) is that for hidden attachment it is necessary to drill holes under fasteners. Otherwise, the fastener will not go into a dense slab. So that the caps are not sticking over the surface, the hole is expanded by using a larger diameter drill.

After installing the screws on the surface there are holes. They are embedded with putty. If it is supposed to put the walls of the walls, act as when - first put the holes close up, immediately removing the spatula of the surplus. After drying, there are places of putty sandpaper with thin grain - to finally get rid of possible irregularities. Then, dust the surface, proceed to the shtlocking of the walls.
If the walls are smooth, you can mount the MDF plates without a frame - on glue. You can use liquid nails or the composition of the type cm-11. The order of work is:

So that in the process of installing the sheet does not move anywhere, you can make holes in the corners and, after alignment, fix the sheet. Even if the tapping screw is held only in the plaster, it will help, as it is required only at the initial stage - while the glue does not begin to fit.
This method seems more simple and costs less (due to the absence of a frame), but to align bulky MDF plates is not easy. Better to try on little plot walls. The fact is that it is impossible to disassemble the established. Only if destroying the trim completely. So it is worth thinking which methods better.
For laying on the floor, moisture-resistant MDF plates of a large density (from 900 kg / m 3 and above) are selected. Sheet thickness - from 5 mm when laying on a draft floor and from 10 mm when mounting on the lags. In this case, the installation method is similar to the alignment of the floor with plywood, only the gaps are less, as the wood cooker changes much less plywood. The rest of the rules are similar:

After grinding putty, the surface of the floor from the MDF plates is ready for painting. If you do everything neatly, it turns out perfectly smooth floor. This foundation can be used and as a basis for flexible finishing materials or under laminate.
Small-dispersive pressed plates serve as the main for the production of decorative finishing panels. The facial surface is covered with paper. This is the cheapest option. A little more expensive laminate PVC film. There are also panels that are saved by veneer. This is more expensive material. There are also options with plastic, but it is already quite rare.

MDF panel with volumetric image - 3D
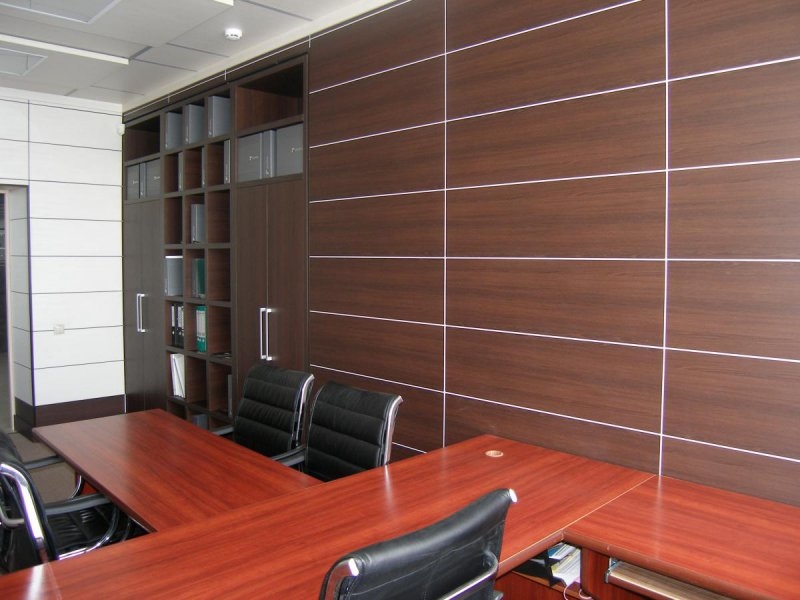
MDF decorative panels most often cut the walls, sometimes the ceiling. This method of finishing allows you to save time: the surface and align, and immediately take the final form, since the additional finish is not required.
We will discuss not coloring and shades, but about the inlet form and the type of decorative surface. In the form of finishing panels from pressed wood fibers are:

When choosing the MDF panels, pay attention to the finish type. Most cheap Material covered with paper, on top of which a thin layer of protective coating is applied. It is clear that such a surface is quickly scratched, it is possible to wipe it only and an extremely soft slightly damp cloth. It is impossible to use even a rough sponge, otherwise, light spots are formed. These MDF panels are good for finishing the ceiling - there is no mechanical load there. If you install them on the walls, it is better to immediately cover two layers of varnish. The type of surface is choosing themselves - gloss, semi-small, matte, semi-mone ... It is important that the film is durable.

More expensive - with PVC and veneer - additional finishes do not require, but at a price of 2-3 times more expensive. If the budget is limited, described above the option is not bad.
MDF panels are mounted or on the frame, or directly on the wall, with the help of glue. The technologies are described in the previous paragraph and is distinguished by the fact that montage uses curvators - special mounting plates for complementary installation. The first panel on the wall is installed in the corner. Here it is attached through with the help of self-tapping. All the others are fixed by the clemas. After the installation is completed, the corners are closed with a special angular profile. It is mounted on glue - apply a thin layer and pressed at the installation site.
There is also a system of profiles - starter, finishing, connecting and angular (external and internal corner). But this fastening system is more expensive, it is used with MDF panels trimmed with veneer, square or rectangular format.
There is another subtlety of the installation of decorative MDF panels on the ceiling. If you use thin sheets / strips - 3-4 mm thick - it is necessary to put the suspension, otherwise the material will drive under its own weight. When using a plate 6-8 mm, the thickness of the suspension can be set less frequently. They are tougher and not bent. But the weight of the finish will be greater, so you have to use more powerful guides and the suspensions themselves.
If the question of environmental friendliness for you is not an empty sound, you probably paid attention to the MDF panels for the walls. With their help, you can seriously decorate your interior, make it more expressive and modern, while not devastating completely precious in the current economic conditions family budget. In addition, the installation process is no different level of difficulty and is quite accessible to master the "simple mortal". Therefore, boldly arrow tool and hurry to purchase the material - today we will tell about how to mount the MDF panels to the wall so that at the form of the result to experience quite well-deserved satisfaction.

It is quite logical before the direct installation of a particular finishing material to cope with what he has positive and negative sides. Moreover, from the point of view of the relevance of using MDF panels, there are far from such a unique solution as plastic or plasterboard. A similar instruction, but already on the fastening of plasterboard, you can read in the article: "How to mount plasterboard to the wall: 2 ways to install."
+


-

As you can see, mounting the MDF panels to the wall surface can be only in relatively dry rooms with favorable thermal conditions. Be sure to get rid of mold on the walls, in the case of any. It is necessary to take into account the fact that this material is very afraid of any power and inevitably give a crack with any actual contact with it. Otherwise, all negative aspects of use are safely leveled by its advantages. One of them is a wide selection of a wide variety of textures and colors that allows you to decorate the interior in full compliance with your aesthetic requests. 


In order to fix the panels, you will not need any specific tools. You need to keep at hand all the same standard set, which is used for mounting any other finishing material.
Prepare consumables:


It remains only to add the MDF panels themselves - and then there will be a complete set of all necessary for high-quality and successful installation. In order to calculate the exact amount of their quantity, you need to make the correct markup. 


Probably the most tedious and tedious stage, which many masters (both beginners, and already professionals) perceive not quite seriously. And sorry, because the quality of the preparation of the base surface depends a lot. Especially if you are fixing the MDF panels directly to the base without creating an aligning frame. Therefore, it is better to still think soberly and perform the necessary manipulations extremely high quality and carefully:


All further your actions depend on how you decide to fix the panels on the wall - directly on the glue or through the auxiliary frame device. Consider both types of installation, noting the features of their use, pros and cons, as well as the specifics of the execution of various stages. 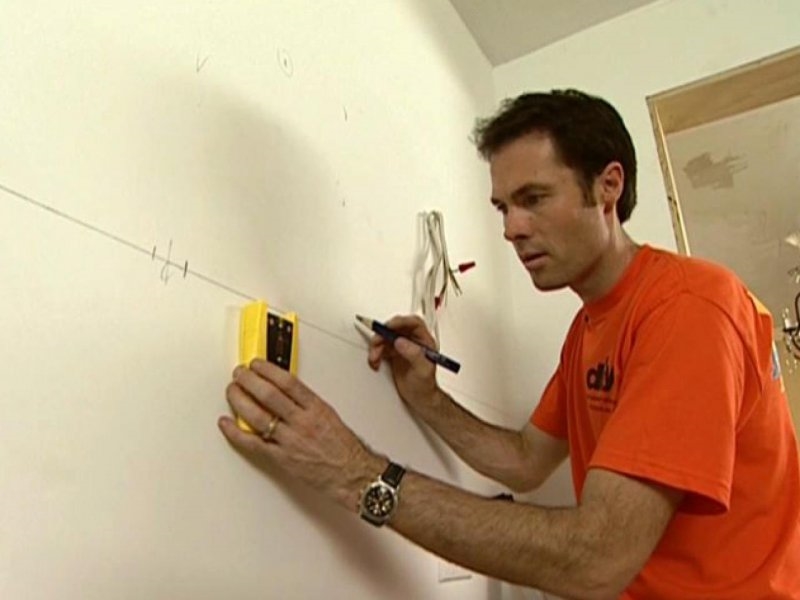


The main disadvantage of this option is the need to mount the frame, which is slightly lengthens the duration of the work. In addition, the frame takes a certain number of centimeters of free space. Are you ready to put up with such "arbitrariness"? Very often you just have no options, because it is far from achieving an ideal surface every time you need. 
Highly important moment - know the method of fastening the MDF panels to the wall: vertical or horizontal. The nature of the auxiliary frame device directly depends on this.


As you can see, everything is quite simple - it is hardly able to confuse! 


Some moments to pay attention to:


The whole process of mounting the frame - in the next video.
Video that tells in detail about the key points of the operation below.


Preparation of the surface and markup with this method practically no difference from the previous method we considered. The only difference is that it is necessary to thoroughly work primer In order to eliminate the appearance of fungus or other destructive processes.
In the rest of himself algorithm of action
looks like that:

As excellent option Adhesive makeup for MDF panels Recommend to use liquid nails - Quickly, reliable and quite inexpensive. 


How to mount the MDF panels to the wall surface with glue, tell the following video.
Information on how to fix the MDF panels to the walls of any type, it will definitely not be too much. In some cases, this material appears hardly by an ideal solution for the design of the wall surface. In addition, it is easy enough and convenient for installation, so it is quite real even alone to cope with it. The main thing is to clearly follow the already proven time algorithm for fastening the MDF panels and do not be lazy to work well over the basic basis, so that after not to edit yourself for the fungus and other troubles. 
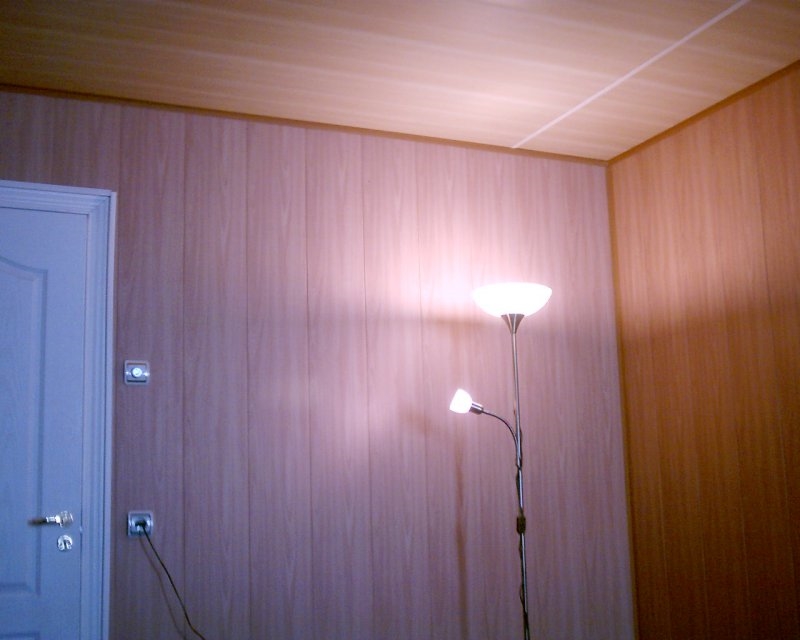


Photo: vk.com.
To date, the easiest and fast way Make the walls of your dwelling with beautiful and smooth is the finish of the MDF panels. This solution is suitable, of course, not for all premises, but for corridors, stair cells, storage rooms and hallways, this material will be almost perfect. We will talk about him in this article, in which, together with the site, we consider how the installation of MDF panels frame and frameless way with your own hands.
There are two ways to fasten the MDF panels on the walls - the so-called adhesive and frame. Both of these methods are good and used depending on the circumstances. If the trimming of the walls of the MDF panels provides for hiding any communications, the frame method for fastening MDF is used. If we are talking about finishing smooth walls, the adhesive method is used.
Wall finishing panels MDF photo
The name of this method speaks for itself - for its implementation, you will need to build a framework, which in some way resembles the design that is used for. The difference is only in the position of carriers - if they are installed vertically to attach them vertical, then the MDF provides horizontal arrangement of profiles. In this regard, the features of the construction of such a frame arise.
In principle, at the first stage there is a similar way - the plane of the future frame is fought off, then the walls of the wall, on the floor, the ceiling and the walls adjacent to it are the guide profiles. From now on, the differences begin. In a predetermined plane, the vertical carrier profiles CD are installed not through 600 mm, but after 3000 mm, which is the standard length of the carrier profile.

Installation of MDF panels: frame method
This is done in order to subsequently set the horizontal bearing CD profiles, the step of which is 500mm. With vertical profiles, they are connected using crab CD-spare parts, and all the same P-shaped brackets are fixed to the wall.
Mounting frame is the main work in the process. installation MDF. panels. The mount itself is a lighter process with which almost everyone can cope. MDF panels are attached to a frame with kleimers (special clamps). Kleimer itself before fastening to the frame is inserted into the groove, located on the end of the panel, in this way providing their reliable fixation to the frame. Kleimers are designed so that they do not interfere with the next panel in the groove.

Installation of MDF panels do it yourself photo
Installation of MDF panels on the walls with glue is made much simpler - significantly facilitates the entire installation process. Lack of metallic or wooden frame, the construction of which takes quite a long time.

Installation of wall panels MDF photo
Before you begin to directly fasten the panels, we will first understand with glue that is used for these purposes. Either what glue here does not fit - need a composition with certain qualities.

Liquid nails for mounting MDF panels photo
The installation of panels with glue looks sufficient simply - its technology is almost fully described on a tube with Liquid nails glue. It is not recommended to break it. For the start of the walls, the walls must be cleaned from dust and dirt - in principle, if you are going to seriously engage independent repair, then the primer process, which is performed for cleaning the walls from dust and dirt, and at the same time to improve the adhesion of materials, should enter your habit. Always stuffed, everything and everywhere.

Grinding walls before mounting MDF panels photo
After drying, the primer is embarking on the direct sticking of the panels. In the meantime, it dries, you can do other preparations - for example, it is cut into a size of several tens of panels.
The glue is applied directly to the panel itself point and in a checker order - the glue drops should be large. After the glue is applied, the panel is pressed against the wall, trimmed tightly and removed. This requires gluing technology - it is necessary to tear off the panel so that the glue is dilapidated, and the panel is not peeled from the wall under its weight. To speed up the process and make the installation of MDF panels with their own hands faster, you can immediately, one by one, to smear up to a dozen panels, attach them to the wall and tear. While the glue is dreamed of, it is allowed to smoke - five minutes later the panel can be closed again onto the wall and overhauled them.

How to glue the MDF panels on the wall photo
Clear panels are easy - it is much more complicated smoothly and high-qualityly cut them. In this regard, special attention should be paid to the slopes and the like obstacles falling on the installation of MDF panels. It should be understood that from smooth trimming panels depends appearance premises.

Installing MDF panels on the wall
Well, in conclusion, we will stop on the main nuances of the installation, which are characteristic of both methods for fastening MDF panels.
That's basically it. This is how the installation of MDF panels is performed. This process is not complicated and not simple, as, in general, anyone finishing workIn which your attitude towards small things plays an important role, which in aggregate affect the overall picture of the repair. Simply put, the little things in this matter does not happen.


