For the convenience of performing preventive work and repairing a car from a good owner, the garage is usually equipped with an inspection pit. This is not surprising - the mentality of most of our men is such that almost every motorist prefers to control the condition of the car himself, and, if necessary, to repair it. Having invested in such a garage arrangement once, in the future you can save a decent amount of service, since it will be possible to carry out such simple but necessary procedures as changing the oil or covering the bottom with an anti-corrosion compound, as well as a number of other work related to the bottom or suspension of the car, you can independently.
However, it should be noted right away that the optimal location inspection pit it is considered a place under a shed next to the garage, or in the garage, but next to the parking lot, since wet vapors that accumulate between the bottom of the car and the bottom of the pit often contribute to the activation of corrosive processes. But, as you know, most often the space in the garage is limited, so the inspection pit is arranged in the middle of the room. Based on this circumstance, it will be further considered how an inspection pit in the garage can be made with your own hands with the arrangement of reliable waterproofing, ventilation and using various materials for the construction of walls.
The best option would be to build a pit before the start of the construction of the walls of the garage, in the place planned for it, in parallel with the creation of the foundation and floor. It is clear that in an already finished building, you can face a number of restrictions that significantly complicate the work.
For example, the same foundation pit, set up in an open space, can be dug quickly and accurately using special equipment. In the finished garage, it will have to be dug exclusively by hand, and this work is quite laborious, since it will be necessary not only to loosen, but also to extract several cubes of soil from a sufficiently large depth, and then also organize its removal from the garage and further removal from the territory.
When planning the excavation of a pit, it is recommended to obtain information about the location in advance groundwater on the construction site in order to protect the building from their penetration into the pit, otherwise it will become unsuitable for work, and over time its collapse will begin. In this case, you will have to "save" the garage, bring the soil and bury the hole. Therefore, it is best to think over all the nuances of its arrangement in advance and get all the information necessary for this, otherwise the work may be done in vain.
To build a viewing hole, you will need a lot of different materials that need to be purchased with a small margin. Usually professional builders are advised to increase their number by 10-15%.
So, to create a full-fledged observation pit, the following materials may be needed:
The work on planning and arranging the inspection pit usually begins with determining its size. It is recommended to fix all parameters immediately, for further drawing up a project, in which it is necessary to show the location of the pit in the garage, its width, length and depth. These values primarily depend on the base of the car, that is, the distance between the wheels along the length and width of the car, as well as on the height of the garage owner. Correct determination of these parameters is important for ensuring safety, and for comfortable work, and the convenience of putting the car in the garage.

The generally accepted, most convenient parameter of the pit is the width of 800 ÷ 850 mm.


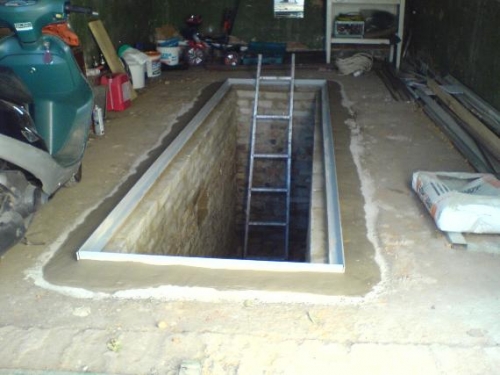
When making calculations, you also need to take into account the place for descending into the pit with the car standing in the garage. The descent must be equipped with a ladder or step ladder. An extension ladder is usually chosen as it takes up significantly less space.
copper cable
It should be noted that it will be better if the pit is dug a little deeper than required, since the required depth can be compensated by raising the floor by increasing its thickness. Usually the depth of the hole is equal to the owner's height plus 100 ÷ 200 mm and is approximately 1800 ÷ 1900 mm.
In addition to the above parameters, when digging a pit, it is necessary to take into account the distance for waterproofing, masonry or pouring walls, as well as for filling clay around the inspection pit, a layer of which will become additional waterproofing. If the walls will be laid out of bricks or filled with concrete, then the pit should be increased in width in each direction by 120 ÷ 150 mm, for gas silicate blocks by 200 mm, for arranging a concrete floor, the depth increases by 200 mm. If a drainage or waterproofing layer is arranged around the pit, the pit will increase in width by another 150 ÷ 170 mm.
As mentioned above, it is necessary to obtain information about the depth of the groundwater. These data should be indicated in the report, which is given after the research of the site before the construction of the garage.

Groundwater level plays an important role in the construction of any building, be it a residential building or a garage. If it goes higher than 2500 mm, then digging a viewing hole in the garage or making a cellar under the house is difficult, since they will be filled with water, even if high-quality waterproofing is done.
In some cases, there is a way out - in order to avoid this unpleasant situation, a drainage system is made around the perimeter of the entire pit to the height of its walls and underneath it, which will help drain water into the sewer well.
Provided that groundwater is located below the level indicated above, there are no restrictions for arranging a viewing hole.

Almost always, garage owners, arranging a viewing hole, prefer to make niches in its walls, placing them in the upper or middle part of the side walls.

The depth and width of such "windows" must be calculated in such a way that it is convenient to put a tool in them during work, from small to large enough. These niches must also be calculated and included in the construction plan.
The marking of the inspection pit is carried out in different ways, since it can be settled in already finished garage or before its construction.
| Illustration | |
|---|---|
 | It is easier to mark the location of the inspection pit in an already built room with a finished floor, but it will be more difficult to equip it. If you plan to make an inspection pit in an already built garage, in which the floor is covered concrete screed, then the marking is quite simple - measure the required distance from the walls, make marks and draw the outline of the future pit. But here it must be borne in mind that the distance between the walls of the future pit and the garage must be at least 1000 mm. |
 | When the markup is completed, the most difficult stages of work will begin. If the floor of the garage is wooden, then it is naturally easier to remove the covering: according to the markings, the boards are simply cut out and removed. It is much more difficult to get rid of a well-made screed, since it will need to be removed to the ground. This will require a jackhammer, or at least a hammer drill and grinder with a disc for metal. First, the concrete is broken according to the markings, and then the bars of the reinforcing structure are cut out with a "grinder". |
 | In any case, the pit for the inspection pit in the finished garage will have to be dug by hand, since no earthmoving equipment will enter the room. This stage of work can be called the most laborious, as usually standard size the pit is 1800 × 1100 × 6000 mm, which is almost 12 cubic meters of land. It is quite difficult to extract such a volume of soil alone, so it is best to have two or three assistants. |
 | The duration of this stage of excavation will depend on the activity of the workers and on the composition of the soil. For work, you will need bayonet and shovels, buckets for lifting soil from a depth, a wheelbarrow for removing it from the territory of a constructed or future garage. It should be noted that for difficult clay or rocky soils, you may also need a pick or crowbar. |
 | When determining the place where the soil will be taken out, it is necessary to take into account that in a loosened state it will take up space 20 ÷ 25% more than it occupied in a compacted form. The obvious advantages of this method of building a viewing hole can be attributed only to the fact that it will not get wet in the rain while digging a pit, which means that the work can be carried out at any time, without much regard for the established weather. |
 | If this excavation of a pit for a viewing hole is carried out in a still open area, then in this case it will be more difficult to carry out markings with high accuracy, but it is much easier to carry out excavation work, since specialized equipment may be involved. The disadvantage of this method of digging a pit is that the pit will still have to be leveled manually, and also that it will not be protected by a roof. If it suddenly rains, all the more - protracted, then after them you will have to wait a long time for the soil to dry before continuing to work, and sometimes even resort to pumping out water using a drainage pump. Therefore, in case of a sharp change in the weather, it is necessary to prepare material or devices in advance (for example, wooden boards covered with foil), which can be used to close the pit from above, thereby protecting it from water ingress. |
 | If clay layers are found during the excavation process, then it is recommended not to take this soil away, but leave it near the garage or dump it next to the pit, since clay is best suited for filling the outer sinuses around the pit walls. |
 | Next, you should immediately think about ventilation. If it will be removed through the wall or pass under the foundation of the garage, then a trench is being dug for the ventilation pipes. |
Despite the measures taken to protect the pit from moisture, over time, one way or another, it may appear bad smell mustiness, gasoline and waste engine oil, so the installation of ventilation in it is simply a must. They equip it according to the same principle as the basement ventilation system.
| Illustration | Brief description of the performed operation |
|---|---|
 | Work on the installation of ventilation ducts is usually provided at the stage of excavation of the pit. The ventilation system can be common for the inspection pit and garage, or it can be performed individually for each of these rooms. |
 | The illustrated diagram shows the principle of an integrated ventilation system. Air enters the inspection hole and the garage through one inlet pipe (item 1), branching into two nozzles - straight for the garage (item 2) and downward - for the inspection hole (item 3). The air outlet is also carried out through one exhaust pipe (pos. 4), passing through the roof to the street and raised at least 500 mm above roofing garage. This pipe also has two holes: one of them is located in the upper part of the wall of the inspection pit (pos. 6), and the other ventilation window is located under the garage ceiling (pos. 5) on the opposite wall from the inlet. I must say that such a scheme can be called the best option that works effectively and does not lead to unnecessary costs. |
 | If you plan to make a separate one for the inspection pit ventilation system, then both holes are located on one of its sides or on opposite walls. In this case, the pipes can be led out into the street not through the roof, but under the wall of the garage, through the foundation. |
 | The supply pipe rises about 500 mm above the ground and is closed from above with a protective grill or a special "pass-through" cover. The exhaust duct rises 2000 ÷ 2500 mm above ground level, and a metal umbrella is fixed to this pipe from above to prevent moisture and dirt from getting into it during wind and precipitation. |
 | The supply pipe will be optimally embedded in the ground from the outside of the inspection pit, and its lower edge will be drawn with a branch pipe through the thickness of the wall in its lower part. However, if space permits, then the pipes can be left in the garage. In this case, they are mounted, fixed to the wall and led out through the ceiling and roof of the building. |
 | If the channels are located on one wall of the inspection pit, then the supply pipe is lowered to the floor, and the opening for it is arranged at a distance of 100 ÷ 150 mm and must be covered with a protective grill. The opening of the exhaust duct is mounted 200 ÷ 250 mm below the upper edge of the inspection pit. The ventilation pipes are embedded in the brickwork (or filled with concrete - if the pit walls are monolithic). From the inside of the inspection pit, they look like windows. |
 | For laying ventilation ducts, it is optimal to use plastic sewer pipes with a diameter of 100 mm. They are mounted on top of a waterproofing sheet laid around masonry walls or concrete formwork. |
 | After the work on the ventilation is completely finished, and the ends of the pipes are embedded in the walls of the pit, it is necessary to test the system for operability. The check itself is not difficult. It is necessary to carry the lighted candle first to the hood - its flame must clearly deflect towards the exhaust duct. Then they check it at the inlet, where the candle can even go out under a strong pressure of air. If the tests are passed with this result, then the ventilation system is equipped correctly and fully functional. |
Now, having figured out in general terms with the issues of ventilation of the inspection pit, let's return to general construction work - in the excavated pit it is time to deal with the floor and walls.
| Illustration | Brief description of the performed operation |
|---|---|
 | Having dug a pit, the soil at its bottom must be very well compacted with a manual rammer. After that, gravel or medium-sized crushed stone is poured onto the bottom of the pit and compacted again. When compacted, the thickness of this layer must be at least 100 mm. The next layer, 50 mm thick, is filled and compacted with sand, then the sandy "pillow" is closed with another five-centimeter layer of gravel. Some builders are limited to two layers of backfill - 100 mm sand and 100 mm gravel, which should also be tamped. Most often, the thickness of the layers and their sequence depends on the moisture content of the soil at the bottom of the pit. |
 | The next step is to cover the bottom and walls of the pit with waterproofing material. For this, dense polyethylene, roofing felt or one of the modern waterproofing membranes can be used. If sheets of roofing material are used, then they are overlapped one on top of the other by 120 ÷ 150 mm. And this strip of mutual overlap is coated with bitumen mastic, since the waterproofing layer must be airtight. |
 | The material is wrapped around the edges of the pit and secured with a load of stones or pipes. However, you should not tighten it too much: the canvases should be located freely, since a screed will be poured at the bottom of the pit, which will inevitably pull the sheets down. Next, ventilation pipes are laid, as already mentioned above. |
 | The next step is to strengthen the entire bottom of the pit with a reinforced screed. For this, a grid is knitted from reinforcement with a diameter of 6 ÷ 7 mm using a wire, which rises above the compacted rubble by 50 ÷ 70 mm - it can be installed on the fragments of bricks, since their height is 60 mm. If it is necessary to make the screed thicker, a formwork for pouring concrete is mounted around the perimeter of the pit. |
 | The mortar for the screed is made of sand, gravel (fine gravel) and cement in proportions of 2: 4: 1 (more precisely, 1.9: 3.7: 1), assuming that M-400 cement is used. Usually, a concrete solution for pouring a floor is prepared in a concrete mixer, then it turns out to be homogeneous and easier to work with. |
 | If the solution is to be mixed manually, it is recommended to add one of the plasticizers or liquid soap to it. Some masters recommend adding liquid glass to the solution, at the rate of 250 grams per 5 liters of concrete. This additive is recommended if increased soil moisture was found in the lower part of the pit during excavation. |
 | The floor is poured with ready-made mortar so that the concrete layer above the reinforcing lattice is at least 40 ÷ 60 mm. Poured concrete is well leveled using a rule. Thus, the screed will have to be done in two stages - first, most of the floor area is poured, and when it grabs and you can stand on its surface, the work is completed. The screed must dry and gain initial strength for 3–4 days. Only after this time is it possible to carry out further work. During the initial ripening period, it is recommended to moisturize daily concrete surface water - so the screed will become more solid and stronger. |
 | Wall construction can be made from different materials- they can be removed from piece material - bricks or blocks, or made monolithic, that is, poured out of concrete. Further actions depend on which method is chosen. When choosing a method for erecting walls made of bricks or gas silicate blocks, the masonry is made along the perimeter of the concrete floor, reinforcing it through 2 ÷ 3 rows with a wire mesh. A gap of 100 ÷ 120 mm should remain between the walls covered with waterproofing and brick, which will later be covered with soil mixed with clay, and then tamped. |
 | Masonry can be made in half or quarter bricks. The solution for it is made from sifted sand and cement, taken in a ratio of 1: 3. If a red brick is chosen for work, then it is recommended to soak it in water for 15-30 minutes before erecting the wall so that it does not absorb moisture from the solution, and the solution dries out naturally. For the evenness of the masonry, it is used as a guide stretched rope, and when performing it, it is imperative to check the horizontal and verticality using the building level. |
 | In addition, niches are immediately planned and formed for convenient placement of tools when performing repair work. To do this, a brick in a certain place is shifted outward by ½ of its thickness, or a metal box is embedded in the brickwork, which can go beyond the thickness of the wall, creating a sufficiently deep niche for tools or installation of lamps. |
 | After the walls are raised, sheets of waterproofing material are wrapped on them, leaving free space between them and the soil walls of the pit. In the next step, the resulting gap is gradually filled with clay mixed with soil, while every 150 ÷ 200 mm of the filled mixture is moistened and carefully compacted. |
 | If you plan to build walls of concrete, then you need to build a formwork for them. It can also be installed in different ways. In the first version, a waterproofing film is folded away from the walls of the pit and folded onto a cemented floor. A formwork wall is installed along the perimeter of the pit, knocked down from boards or plywood (OSB) with a thickness of at least 10 mm. Then, a film rises on the wooden walls, here it is necessary to prevent concrete from flowing through the cracks formed between the boards. |
 | Further, along the waterproofed outer surface of the formwork, a reinforcing lattice with cells of 150 × 150 mm is mounted. You can use ready-made mesh maps, or tie them from reinforcing rods with a diameter of 7 ÷ 8 mm, fixing them together with a wire twist. |
 | It should be noted here that, choosing this option for the construction of walls, the reinforcement of the floors under the screed, and then its arrangement, can be carried out simultaneously with the reinforcement of future walls. In this case, first of all, the floor is poured, and then the second, inner wall of the formwork is installed, which can be made from plywood (OSB sheets) or boards. |
 | Thanks to plywood (OSB) formwork, the walls are guaranteed to be smooth, and concrete will not seep in a large volume between the joints. In order for the concrete to be evenly distributed inside the formwork, it is not necessary to lift its inner wall immediately to the top. Pouring is usually carried out in tiers. To begin with, it is enough to erect a formwork with a height of 500 ÷ 700 mm along the entire perimeter, and reinforce the opposite walls, in order to avoid their deformation under the mass of wet mortar, with spacers. |
 | Then, concrete mortar is poured into the formwork. After setting this tier, another superstructure of the inner wall of the formwork is erected, which, in turn, is also poured with concrete. And so it continues to the very top edge. |
 | In the second version, the waterproofing film remains on the walls, and along it, with an indent of 50 ÷ 70 mm, a reinforcing grid is mounted, that is, the wall of the pit, covered with waterproofing, acts as the outer side of the formwork. After that, the first tier of the inner wall of the formwork is erected around the entire perimeter of the pit, which is filled with mortar. Then it grows and is poured again, and so the work continues to the top. The formwork can be removed no earlier than two weeks after the last pouring of concrete. The disadvantage of this manufacturing option is the higher consumption of concrete solution. |
 | To form niches for tools, a reinforced recess is made in the wall, and is closed from the outside with plywood, that is, concrete will be poured into the formwork around the recess without getting inside. After the concrete hardens, the formwork is removed and the niche is cultivated with concrete mortar. In this case, a metal box can also be used to arrange niches. It is fixed to the reinforcement grid by welding or wire, depending on the thickness of the steel sheet used to make the box. |
 | The poured reinforced concrete walls must be left to dry and cure for about two weeks. After that, the formwork is removed. If wall decoration is planned, for example, ceramic tiles, then the concrete is left to ripen for another one and a half to two weeks. However, most often the walls remain concrete, and in this case it is recommended to cover them with a special hardening primer. deep penetration... Such compositions penetrate into the thickness of concrete, filling all its pores and microcracks, protecting it from moisture, preventing dusting, erosion and destruction. |
 | In addition, after pouring and leveling concrete in the formwork along the top of the walls, it is recommended to fasten metal corners along their edges to studs (150 ÷ 200 mm long). The studs are immersed in the mortar through the holes drilled in the corners, and so that they do not drag it with them, metal strips are placed perpendicularly under the edging from the corner, the edges of which will lie on top of the walls of the formwork. |
 | The corners will serve as a limiter for the pit, a support for laying boards covering the pit, as well as a wheel bumper that will prevent wheels from getting into a dangerous area. In order for this element framing the pit to perform its functions, it must be raised above the level of the main surface of the garage floor by about 50 ÷ 70 mm. |
 | After removing the formwork, the gap between the built and the soil wall is backfilled, if it remains. For this, the mixture of clay and soil, after filling it into the space between the walls, is well compacted and reinforced, since a floor screed will be arranged on top of it. |
 | The design and material of manufacture of the ladder for descending into the pit may be different. But whichever of the options is chosen, the reliable fastening of this element to the wall and floor is a must. |
 | To close the inspection pit from above, ordinary individual boards or assembled into shields are most often used. There are more interesting options, for example, when the boards are loosely fastened together with a strong waterproof rope. This approach is convenient in all respects - such a "mobile" cover quickly folds and unfolds in the frame from the corner, so you do not have to select and lay each of the boards separately. |
Garage floors have special requirements
It is important that the coating is durable, wear-resistant, and not afraid of the effects of fuels and lubricants or other aggressive technical fluids. Detailed information on how to do it right and what kind of coverage to choose for it can be obtained in a special article on our portal.
As a "bonus", there is a calculator below that will help you quickly and accurately determine the required amount of concrete of grade M300 strength for pouring a garage floor. In the options of this mini-application, it is possible to take into account the amount of mortar that is required if the pit walls are also poured from concrete.
If we are talking only about the pit, without taking into account the garage floor (for example, the screed has already been poured earlier), then in the first group of input fields, you can specify not the length and width of the garage, but the corresponding parameters of the pit itself. In this case, the calculation will be made only for the screed on the floor of the pit, which will be required in any case.
You can take into account in the calculations and the entrance ramp, if it is also planned to be concrete - when this calculation path is selected, additional fields for entering the corresponding data will open.
The final result will be given, first of all, in the total volume of concrete solution - this is convenient if it is ordered at a specialized enterprise. And for those who are going to make a solution on their own, the amount of necessary ingredients is given. Moreover, it will be shown both in weight and volumetric dimensions, since various trade organizations can sell, for example, sand or gravel both by weight and by cubic meters.
Convenient maintenance and minor car repairs, which can be carried out independently, can be provided thanks to the inspection hole. Otherwise, you will have to lie on your back under the car, which does not guarantee maintenance comfort at all. Let's figure out how to make a viewing hole in the garage.
The size and depth of the inspection pits may vary. When building such a pit yourself, you need to proceed from the dimensions of the car and your height. At the same time, it should be convenient in the viewing hole - so that there is where to turn around. But the pit should not be wider than the distance between the wheels.

Usually the pit is made more than eighty centimeters wide. The length of the pit is determined by the length of the car, to which 1 m is added.This approach will provide convenience when working. The depth is calculated based on its own height, while adding about ten to fifteen centimeters. If you plan to spend a lot of time under the car, a small stool or wooden ladder can help.


Everything described is not mandatory, when building an inspection pit in the garage with your own hands, you need to try to make it suitable for yourself.

To the question of the location of the pit. As a rule, it is more convenient to make a hole near the wall so that equipment, cabinets, etc. can be installed in the garage, where spare parts will be placed.

Let's consider how to make the walls of the inspection pit correctly and from what materials. The pit walls are usually made of bricks, building blocks, or monolithic concrete.


When choosing the first option, ceramic is preferable as the most moisture-resistant material. It is worth remembering the thickness of the brick when determining the size of the pit - after laying out the walls with bricks or blocks, the volume of the pit will decrease.

The choice of material for the pit walls depends on the soil. If it is dry and dense, feel free to choose a brick. Otherwise, reinforced concrete must be used.

Concrete blocks are moisture resistant. When using other units, a waterproofing material is required. Concrete blocks can be negative consequences interact with moisture, are durable and will not swell in winter.

If the inspection pit is filled with concrete, the layer of such a fill should be at least fifteen centimeters. Reinforcement of concrete with wire mesh 0.5 cm thick will also be required. Instead of a mesh, it is possible to install a frame. You can use fittings for it.


To reliably protect the pit, you need to waterproof the outside. Such waterproofing should be carried out only during the construction of the pit itself. For the protection in question, a film or membrane of butyl rubber or similar materials is used. Such protection must be lined in several layers, sealing the joints. In this case, the film or membrane must adhere well to the walls.

For complete protection from water, the pit must be waterproofed from the inside. For this, the walls are impregnated with a special coating. As the latter, a special composition for the pool or a primer is often used.

Also, a caisson made of metal sheet material can protect from moisture. The design is represented by a box, treated with a special compound against corrosion. You can clearly see the caisson by examining the photo of the inspection pit in the garage with a caisson.

Natural ventilation is an integral part of the inspection pit. You need to do it during the construction of the pit. Ventilation in the inspection pit can also be done by hand. For this, when working on the floor of the pit, a special hole is made in it to exhaust air through a hose. After installing the hose, cover it with a lid.

If desired, electricity can be supplied to the inspection pit so that there is light. At the same time, do not forget about safety and moisture resistance.

Also, for the same purposes, you should not install sockets with a voltage of more than 35 volts. 220 Volt lamps cannot be used.

An additional element will be the roof, which is usually wooden. The roof must be secure, but not too heavy. The golden mean will be a thickness of three cm, which will provide reliability and will not cause problems when opening.


Many garage owners are trying to equip them with maximum functionality. This is not just a place where a car is stored, they make cellars, store things, someone even equips a living space. And for motorists who prefer to service their car on their own, an inspection pit is needed in the garage. It is about how to do it correctly, and will be discussed in the article.

Of course, not every garage can be equipped with a viewing hole. And this possibility depends, first of all, on the level of occurrence of groundwater. If it is higher than 2 meters, then the pit will be impractical, as it will be filled with water. Even with rather critical indicators, this problem can be solved by making the correct drainage system of the garage and good waterproofing of the pit itself.

In fact, such a seemingly simple device as an inspection pit has quite a few options, in addition to the standard one. For example:

And each of these pits has many subspecies. The dimensions of a full inspection pit in the garage can also vary. It all depends on the person with what parameters will use it and the dimensions of which car will be placed above it. If there can be a lot of users and cars, then it is worth starting from the following calculations:
Starting work on planning the pit, it must be borne in mind that these indicators are only a guideline for the pit. In practice, you need to dig it out by making allowances of 40-50 cm in length and width, and 20-25 cm in depth. If the plans include wall insulation, then the dimensions of the pit will have to be increased by the width of the insulation (as a rule, it is 50 mm).

There are a lot of waterproofing materials on the market now, each of them in varying degrees has certain qualities. But which one to choose for a viewing pit? On the one hand, the material must effectively cope with its functions, because, as already mentioned, the pit carries a very strong load in terms of excess moisture, on the other hand, it must be in an affordable price segment.
Guided by these considerations, from the whole variety of materials, the following can be distinguished:

There are two popular solutions here - concreting and brickwork. If desired, both options can be decorated with decorative finishes, plastering, tiles or fiberglass.

Preparatory work for concrete and brick is required and looks the same. The walls should be covered with a layer of clay, a thick film should be laid on it, then formwork should be installed 10-15 cm thick.
At this stage, it is necessary to provide two important points:
Even those who are unanimous that a viewing hole in the garage is a very necessary thing, find a reason for controversy, the most striking of which is the issue of lighting. Is it needed in the inspection pit?
The final, but also very important stage. As a rule, wood with a thickness of 50 mm is used for the lid, although 35 mm may well be enough, because the boards will not experience large loads anyway, but lifting them will be a little easier.

Pit covers, in addition to standard hinged ones, can be of several types, which depend on what the pit surface is edged with:
Observation pit video
Every car owner sooner or later is faced with minor repairs to his vehicle. A routine check of the technical condition of a car can turn into hours of waiting. You can save money and time by having your own inspection hole in the garage, which you can do yourself.
The need for an inspection pit in the garage is obvious, since in cases of oil changes, minor repairs to the bottom of the body or a routine inspection, you have to allocate several hours to travel to the station. Maintenance and pay for an expensive service.
The pit for a technical inspection of the car can also be used as a cellar or vegetable store. For this, niches and shelves are designed inside it.
The condition for the high-quality use of the inspection pit as a technical structure and a place for storing food is compliance with all construction standards and the availability of reliable waterproofing of the floor and walls.
Even such simple construction requires careful planning of actions. An important point at the same time, the determination of the quality of the soil and the level of groundwater is. The most suitable base for such structures is clay soil. Its peculiarity lies in the fact that it does not allow moisture to pass through, which means it can become a kind of waterproofing layer.
With a large accumulation of groundwater and a high level of their location, the inspection pit is additionally equipped drainage system to remove excess moisture, and submersible pumps so that the room can be quickly drained.
The installation of the inspection pit can be carried out independently. There is nothing difficult in this if you follow the detailed instructions.
To calculate the area of the future inspection pit, you need to take into account the thickness of the walls and base. For such calculations, it is necessary to recall the geometry course and resort to a simple formula for determining the area - S = ah, where a is the length, h is the width of the pit. The finished inspection pit will have dimensions of 75x185x300 cm. The thickness of the concrete walls and floor, as a rule, is about 10 cm. Calculations will be as follows: 0.85x3 = 2.55 m² is the area of the pit for the inspection pit.
Comfortable work in the inspection pit is created by a correctly calculated space, namely, its parameters should be convenient for the complexion of the person in it. Usually, the width of the pit is built in the range from 70 to 75 cm. This width is enough for you to move freely inside. The same distance between the walls makes the observation structure convenient for a passenger car.
The pit can be wider if the inspection pit is intended for large vehicles or trucks. The distance between the inner sides of the wheels of such vehicles is much greater (from 80 to 90 cm).
The observation pit is arranged in such a way that the walls taper slightly to the floor. Schematically, in section, its design resembles an inverted trapezoid. This shape allows easy access to the tools in the niches and free movement.
The length of the inspection pit is selected based on the size of the garage. If the area of the room allows, then a ladder can be provided in the pit. To do this, the length of the pit is increased by 100-120 cm.
Depth of the pit "with a margin" for the installation of the floor
The height of the pit is at least 170–180 cm. These dimensions are relative, since the depth is made in accordance with the height of the owner of the car. While in the inspection pit, a person should not touch the bottom of the car with his head.
For additional safety of the car and its owner, the inspection pit is equipped with metal stops. Usually they are four pillars fixed at the corners of the niche. They rise 10–15 cm above it. Sometimes, not four pillars, but two metal corners are used for technical inspection. They are attached opposite each other along the edges of the pit length.
The depth should be 25-30 cm more than the growth of the host. With such a distance from the base to the body, the hands will not quickly get tired, as this makes it possible for them to be in a bent position.
Most often, concrete, wood, metal or brick are used for manufacturing.
To calculate the required amount of concrete, you must use the formula that determines the volume. To do this, you need to multiply the values for the length, width and height of the wall. Similar calculations are carried out for the floor.
If brick is used in the construction of the pit, then, knowing its parameters, it is easy to calculate the required amount of this material in pieces. The dimensions of the red brick are 250x120x60 mm.
When building a viewing pit, you cannot do without the following tools:
The following materials are also required:
All work must be done in a strict sequence of steps:
Features of the installation of partitions depend on the material used.
Before pouring the mixture, it is necessary to make the formwork. For this it is best to use OSB boards. This material does not allow the poured mixture to pass through and does not deform over time. The plates are fastened together using boards and self-tapping screws so that the distance between them is at least 15 cm.
To keep in shape wooden structure it must be secured with spacers. The gaps in the joints of the slabs should be absent or minimal. Reinforcement mesh should be installed inside the finished formwork.
There is an option of pouring concrete with one-sided formwork. To do this, it is necessary to cover the walls of the pit with a waterproofing material. Further, OSB boards are installed along the inner perimeter of the pit. Between them and the waterproofing is placed metal grid... Concrete is poured inside this structure.
A waterproofing sheet is laid in the finished pit. It must completely cover the floor and walls. The fabric must be overlapped. To prevent the edges of the material from picking up, they are pressed with boards. On top of the waterproofing, laying "in half a brick" is made. When the wall reaches a height of 135 cm, niches can be made, and then continue laying to the upper edge of the pit. It is recommended to install a metal frame from the corner on the last row, and it should be welded in such a way that one shelf of each side is parallel to the floor. Thick boards will be laid on it, covering the pit. Next, pour the concrete floor in the garage.
This design resembles a large box. In its manufacture, the sheets must be joined by continuous welding. The finished structure must be carefully treated with anti-corrosion coatings. The box should be equipped with fasteners. They are welded metal corners that abut against the ground for 100–150 cm. They are attached to the body from four sides. They will hold the box in place. If this is not done, the entire structure will simply float up when the groundwater level rises.
Wood rots quickly without proper treatment. Therefore, the material must be impregnated with special antifungal agents and additionally waterproofed. It is better to take thick boards for walls. The material is installed horizontally. Spacers are fixed along the edges of the narrow sides of the inspection pit.
This process is carried out both before the construction of the structure (external insulation), as well as after its construction (internal insulation).
If the garage is located on an area with a low groundwater level, then many owners are in no hurry to isolate the inspection pit from moisture. However, the hydrological situation in any area changes every year, therefore it is recommended to take care of isolation even at the construction stage. For this, special films or membranes are used, for example, butyl rubber, aquaizol. They must be laid in a pit. The edges of the material should be laid with an overlap of 10-15 cm. To obtain a sealed seam at the overlap, double-sided tape is used.
When installing a film or membrane, it is important not to damage their integrity. Otherwise, moisture from the soil will get into the pit.
The installed waterproofing layer is melted with a blowtorch. As a result, the film straightens, adhering more tightly to the walls and bottom of the inspection pit.
Do-it-yourself internal waterproofing of the inspection pit in the garage means treating the surface of the finished inspection structure with liquid substances, which, when dried, form a dense water-repellent layer. A well-proven composition for the treatment of swimming pools. It is applied with a dense wide brush, and when solidified, the substance forms a waterproof material resembling rubber. For greater reliability, more than two coats should be applied.
Insulating material can be applied with a spray gun
There is another way internal insulation from moisture - this is the use of special primers based on cements, which tend to be deeply absorbed into the applied material. This effect is achieved thanks to the polymer particles that are in the mixture. They block the capillaries that allow moisture to penetrate through the base material.
A covered inspection pit will not only protect the car from accidental failure, but will also serve as an additional waterproofing layer. In the absence of a cover, the evaporated moisture settles on the lower parts of the car body, thereby creating favorable conditions for the formation of metal corrosion. To avoid such problems, the inspection pit is covered. For this, sheets of metal or boards are used.
Wood is a relatively inexpensive and lightweight material. The boards are easy to replace if necessary. They are selected from hardwoods such as oak and larch. Before use, the boards are covered with antifungal impregnations and antiseptic agents. They are laid in the openings of the metal corners fixed at the top of the inspection pit. Each board must be over 40 mm thick.
The use of metal is less convenient, since this material is heavy, expensive and not resistant to corrosion. During operation, its surface bends.
The construction of a vegetable pit has its own characteristics.
For a vegetable pit, both the presence of waterproofing and depth are important.
The place for storing vegetables must be below the freezing point. Otherwise, the meaning of storing food is lost, as they will be spoiled by low temperatures.
The freezing point depends on the region where the garage is located, for example, inin the northern regions, the ground freezes up to 150 cm... Considering this fact, a pit should be dug with a depth of at least 190 cm.From 10 to 15 cm must be allocated for the drainage layer under the base, another 10 cm is required to install the overlap. Remains 170-175 cm to accommodate shelves, racks and niches for vegetables and lighting. The depth also depends on the growth of the host.
Optimal size option for this structure
The optimum width of the vegetable pit is 150 cm. This size allows you to optimally place shelves and racks, while a person will not be constrained in movements inside the pit. To select the length, you need to adhere to the rule - the pit should not reach the garage walls closer than 50 cm.
To make a vegetable pit in the garage, you will need the following materials:
When building this structure, you cannot do without such tools:
Calculations of materials for the construction of a vegetable pit are similar to the observation pit.
Preparing everything necessary tools and materials, you can start building a vegetable pit:
Ventilation pipes promote long-term storage of vegetables
The issue of insulating the inner surface of the cellar from moisture should be treated especially carefully. This is important, as the slightest hole in the waterproofing will become a source of dampness and cause spoilage of vegetables.
This stage can only be started if the concrete is completely dry. You will need a waterproofing sheet or aquaizol. This material must be used to cover the walls and floor of the vegetable pit. The canvas must be laid with an overlap of at least 15 cm. The joints are fixed with a blowtorch or double-sided tape. All operations with the lamp should be carried out very carefully so as not to damage the canvas, otherwise moisture will get into the vegetable pit. The same materials cover the outer part of the pit ceiling.
Solving the issue of warming the cellar in the garage is just as important as installing waterproofing. Insulation will allow you to maintain a stable temperature inside the pit. To do this, you can use mineral wool or foam.
To install the foam panels, you will need plastic umbrella plugs. The installation process is as follows:
In the northern regions, where the air temperature drops below 25–30 ° C, it is also necessary to insulate the ceiling of the vegetable pit. So that over time the foam does not crumble, you can cover it with any finishing material... This will create an additional thermal insulation effect.
Making a viewing or vegetable pit in the garage with your own hands is not difficult at all. It is enough to listen to the recommendations of experts and follow the step-by-step instructions. If desired, these two rooms can be combined.
Before you build inspection pit in the garage do it yourself, let's figure out what it is.
Observation pit- this is a motorist's workspace, which should be as comfortable as possible, allowing you to turn around and stand in full height... If these conditions are not met, fixing even the smallest problem becomes a nightmare, which should not be allowed.
How to make a pit in the garage correctly?
First of all, we must measure the length, width and depth in order to find out dimensions of the inspection pit in the garage with your own hands.
Parameter length calculated based on the length of the machine. Add one meter to it, it will be optimal space convenient for work.
The second parameter, again, directly depends on the dimensions of the vehicle. On average, this is 75 cm, but professionals use another way to measure the optimal width: you need to measure how far the front wheels are from each other. From the obtained value, 20 cm is subtracted to be sure that during the drive into the pit, the car won't fail.
IMPORTANT: Before making a hole in the garage, keep in mind that its width should be slightly less than the width of your vehicle, otherwise the car will simply fail.
And finally, the last parameter - depth... It is calculated from the calculation of the growth of the motorist, to which 20 cm is added.The obtained parameters need increase by 30 cm, which will make up hydro and thermal insulation. After calculation, you can compose drawing pits in the garage.
Do-it-yourself inspection pit in the garage: dimensions - photo below:
Having received the required dimensions, we proceed to construction inspection pit in the garage with your own hands. Of course, it is much easier to build an inspection pit when the garage has not yet been built, here you need to do this work before the floors are poured with concrete, but even when you thought about how to make a garage with a pit with your own hands, then this question is quite we decide.
Construction work is as follows:
REFERENCE: How to make a viewing hole in the garage when it has already been built? We mark the floor, and then, according to the markings, with the help of an electric tool we cut the screed, after which digging work is already carried out.
We build a pit in the garage with our own hands step by step:
We put a crushed stone pillow on the ground, on top of which, about 5 cm, pour sand, tamp it.
 The next layer in this "pie" is 30 cm clay... The clay is already being put reinforced mesh, which becomes the backbone of our structure, strong, reliable, durable.
The mesh is poured concrete... We mix sand with cement, in a ratio of three to one, and fill it with a thickness of 7 cm.
We are waiting for the concrete to harden and only after that we process the floor solution bituminous mastic ... We put roofing material and glue the joints with bitumen, be sure, hot.
Styrofoam is laid on the roofing material, and then the whole structure is generously poured with concrete, about 15 cm. And again we wait until the concrete dries.
After the concrete is dry, you can proceed to the design of walls and niches:
It is necessary to pour concrete in layers, here you need to be guided rule, the quieter you go, the further you'll get. You need to fill a hole in the garage within a few days, every day - 20 cm in height.
When the concrete hardens and you are satisfied with the result, remove the formwork, we don't need it now. Well, we proceed to the next stage, creating niches.
As in the construction of the floor and walls, when constructing niches, we use fittings and clay... But here we no longer need concrete, there will be an inspection pit in the garage with our own hands brick with which niches are faced. If you don't like this option and you are still interested in how to lay out a viewing hole in the garage, then use ceramic tiles, it will be more effective.
See how to do inspection pit in the garage with your own hands- Photo: 


Before making a hole in the garage, you also need to take care of waterproofing, because humidity is unacceptable in the inspection pit, where, not only is it necessary to work in comfortable conditions, but it is also important to observe safety precautions when working with electrical appliances in a car.
Today we can choose from a wide range of materials:
Polymeric. It is a material with a complex synthetic structure and excellent waterproofing properties. There are two types: multilayer and single layer, the former possess the best qualities and can last much longer, up to fifty years, the latter are cheaper. Polymer waterproofing is laid on reinforcement with 10x10 cells.
The frame must be covered geotextile... Polymer plates, if they are with a self-adhesive base, are installed with an overlap of 30 cm, if the membranes are not self-adhesive, then the overlap is made by 10 cm. The joints between the polymer plates are necessarily processed with a special adhesive.
Bituminous. This waterproofing option is presented in several types: rubemast, euroruberoid and roofing felt, each is interesting in its own way, each has its own pros and cons.
 Installation bituminous insulation, perhaps, the simplest, in addition, this material belongs to the category of economical, although its service life is much lower, only 10 years, if the work is done efficiently, the shelf life increases to 15 years, but no more.
Bituminous insulation is applied in a double layer.
Dry mixes. This is one of the modern methods of isolation. It is effective, durable, and allows you to eliminate even microscopic cracks in the walls and floor, which increases the service life of the inspection pit. Mixtures diluted with water in the consistency indicated on the package are applied to the concrete layer.
If dry mixes- This modern way, which, however, is often used as additional insulation supporting another, polymer or bituminous, then mixture of clay with petroleum products Is the most old way isolation. It is good because it is easy to carry out work and requires minimal financial costs.
The disadvantage of this method is that refined products toxic, and experts do not recommend working in a pit treated with such a composition for a long time.
IMPORTANT: do not forget to always glue the joints, be it polymer material, bituminous material or some other. Failure to comply with this condition may result in to the destruction of the entire structure and nullify your labors.
Thermal insulation is an equally important issue, because in our country warm weather is established only for five months, while the rest of the time - rains, cold and bitter frosts.
At installation of an inspection pit in the garage, the material can act as a durable, effective insulation polystyrene. Positive properties material is the minimum percentage of water absorption, versatility, excellent thermal insulation characteristics... Minus - fragility, about 10 years.
As the finishing touches, we will designate:
Safety involves the installation of an iron grate on the pit.
Inspection pit in the garage - how to close it? In no case should it be always open. You can think, forget, not see ... the consequences of such inattention are usually deplorable. Therefore it is better trellis during the absence of repair of the inspection pit in the garage.
Niches in the wall are needed in order to store tools in them, so as not to run upstairs every time for pliers or a screwdriver. Niches also serve as a decoration for the room, creating an indescribable atmosphere conducive to work.
For lighting it is necessary to conduct wiring, install sockets in the wall. You can, of course, use a portable lamp, but it will not be so convenient and aesthetically pleasing.
Ventilation- one of the main issues in the design of the inspection pit, because it is often necessary to use toxic substances, varnishes, paints, which are unacceptable to breathe in a closed room. Therefore, devote a significant part of your attention to the issue of ventilation.
In addition, ventilation is needed to exclude the possibility of creating condensation effect: high humidity can lead to the destruction of the inspection hole and damage to the car, power tools. Ventilation can be built by removing air vent from the garage floor by 30 cm. And in order to prevent any debris from getting into the ventilation pipe, it is covered with a net.
Now you know how to do inspection pit in the garage do it yourself. Believe me, this is not at all as difficult as it seems, looking at such a voluminous instruction. And, finally, it remains for us to wish you only patience and kindness!
How to build a pit in the garage with your own hands, watch the video:


