How to make beautiful stretch ceiling two-level? Photo for the hall, useful adviceAll this can be found on the site of any major designer agency. If earlier, similar ceiling structures were considered a manifestation of luxury, then they are currently familiar and common.
Duplex stretch ceilings for the hall suggest serious preparatory work. It is important to pre-create a designer project in which all the features of this room will be taken into account, the dimensions of each level will be thought out, which materials will be used to implement plans to life, and only after that begin practical work.
The living room is the place in the house or apartment where not only family members are going, but also numerous guests. The impression that friends about the owner of the premises, his taste and material well-being are dependent on the appearance of this room.
Tip! Duplex stretch ceilings in the living room should be chosen if the room has sufficient dimensions.
As the main material used in decorating the surface of the ceiling, plasterboard is of particular interest. With it, you can create two-level stretch designs in the living room, featuring aesthetic appearance, maximum functionality.
With the right choice of form and configuration, you can count on the fact that the created two-level ceiling will decorate the living room, an excellent addition to the overall image selected for the living room.
Plasterboard has excellent technical and operational characteristics, has an acceptable cost, therefore it is considered the optimal material for the organization of duplex stretch ceilings in the living room.
The ceiling must be an integral part of the overall design selected for the living room, and not a separate item.
Attention! In a small room, a two-level multicolor ceiling is inappropriate.
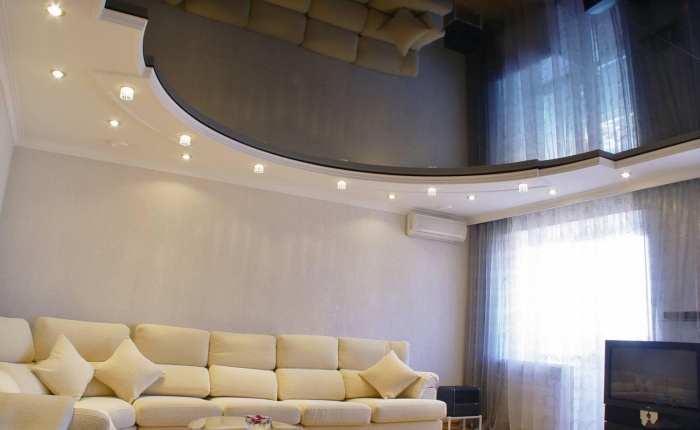
The main purpose of the two-level ceiling construction is the separation of space in the room into separate zones.

For example, if plans include the release in the hall of the zone for recreation and dining part, it is quite possible to equip a two-level glossy or matte design from plasterboard sheets.
Tip! The first level of the masterpiece created can be used in the sofa area, and the second level is placed in the dining part of the living room.
If the hall has modest sizes, then it is better to use a single-level matte ceiling, and use walls and furniture for zoning.
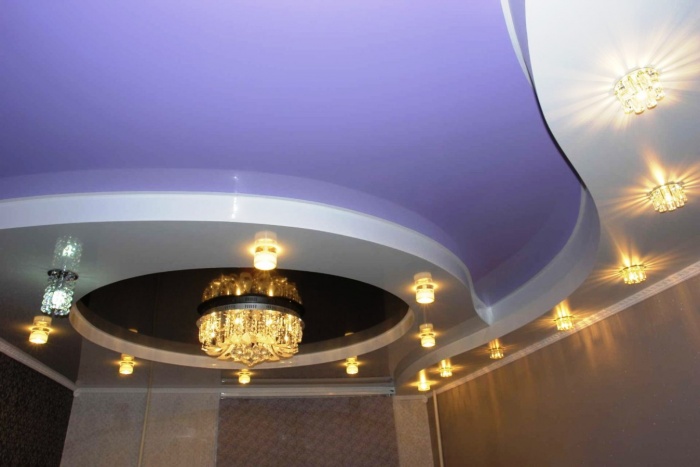
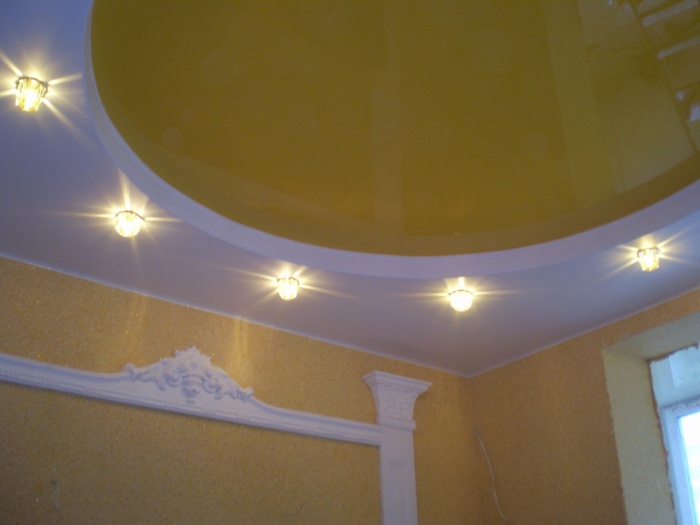
So, in a spacious living room, the two-tier ceiling allows zoning of the room. Inside such a canvase, you can place the main engineering communications, as well as easily install point lamps there.

In a small apartment, a two-level version of the ceiling will be absolutely not appropriate, as it will make the space in the room visually even less.
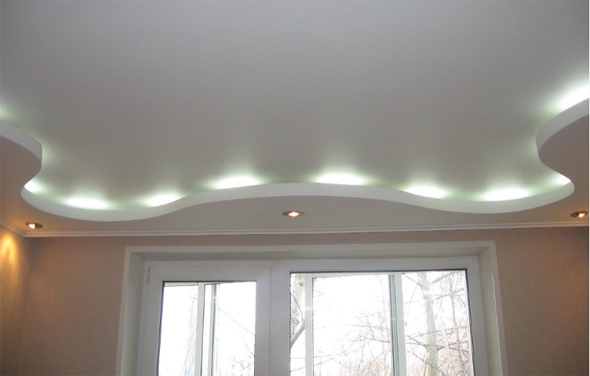
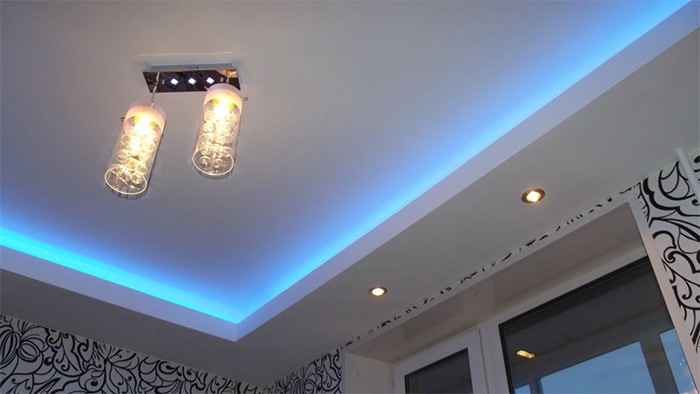
Tip! When thinking out the form of a two-level design, it is necessary to pay special attention to the organization of additional illumination in each level.

In addition to additional internal lighting, it is also important to pay attention to the selection of the ceiling color option. Thinking out the color version of the two-level ceiling, it is necessary that the shade corresponds to the overall interior decorated into the living room.
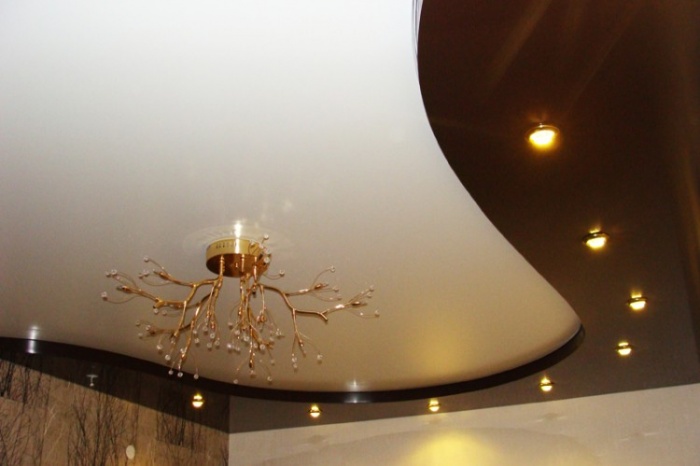
A variant of the color two-level ceiling is appropriate only if white color will prevail. Ceilings having an unusual shape have an original appearance.
The "floating" ceiling involves the presence of sufficient free space in the room. That is why professionals advise to choose such complex ceiling structures only if they are supported and complemented by space layout.
Stretch two-level ceilings in the living room are two canvases that are mounted separately. They are placed at different levels, represent the completed composition together.
Stretch ceilings have significant differences from plasterboard structures. First of all, it is necessary to note the diversity of textures and tones of the tissue and film material. The stretch option is convenient because in the case of flooding, you can safely drain the water at any time, and return the film into the original state.
Installation of the stretch ceiling can be spent in a few hours, but to create a two-level plasterboard ceiling, a much greater time interval will be required.
Tip! In order to make a beautiful and unique plasterboard ceiling ceiling in the living room, the professional help will be required.
The design created will have a considerable height, suitable for spacious room. With the help of the finished design, you can visually increase the height of the ceiling, add to the living room Individuality and additional charm.
Even with the presence of an ugly and uneven base, you can get a flat and beautiful surface of the ceiling. The two-level velocity of the ceiling has a significant operational period, an excellent aesthetic appearance, high environmental friendliness, ease of operation.

Inside the created interior masterpiece, you can easily hide all engineering communications.
Modern plasterboard ceiling with proper selection will be one of the decorative elements of the interior, the decoration of the living room.
The responsible torque is the selection of the color of the ceiling. Dark ceilings are a rarity, because they reduce the height of the room. Colored options prefer creative property owners, ready for bold creative experiments.
When choosing the same tones of the ceiling and walls, either with a lighter version of the ceiling, you can count on the visual expansion of the space indoor.

Glossy coatings Interior professionals are recommended for dark rooms. In the living room filled with excessive amounts of natural sunlight, glossy ceilings use undesirable.
Warm I. bright colors Suitable for those living rooms in which there is not enough sunlight.

Gray, green can be chosen to decorate the ceiling in the hall located on the south side.
Tip! To obtain the most beautiful and harmonious image, you can make the first level in bright colors, and the second is made saturated and bright.

Thanks to this color roll call, you can get the desired result, enjoy the exclusive version of the bunk ceiling.
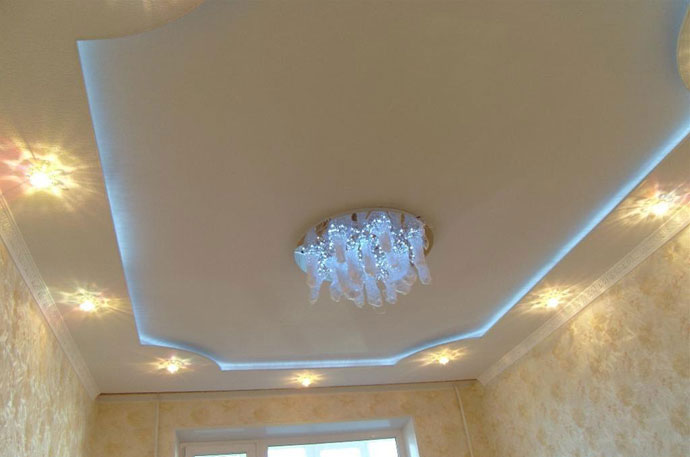
In order to give the ceiling design to the completed image, the backlight is mounted using lED lamps or fiber.
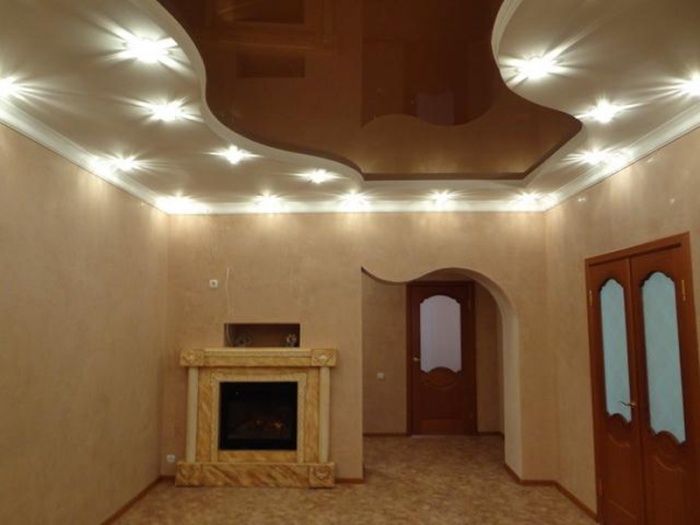
Thanks to the bunk design, it is focused on separate items, for example, to highlight the rest area, emphasize the fireplace corner.
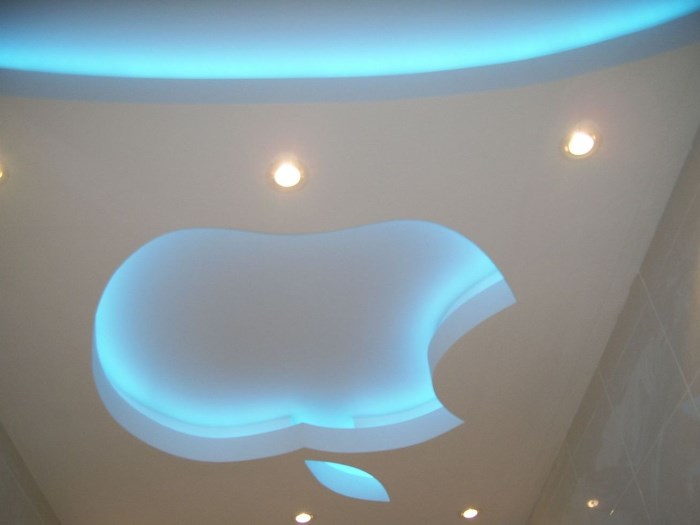
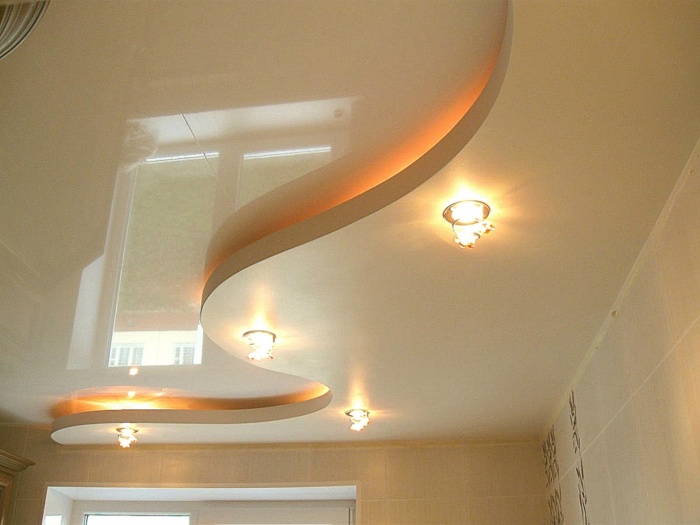
When choosing an option for plasterboard bunk design, you need to pay attention to the features of the general design room. For example, for the modern one, you can create a ceiling with smooth and streamlined lines. The classic interior suggests smooth and clear lines, so you can restrict ourselves to single-level ceilings. Romantic lovers may pick up two-level options in the form of a heart, clouds, flower.

Designer lighting involves a lighting option that creates a unique atmosphere in the room. With the help of LED tapes and lamps, you can get soft and even lighting, which visually increase the depth of the ceiling surface, create a design effect soaring in the air.
With a combination of LED tapes having different power and color, you can give the surface uniqueness and uniqueness. In addition to the main lighting, you can additionally select outdoor floor lamps.
Plasterboard option can be operated without any special problems and repair for ten and fifteen years.
Modern technologies allow a new one to take a look at the design of the housing. Take at least the design of the stretch ceilings: the PVC film gives a lot of opportunities for design. The uniqueness of this material is that such qualities There is no other material for finishing the ceiling. Consider the most popular type of design: two-level stretch ceilings; We study their types, advantages and disadvantages, as well as all the subtleties of choice.


Duplex stretch ceilings are a design of metal profiles with a PVC film cloth fixed. The installation is carried out by adding the design of the drywall that specifies the desired design and the size of the tension inserts. Technology of these systems may be seamless (when the coating width is sufficient and is about 5 m) or suture (3.5 m), at which the panels are connected by welding.
Unlike single-level structures to give volume and relief, it is predominantly plasterboard forms, rather than plinth and molding.


Such ceilings are easy to install. Having a detailed step-by-step instruction at hand and necessary materials, You can install them for more than a couple of days. At the same time, the result of finished work is not much different from work. experienced masters. This allows you to significantly save the budget, paying more attention to the purchase of high-quality material and simple inventory, if it is not available.
The installation process is a fastening of support profiles to the base (ceiling) to form the desired lines, which are initially noted with maximum accuracy in the drawing, indicating dimensions. Purchase of the stretch cannon is carried out only after measurements, in some cases it is acquired after the profiles are installed. It is cut out and sewn to the box itself or a frame, providing a high density of profile adjacent to a two-level design. This factor determines the durability of the tensioning two-level ceiling.


The cloth is fixed in several ways (wedge, stroke or harpoon). More often for fixing, the last method is used, welding special hooks to the edges of the panels to pull the material and fastening to the frame. Sometimes a special tape is used for fastening. A feature of the installation of stretch structures is the heating of the panels by means of a special hair dryer or heat gun.
When heated, the material becomes elastic. At first it is fixed in one corner, then in the opposite and only after that in the two remaining, correcting irregularities. After that, the edges are fixed to the profile or baguette with a step of 8 cm. The technological slots are masked by means of a flexible tape.
If you want to build a backlight, holes are performed on the canvas, without forgetting to protect the film from powerful lamps due to the thermal insulating ring. So light sources will not touch the film.


The main component of the stretch design is a canvas. More often is a polyvinyl chloride film, less common to decorating the ceiling use fiberglass and polyester textiles. The fabric is a heat shrink: it is mounted without preheating, it is capable of partially absorbed moisture. In fact, it resembles ordinary textiles, eliminates the possibility of re-editing. It is used to combine glossy and matte cloths in different levels of two-level structures.


Metal or plastic profiles are used as fastening systems. These systems allow you to place the tension cloth at different distances relative to the basic. With their help you can hide various communications if they are located on top. If stroke technology is provided, plastic inserts are used. In other cases, the mount is believer.
If special forms are needed, used drywall, which, if necessary, can be painted or wake up with wallpapers in one style with a tensionable cloth.


A characteristic feature of such designs are limitless design capabilities: drywall allows you to perform a variety of fantasy lines and figures in which the tension inserts look in a special one. These designs are recognized as the most aesthetic and convenient type of ceiling of the ceiling of modern housing. They can have a different surface texture, which allows you to choose a variety to decorate any room with necessary effect. Consider the nuances of each type of coating.


This material is one of the in demand crafts for decoration. modern interiors. It is especially harmonious when it is necessary to demonstrate the synthetic basis of raw materials and gloss. It is distinguished by the presence of reflective ability, due to what It is used to visually increase the height and width of the walls of small-sized rooms.
However, with all the aesthetics of such a surface, such a material creates an emotional stress, so it is necessary to use it in the design of the two-level design of the stretch ceiling.


An interesting nuance is an increase in reflective ability with an increase in saturation and dark color. In addition, among these coatings, there are mirror options that, along with the expansion of space, contribute to its perception of an imbalance, doubling the room in detail. In addition, such a texture attracts attention that it forces it to think about each element of its decor, ranging from the drawing and ending with the backlight. At the same time, it is not so easy to care, because often after a wet cleaning of the surface on it is visible.


Such material is appropriate in different directions of interior design, so it can support any style or become its highlight, without interrupting the overall concept of the interior. The matte surface type in two-level structures are used in combination with glossy coatings, as it is able to soften the sharpness of the gloss. The matte film is perfectly combined with different illumination and allows the execution of complex composite techniques, when at the same time the built-in and outer backlight is used to give the volume and depth.


This film is easy to maintain and allow the use of a damp cloth, treatment with a cleaning vacuum cleaner. Due to antistatic, she repels dust, so the coating almost always looks neat. This type of invoice contributes to the creation of a cozy atmosphere, so it can be used in any dwelling room.
Especially contributes to the fact that the appearance of condensate on its surface is impossible; This allows you to use it in rooms with a high percentage of humidity.


This material is another type of film coating. His distinctive feature - It is frost-resistant and can be used in unheated premises (for example, in the design of the cottage). This type of coating is submitted to a separate group due to the pearl reflections of the surface, which is not peculiar to neither matte or glossy types.
On its operational characteristics this material The first two counterparts. It looks more expensive, aesthetically more attractive and can successfully fit into any interior design, regardless of the creativity of its direction. It is worth a particular cloth, it provides for the decoration of the surface by any decor until the drawing. It does not compete with decorative elements and illumination.


Duplex designs of stretch ceilings have a lot of advantages. Denote the most relevant.


photos
The list can be continued for a long time, but along with the advantages of two-level stretch ceilings there are disadvantages. We note the main:


The palette of shades of stretch structures with two levels of multifaceted. If necessary, you can perform a two-level design in several shades of one color, different saturation, different saturation. This technique allows, without disturbing the integrity of the composition, to give any room an organization. Conditionally, all kinds of paints can be divided into several gamps:


The favorite among the tones remains white: it is able to make a positive in any interior, make the room visually easier, fill it with air, soften the perception with the abundance of dark tones, create a balance. However, if it is used with black tone, perception changes: the absence of living (color) tones deprives the space with a black and white cheerful ceiling.
Therefore, the white color often takes the desired color due to the contrast to which it is accepted. For example, if you add a light gray and beige to it, it will already look different.
Designers pay attention to the significance of the addition of white in the design of the double ceiling design with the stretch web.


Pastel shades are better than others look in the design of stretch ceilings in two rows. They are perfectly combined with white and allow you to put in the premises of the comfort. Some tones (for example, gentle turquoise, caramel, mint, light peach, ivory and pink) are selected by individual project, pushing off from the overall style concept.
In this case, it is possible to repel from the color of the wall finish, furniture or certain significant accessories and even photo wallpapers.


The use of natural (natural) tones is often independent of the selected style, so they are oriented so that it fit to different design, because the wallpaper changes more often. In this case, it is important that the tone is not dark and inexpressive. The most sought-after color is beige varying degrees of saturation. It can be bright, bright, while it is important that the color does not coincide with the tone of furniture. To other colors include brown colorwhich is more often used in glossy canvases.


Saturated paints are trying to apply dosage, combining with light shades or white. This is due to the fact that bright tones are dragging on all attention. If they are a little, it does light colors expressive. When saturated contrasts dominate, the color imbalance of the entire interior is created. In this group today, purple, purple, yellow, wine and burgundy are most in demand. A difficult in work includes blue, bronze, orange.


The lighting of the two-level designs of stretch ceilings is of great importance. It is that it can pull out any design, including laconic design options. Conditionally, it can be divided into two types: built-in and external. In the classic embodiment, these are chandeliers on the suspensions or other mounts or flat panels of the near-surface type. From the usual models of the central luminaires, there are often ease of form: they have many small lamps of high power.


Usually, the modern type of light sources - LEDs is used as lighting such ceilings. According to mine technical characteristics And the operational qualities are largely superior to any known types of lamps. But this is solely on the condition that they are purchased in a secure store of a particular manufacturer, tested by time and noted by a mass of positive feedback.
In the process of work, they consume the minimum of electricity, almost all of it is converted into the light, therefore almost not heated in the on state.


The main types of built-in backlight are spotlights (sophisticated), sides (lighting devices with the possibility of adjusting the angle of inclination), cord and flexible LED tape. TO unusual solutionsUsed mainly to decorate the tensioning canvases of translucent and transparent type, include fiber optic threads. When mixing their thicknesses create realistic effects, highlighting the ceiling from the inside (for example, the effect of flickering stars).
The ribbon is distinguished by the ability to clearly repeat the shape and any bend, while it is easy to install and makes fixation to the cornice. These light sources are harmless, do not contain mercury, do not distinguish toxins, shine smooth and directional light. Therefore, in order to eliminate the dark unlit areas in the interior, you often have to have them at the same distance from each other around the perimeter of the box or along the figure of the drywall. Their design is almost always laconic, but successfully fits into the design of any conceived idea.


SPOTS are remarkable by the fact that they can be mounted on false beams or other protrusionsprovided for in the design of duplex stretch designs with plasterboard.


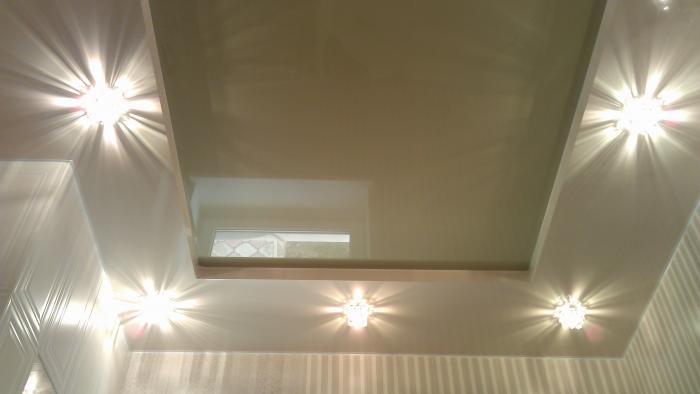
The complexity of the two-level structures of stretch ceilings, as well as the use of a certain texture depend on the selected direction of interior design. If these are solutions to which classic, neoclaxic, classicism, italian style , It is important to show the elements of the palace solemnity. As a basis, you can take white or light beige color. Combining matte and glossy texture is allowed, the compilation of the levels of the P-shaped form. It can be a certain lacquer accent geometric shape, located in the center of the room (for example, a square, oval).
It is desirable that the design provides for symmetry: this is a business card of classical directions. To give luxury, you can decorate design elements with gilding or imitation of plaster stucco or choose satin cloth, decorating it, say, photo printing in the form of gold-plated laces around the edges.
However, with visible luxury, the design should not be pompous: it is important to leave this role a demonstration of furniture and accessories.


If we are talking about Modern directionsThey are divided into two types: minimalistic (minimalism) and elegant (modern, high-tech, brutalism, bionics). In this case, both categories are inherent in functionality and demonstration. modern technologies, including through the selected texture. It is important to show the synthetic component, with which the glossy type of coating is perfectly cope with the lamps of ergonomic shape.
The lines of structures are more often figured, although often the ceiling space is decorated with rice-shaped plasterboard elements that emphasize the central part of the ceiling.


If a certain vintage direction is chosen as the idea, which is capable of immersing in the desired era, it is most likely to beat the design by means of matte stretch panels, picking up for registration angular and simple forms, if it is the stylistics of the French village. For luxury interiorsto which belong baroque and RococcoOne should look at the ceilings with satin reflections and gypsum decorations.
If in simple compositions it is appropriate to decorate the ceiling with matte lamps with a simple design and a single flappon, there will be better chandeliers on the suspension.


It is impossible not to note creative stylistics, for example, popular styles loft and grunge. In this case, it is undesirable to demonstrate the gloss of the ceiling surface. Since the view of the interior should resemble a cuddled industrial object, it is better to take a matte texture as a basis. At the same time, it is allowed to apply a pattern with imitation of even concrete. The main thing in this case is the right choice of lamps, which can be beaten through spots with imitation of communication systems.
If you want a greater creative, you can finish in the form of an accent in light gray or white on the lime, making the transition to one of the walls or on a partition separating different functional zones. Such a design will be memorable and impressive.


An interesting design decision today is the use of photo printing. The process involves applying an image to the surface of any color and size. It can be selected from the catalog or order at will, using a high quality picture and sharpness for design.
However, that the image was successful, try to select motifs in positive colors, as well as drawings without a perspective that creates a negative effect (for example, adversely tremendous flowers and birds, a view of a person from below, military equipment).


The popular plot today is heavenly topics. These are daytime motifs with the image of the sky, clouds, sunlight, as well as mysterious space. The top of the design art can be called a two-level composition with the theme of the starry sky, which is created using a composite backlight, embedding it inside the stretch design and applying to the network. At the same time, for realism, you can use the desired image, selecting the fiber-optic threads for the effect of greater realism, where the stars are drawn.


Of great importance in the design of the ceiling by double design is the purpose of the room. The color and type of material texture depends on it. Consider several options.
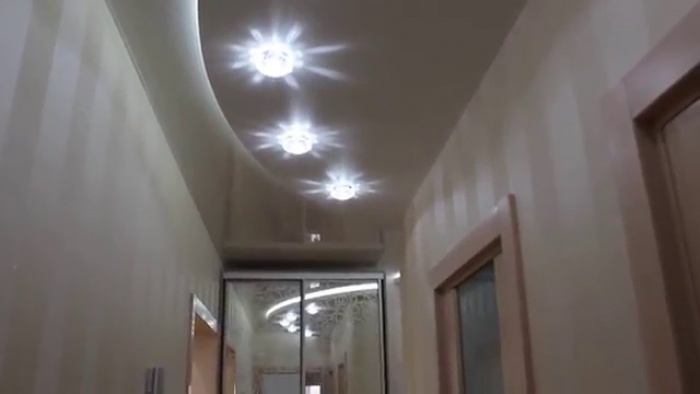
There are often no windows in these premises, which makes them uncomfortable. The main task is to replete lighting. At the same time, the design of the two-level design should not be massive, otherwise you can create a negative perception of space.
The ease of registration is welcomed, for example, it is sufficient to emphasize the small part of the ceiling space through the tensioning canvas, mitigating the design with white color and one-photon coating.


If things are a bit in the hallway, or they are hidden in the closet, it is quite appropriate to use glossy texture. This will allow you to visually beat the lack of light and lack of a metraset, which is usually inherent in the hallway. If the corridor is part of an open plan, you can select it through a separate box or a figure line of one of the levels. In this case, you can combine two different shades or play with texture using a matte and glossy type of the same white color.


Here are appropriate dynamic colors. Contrasts can be the most unexpected. For example, the original light gray mix with a contrasting insert of the wine-colored, selected for different kitchen zones. To the combination of tones was not sharp, you can choose imitation natural material, embody it in a gray shade through a picture.
However, choosing extraordinary solutionsIt is important to understand that for harmony, in combination, they must be repeated in the details of the interior composition. It can be a rare vase of an unusual shape, curtain or a different small element of arrangement (up to the flower or color of the panel pattern).

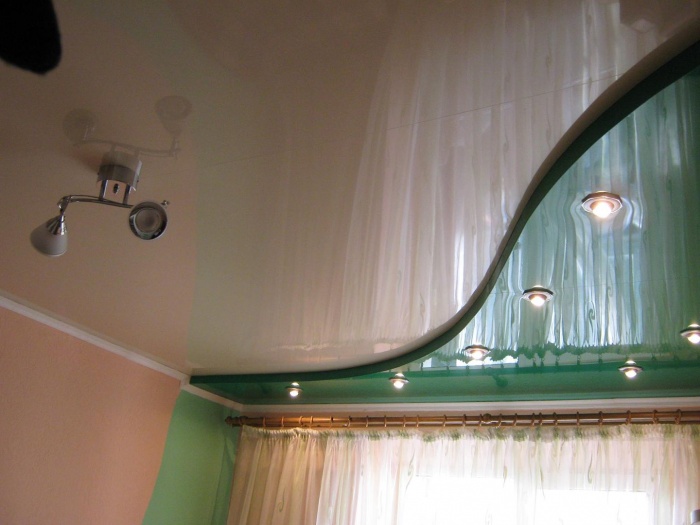
Recalling multifaceted two tones is also appropriate. You can decorate the ceiling with a glossy blade pale green and emphasize it with a more rich tone. So that the design does not look boring, shades should dilute white. So in the kitchen and ease will not break, and freshness will be felt. The complexity of the two-tier design will depend on the size of the kitchen: if it is combined with a living room or dining room, you can make a transition with a figure line, unobtrusively separating the two functional zones.


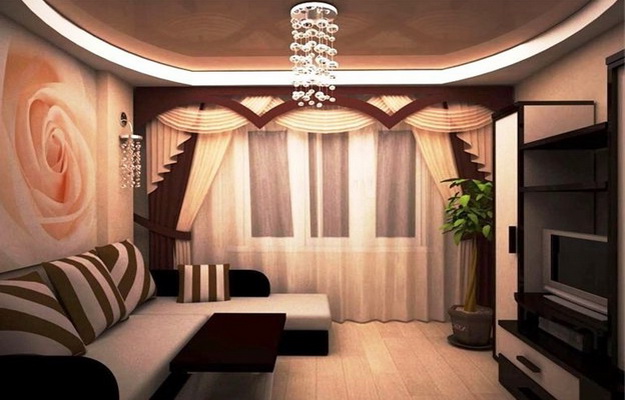
This room is the heart of any housing, so we will pay special attention to it. It must be comfortable. Therefore, in the priority, glossy and satin options for cloths: they will bring elegance in the interior, a certain proportion of elegance and will not allow the design to be boring. To create comfort, it is preferable to choose warm and bright colors of the color palette: they will arrange all households, will not have a negative energy.


If this is a young family apartment, you can add purple, yellow, sandy color. In addition, let's say blue shade, mixed with purple due to photo printing pattern, say, star nebula. If older people live in the house, these tones are undesirable for them: they will cause the development of depression, even if there are no many in the design. The perception of young people: it will seem that the room is filled with freshness.


All are beige tones, the use of white, light peach, milk color. It is undesirable to decorate a two-tiered ceiling design with a pink tint: This color creates discomfort in men. The same applies to the lilac.
Avoid red and black colors in the design of stretching cloths: they carry a negative load and are sources of irritability.
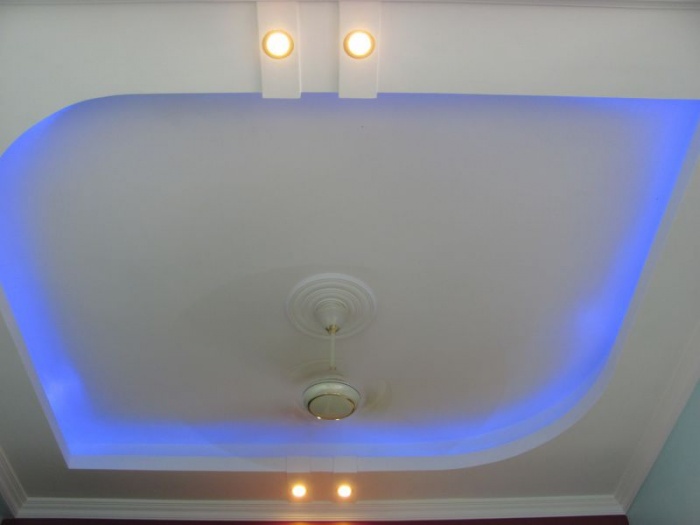
It is worth mixing matte canvases with satin or glossy. It will look beautiful. If possible, emphasize different levels of point illumination: so tier systems will become more elegant. As a backlight, use light sources with a warm tint of the light flux. If you want to change perception, make one of the tiers of the RGB type LED ribbon. Optionally, you can change the shade of the glow from white to violet, varying the color in the mood.


The bedroom interior needs bright colors and creating a relaxing atmosphere. Here are applied matte and satin coatings. The first will allow to relax as much as possible, the second will bring luxury to the interior. In order for the design to look unusually, it is possible to perform a small focus using the photo printing, making the transition of the tensioning canvas on the head of the head of the head. If matte texture is selected, you can decorate it with simple patterns. Such an emphasis is clearly denoting the sleeping area, asks the main mood design.


To strengthen the harmony of the design of the ceiling and interior, repeat the elements of the backlight on the walls or the facade of the cabinet. You can use a toilet table, highlighting it with identical satellum or cord.
Avoid large patterns: here they are inappropriate. Better in the bedroom looks monophonic contrasts with a predominance of white. Use warm tones, they contribute to relaxation.

Matte texture looks good in the native. It contributes to the best perception of space. However, for zoning, you can apply a small contrasting insert by placing it in the working area of \u200b\u200bthe room. At the same time select the material should be supplied in such a way that the reflective ability is not largeOtherwise, it may distract attention, which is especially undesirable for schoolchildren.
The color of the tensioning canvase can repeat, for example, finishing the rack. In this case, you can perform a separate backlight of each room section by applying small point lights.
Do not overload design, selecting unthinkable complex structures based on two tiers. In this case, it is worth a bet on pleasant tones and hobbies of the child. For example, for a teenager, you can choose an option in the form of the porthole of the spacecraft, depicting the focus of this topic.


We note the basic principles of the choice of tension structures and their design. This will determine what option is more suitable in a particular case.
Avoid dark tones on the attic floor: here and so often lacks light.


To assess the role of decorating the space of different dwelling rooms, we turn to the examples of the photo gallery, considering various samples of the design of a 2-level stretch ceiling.


Tension ceilings from several tiers have long been not surprised. This finish looks not only effectively, but also allows you to hide constructive elements or communication. Thanks to the emergence of special profiles to move the level, make a two-level stretch ceiling is easy to hand. Most of the work takes on the manufacturer. Based on the sketch provided, the calculation and cutting of the material is carried out, as well as the preparation of structural elements. It remains only to collect the frame and pull the canvas. So it will be possible to save significantly at the expense of the value of the installation. We have prepared a step-by-step instruction in which we consider in detail what profile to choose to create two levels how to properly prepare a drawing for the manufacturer and install.
On the device, there are three main variants of bunk tension ceilings. They differ according to the materials used and the complexity of manufacture.
The canvas stretch into two levels, the design is a simple transition without a niche and hidden backlight. PVC film is mainly used. First install the frame from special profiles, then both levels are tensioning the cloth. Often, tiers make from materials that differ in color and texture. Contrast emphasizes the difference.


In such a ceiling for tiers, different materials are used. The second level (nearest to the floor) is collected from plasterboard. For this, the framework is mounted and crushed GLC. Then the design is putty or color.
As the top level (located closer to the basic overlap), the film or tissue canvas stretch. Baguette is fixed to the vertical part of the plasterboard design. So that he did not deploy under the action of tension, the connection site is pre-enhanced. For this put an additional aluminum profile or wooden barSince plasterboard does not have sufficient strength.


The main minus of such an option is a longer installation. For the stretch ceiling, it is enough to put a frame and pull the film or cloth. And in the case of plasterboard, it is necessary to additionally separate it and wait until the twin driving, paint, etc. It is spent on this time.
The general principle is the same as for a conventional two-level ceiling. But additionally mounted backlight. To do this, take a special framework, which is then stacked by the LED tape. There are such baguettes for installation both around the walls and between levels. The backlight can be located all over the perimeter, only on one tier or in niche between them.


In the process of installing any stretch design, the ceiling is lowered. If the room will result in too low, it will be inconvenient and uncomfortable in it.

The smallest distance to which the ceiling drops is determined by the profile width. For the first-level baguettes, it is 3-4 cm, the second is 8-10 cm. That is, the height will decrease at least 11 cm. Calculations are valid for rooms with a slight overlap dropper vertically.
It turns out that the height is 2.7-2.8 m is enough for a two-level stretch ceiling. Host and halls may be lower.
A thin polyvinyl chloride film (PVC) or synthetic polyester fabric impregnated with polyurethane is used as a web.
From the point of view of two-level structures, the most important differences in options are:


The film is cut in production precisely in size. Garpun is welded to the edges (a strip of a thicker polyvinyl chloride in the form of a hook). When installing, the canvas are simply refueling into the baguette using special spatulas. Garpoon is inserted into the profile groove, snaps up and reliably fixes the material. The installation is performed quickly and easily, since the size of the canvas and tension is designed for production.


For these reasons, the fabric is rarely used in similar structures. It is pulled only with combined (that is, in combination with plasterboard). The most common version of the ceiling in two levels is a polyvinyl chloride canvas with harpoon. It is so easier to choose a baguette and create a complex design.
There are also several options here. You can take a separation baguette, which is used to connect the cloths at one level (marked by the BC) and the bump. This is a profile in section resembling the letter "Y" or "Z".


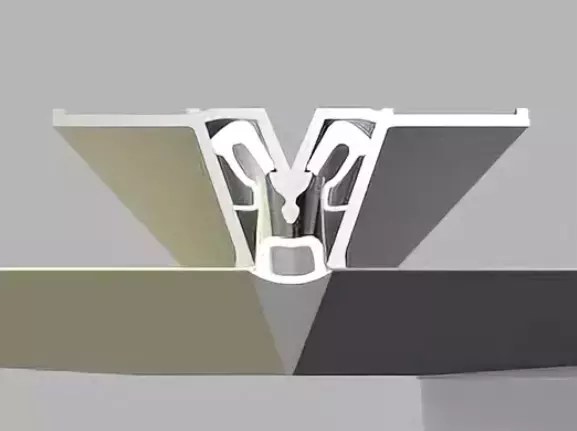

With this method of mounting the frame of the second level, the dividing baguette is not horizontally, but vertically. It is fixed to the top of the beam or a solid bar. And to the bottom screw the bump. One cut film is inserted into the upper part of the separation profile and stretch at the same level. And the other - fill in the lower gap and spend vertically to the bump, where the film changes the direction to the horizontal.

But this method is relatively complicated in the implementation. More often take baguettes specially created for bunk ceilings. They are divided into several varieties, each with its marking and appointment:


All types of profiles are used to create both direct and curvilinear structures (circles, ovals, waves or spirals). So that the frame is bent, the baguette is inscribed every 15 mm. And then for strength to be fastened with aluminum ribbon and self-drawing (approximately one strip on three inscribed or 2-4 cm).


Consider in detail the technology of mounting a simple two-level stretch ceiling. The material of both tiers will be PVC film. As a frame, we use the Ceiling Profile of PP 75 for the step of the level transition. In the lower tier, build point lamps. This is the most simple design of the two-level stretch ceiling for independent installation.

For installation you will need:


Before starting the installation of a two-level stretch ceiling, you need to remove the size of the room, draw the scheme and transfer it to production. Then prepare the basic overlap.
It is necessary to accurately determine the length of each wall and calculate the magnitude of all angles. Even in a rectangular room, these sizes may differ slightly. It is also important to determine where electrical wiring and other communications are located if they are.

Considering this data, it is necessary to schematically draw the room and build a sketch of the future ceiling. It is noted on it:

The pattern of the stretch ceiling along with the size is transmitted to production. Experts will create a frame and take out the film (if the ceiling is wider than the roll, the segments are smeared on the TSF machine).
Attention! It is better to order everything in one organization. So the frame and the canvas will accurately approach each other.
Waiting for materials you can do a rough ceiling. From him remove the remains of the previous finish: paints, plasters, wallpaper or tiles. To do this, use a spatula and water, sometimes with the addition special Tools. If you do not remove the old coating, it can fall on the film after installation. Then the ceiling will ugly promiscuous under the weight, and if the corners are sharp, it will break. It is easier to prevent similar problems than later to repair or fully change the canvas.

The surface is carefully examined in search of slots and joints concrete slabs. They need to be embedded, otherwise the ceiling can be inflated or stick to the base when opening the window or door. For sealing gaps use mounting foam, sealant or plaster, which is sometimes put in several layers. Before applying the next, wait until the previous one dries.
Careful level alignment is not required, as it will be hidden. But you need to progress the ceiling with an antiseptic agent. This processing serves two goals: strengthens the surface and does not give to develop mold. This is important, since a wet microclimate is created under the film, favorable for fungus.


Drawing must be transferred to overlapping and walls. First measure the heights in the corners and places of the level transition. From the lowest point, the required distance is postponed (which the ceiling drops). Then between the marks pull the bulk cord, we will be discharged and released. Thus, with the help of chocline, horizontal lines are applied to all walls.


The second level is placed similarly. The border between the tiers is denoted on the ceiling. For smooth lines use a marking cord. Curved noted using different devices: templates in the form of geometric shapes, threads attached at one point with a pencil at the second end, etc. In the case of finished structures, simply apply the workpiece to the ceiling.

Also celebrate the location of the lamps. Check that the necessary distances (between them, to the walls or before the transition level) were the same.
Tip! The location of the lights is best noted on the floor. Then they will be easier to find after installation.
If the dimensions of the design of a 2-level ceiling are too large, it is delivered by separate parts. Then you have to collected in place.


Then profiles are attached to walls and overlap. If you screw the baguette of PP 75 straight to the stove, the height will decrease by 9.5 cm. Sometimes it takes more, then the frame for a two-level stretch ceiling is installed on metal corners or a wooden bar. To withstand the horizontal plane, use level or thread, stretched between points on the walls.

Then mounted a wall baguette. The mounting step is 10-15 cm. On loose and fragile partitions, as well as closer to the place of joints it is better to reduce it to 5, and sometimes even up to 2-3 cm or reinforce the struts.


Baguette pricing is made closely without gaps and level drops. To do not damage the cloth at the junction when installing, the edges of the profile are treated with a file, and the connection is sealed with aluminum scotch.
We will need platforms, flexible steel suspensions for fastening and screws "Blinds" 3.5x9.5 mm. For point lamps produced (fixed different diameters and universal).

Considering the distance from the basic overlap to the film, the height of the suspension is determined. Superior cut off, the plate is bent "harmonic" and attach to the site. So it will be possible to regulate the height of the structure in the future, and the strength will not suffer. In the slab overlap drilled holes, then the mortgages are fixed in them with self-draws.


After that, we begin to lay the electrical cabin. To the network, the lamps are connected in parallel. If one of them is overrigent, the rest will work.
The wire is pulled to the first place, make a loop of about 10 cm long, and then to the next, etc. So that later the cable does not hurt the stretch ceiling, it is fixed to the suspension. To do this, it is convenient to use small cuts Perflectors or plastic clamps.

Important! The wire cannot be tightened, there must be a small sagging.
The ends of the loops are cut, cleaned and insert into terminal blocks. Such a connection of lamps is safer and more convenient than a twist. So that the wires do not interfere when installing, they are raised up and removed for mortgages.
In order for the film to stretch and became more elastic, it is heated by a heat gun. Before starting this stage, the doors and windows are closed so that there are no drafts.

The canvas gently unfold on the floor, and then with crocodile clamps suspended to the corners. The film is heated and gradually refuel the spatula in the baguette. This sequence is:

Thus, it turns out a smooth canvas without wrinkles and folds.
Note! First stretch the lower tier, and then - the top.


By floor marks determine where the mortgages are located. The ceiling is glued to the thermal coil, which are needed to protect PVC films from overheating. During operation, the material is not melted when the light is on and will not disappear from the cut.
The protector is missing with mounting glue (better "Cosmofen CA-12") over the entire surface so that emptiness is not formed. Then the ring is applied to the ceiling and pressed for 2-3 seconds, without moving and not smooth.


When the defense was glued, the film inside is cut with a construction knife. Muffd up the mortgage so that it is to be flown with the ceiling. Pull the wire, connect the lamp and put it in place. Built-in models have on the housing of the springs-retainers that you need to press and insert into the hole on the ceiling.

Due to the characteristics of the baguette design after the installation of the tensioning canvas remains: between the ceiling and the wall, as well as the upper and lower tiers. To close the gap, use a decorative plug. This is an insert from PVC, which is chosen by the color and texture of the film.
Masking tapes are produced multiple varieties. On the perimeter of the room with a harpoon attachment insert:


To disguise the level transition, other models are used, since the size and shape of the slit in the separation profile differs:


Our masters regularly improve their qualifications not only directly at facilities, but also at seminars and various trainings.

In the work we use your own equipment and only high-quality cloth. All this allows us to significantly reduce the cost of two-level stretch ceilings and implement courageous and creative ideas.
What is remarkable such design? Above, we have already noted that the two-level stretch ceilings make it possible to create a unique design of the room, which is confirmed by numerous photos in our portfolio. However, besides this, the design has the following functionality:
And, of course, each stretch ceiling, designed and established by us, is an exclusive product affecting the imagination.
There are three ways to find out our rates:
Call us or call the designer to the house. We will consult you for free for each question, which only can touch the development and installation of ceilings. We will also produce all the calculations, and then send to you a brigade of installations - finishing, which in the shortest possible time will install construction.
Stretch ceilings are a modern and popular finish. With this technology, you can give the room any desired appearance and shape. Most often there are bunk structures - they look stylish and elegant, and they differ in an acceptable price. If there are materials and tools, the bunk tension ceiling can be installed independently.
Duplex stretch ceilings fully possess all the advantages of simple stretch structures; In particular, this is:
These qualities are inherent in all ceilings regardless of material and textures.
The most popular Ceiling Ceilings from PVC film, moreover, have such qualities:
With all these advantages, the bunk ceilings take away from the premises of only 10-15 cm height, so the two-level design is most popular with designers, decorates and apartment owners.

Mounted bunk ceiling in two ways: on the basis of the hypskarton or aluminum frame. In the first case, the lower tier of the ceiling is performed in the form of a box of sheets of GKL or GVL, put off and paint it. The profiles for stretch ceilings are installed on the design and the top tier is fixed. This method of installation is justified if the installation of a massive chandelier or decorative elements, such as plaster stucco, is necessary.
The second method implies the installation of both ceiling tiers on special guides, while all planes (and horizontal, and vertical) are formed from the tension ceiling canvas. Such a ceiling is easier and creates a smaller load on overlap, no moisture is afraid and does not require repair 10-15 years.
set of stretch ceiling
The tension ceiling canvas is attached to aluminum or plastic guides (baguetas), which are fixed on the walls, and in rare cases - on the ceiling.
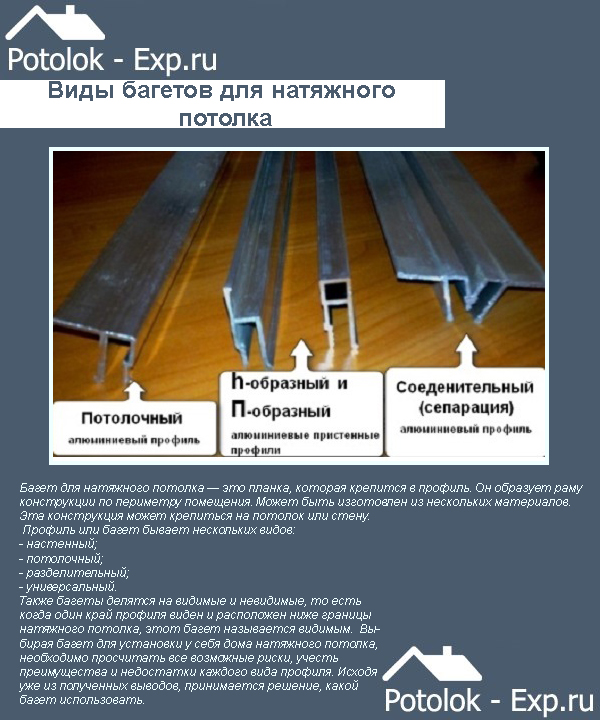
Depending on the place of attachment, the profile may be:
Ceiling used for upper Yarusa Two-level ceiling, while the gap between the slabs of the overlap and the blade is minimal. Wailed fastening at any level of the wall or box of plasterboard. Connecting, which is also called separation, is used in cases where you need to connect two canvases at one level.
The most popular methods for fastening the canvas to the guides - Cartoon and Wedge. The harpoon system is usually used for PVC ceilings, while harpuna is fixed at the stage of cutting and making the canvas on ready-made measurements. The wedge system is used when installing textile canvases, it allows fitting and tightening in place.

Installation of the ceiling with a wedge system requires high qualifying of installers, so when installing a bunk ceiling, a harpoon system is more often used with your own hands. Harpoon at the same time will be given in the groove of a pre-installed baguette, where it (harpoon) snaps and is fixed rigidly. The gap in the guide is closed with a plastic ostel, which has a rather elastic structure and allows you to hide small irregularities of the wall.

Important! For attaching the cartridge system, high accuracy of measurements is required. It is necessary to measure the room with an accurate instrument, considering not only the length of the walls, but also diagonally.
Multi-tier ceilings are distinguished by a huge variety of shapes and colors. They can be monophonic or combine the cloth of different textures and colors, this technique is often used in zoning. Designers use different shape of tiers depending on the overall style and size of the room.
Strict straight lines are usually used in a classic style finish. One of the ceiling tiers are performed in the form of a symmetric geometric shape. It can be located in the center of the room, at one of the walls or in the corner.
stretch ceiling starry sky

Note! When choosing a symmetric figure of the lower tier, the built-in luminaires are better to have symmetrically.
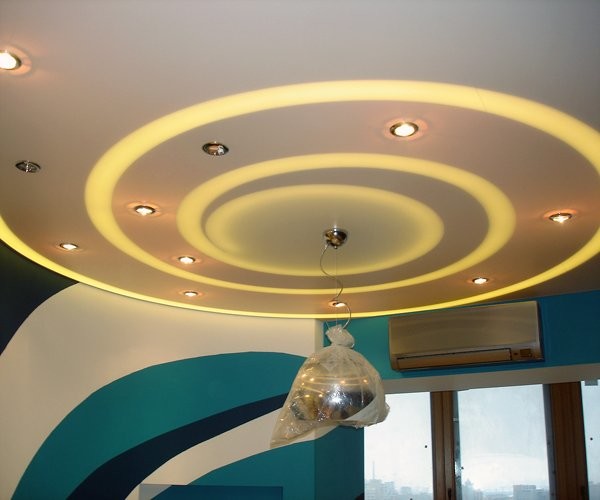
They can be based on simple geometric figures or have an abstract curvilinear design. Such ceilings are appropriate in the design of any premises, from the work office to the children's and bedrooms. When choosing a form, you can not limit fantasy, while the main rule is to keep the balance of the size of the upper and lower tier.
Popular abstract figures are shown below.

Note! The elements located in the center of the room in the form of the top tier are very advantageous in the framework of the LED tape. They can additionally decorate a chandelier with a multitude of diode lamps.
The popular form of the bunk ceiling can be used in rooms of any form, size and destination. With the help of a variety of wavy lines, you can compensate for the disadvantages of the room, expand and zonate it. Despite the complexity of the framework of the frame, the wave-like structures are used very widely, both in monophonic and in two-color ceilings.
fabric stretch ceilings

Note! Make bunk waves on the ceiling with their own hands is quite difficult, it is better to resort to the help of professionals.
IN bunk structures You can use a combination of different textures of the canvas, in particular:
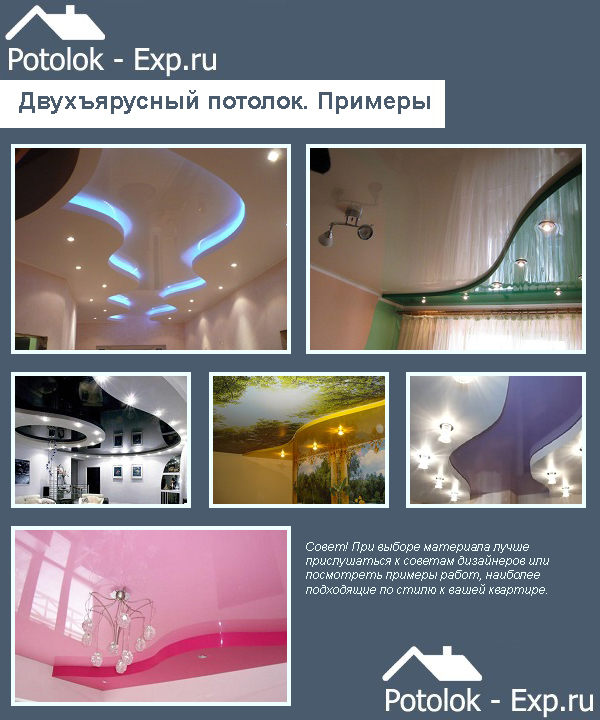
When choosing a material it is better to listen to the advice of designers or see examples of work, the most suitable in style for your apartment.
If you decide to mount the stretch ceilings with your own hands, first of all, soberly appreciate your strength: this work requires accuracy and accuracy. Installing a simple ceiling easier to order in the company, payment of work in the general price tag will take only a small part, the rest you pay for the materials.
Significant savings from self-installation is obtained in two cases:
The sequence of installation of the stretch ceiling includes such steps:
Most of the work can be made independently in the presence of skills and the necessary tool. Step-by-step instruction Described below.
It is known that walls and angles in modern houses far from perfection. Therefore, for the manufacture of a canvas that fully repeats the contour of the room, it is necessary to measure not only the length of the walls, but also all possible diagonals.
In place of a simple rectangular shape, it is simple enough, it is necessary to follow the plan shown in the first drawing. They draw a schematic plan of the room, denote the corners of the letter characters and mark the measurements of all four walls and both diagonals on the sketch. Measurements are more convenient to produce laser tape measure.

To premise a complex measurement form it will be much more. So, for rooms with niches and protrusions, it is necessary to read on the line plan connecting everything possible anglesAfter what to measure these distances.
If the walls have a curvilinear form, it is necessary to draw the rays from one corner on the plan, and make measurements of lengths of segments.

After all the measurements, the room plan is drawn already on paper or on a PC in any graphic editor. Symmetric elements are drawn by basic graphic editor tools, after which they are placed in the drawing control points and measure distances between them.

Geometric shapes on the ceiling - measurement methods
Asymmetric waves and other drawings can be drawn from hand or by template. On the finished plan, you need to mark the ceiling levels and mark other items: lamps, pipes through the canvas, fire alarm sensors.

The finished sketch can be attributed to the company to order the canvas with the harpunas fixed on it. They also choose the color and texture of the ceiling, and other components can be enjoyed: baguettes, nachets, fixtures of lamps.
glossy stretch ceiling
Note! With independent measurements, the manufacturer is unlikely to take responsibility for their compliance with the size of your room. If you are not confident in your skills of measurements and preparation of drawings, it is better to entrust it to specialists.
Stretch ceilings do not require careful preparation of a rough ceiling or overlap. It is enough to remove the old-spirited paint or plaster and close the gaps and joints. If the ceiling is installed in stitched and suspended structuresThey are dismantled and close up with a putty hole from fixing guides and suspensions.

When installing thermal insulation or noise protection, it is necessary to set their design to the installation of electrical cables and installation of lamps.
The finishing of the walls can be performed both before and after the installation of stretch ceilings, but the wall leveling work should be completed before the measurement starts so as not to make an error in the final result. The color of the walls with interior formulations is best finished before the web stretching so as not to be staining the ceiling. But the blending of the wallpaper is carried out after installing the ceiling structure, so that it is not to break the wallpaper with a lacaround when installing baguettes.
Satin Stretch Ceiling - Pros and Cons
To find out about all this, read. You still may be interested in material about what the ceiling is better -.
After premiting the premises, the order of the guides and the manufacture of the canvas can be started to install the bunk ceiling.
It is necessary to prepare such tools:
You should also be supplied with an electrical cable, reinforcement and brackets for lamps, a corrugated metal tube and connecting terminals.

Step 1. On the ceiling make the stake marking. To lower the top tier of the ceiling on the required height, the bar is fixed or a metal frame to the ceiling. At the same time it is necessary to use the level to avoid distortion. Bagus fasten on the height of the top tier ceiling.
Step 2. The level of both tiers of the ceiling are noted on the walls. If the wall decoration is not completed, you can make it a marker. Fasten baguettes on the walls around the perimeter of the room. Put the electrical cable in the corrugated sleeve and fed it to the place of installation of the lamps. Install fittings on adjustable brackets to the ceiling.
The method of fixing the reinforcement to the ceiling is shown in the figure. The upper part of the racks is attached straight to the ceiling or bar. The lower part of the rack equipped with a tread ring should be strictly on the plane of the stretch ceiling.

ceiling. Part 1
For stretch ceilings, it is impossible to use strongly heating lamps. The recommended power of various types of lamps is shown in the table. For luminaires with voltage, different from the voltage of the network, it is necessary to install a lowering transformer with a rectifier block.
Step 3.Fasten another bar forming vertical plane and the angle of the lower ceiling tier. Its edge, to which the film will be stretched, is stone with a plastic corner to not break the canvas. Small irregularities are poured with epoxy glue, after drying, it is stuffed with shallow sandpaper to a smooth state.
Step 4. Install the chandelier on the adjustable brackets. The design must be strong enough to withstand the load. Fasten the electrical cable.

Step 5. The room is heated using a gas thermal gun to a temperature of 55-75 degrees. In this case, the tension ceiling can be softened and becomes supple. The mounting of the canvas starts from the top level. First, they are installed in place the corners of the ceiling, then using a special plastic blade, carefully fill the harpunas in the baguettes, watching the canvas do not bother.

Similarly come with a second-level web, if necessary, heated before this air in the room. After cooling the room to normal temperatures, the canvas is stretched and becomes elastic.
Important! When heating the room with a gas thermal gun, a balloon is located in a nearby room, on the street or balcony.
Step 6. When installing embedded luminaires, it is necessary to cut holes for them. To do this, find the protector ring on the pre-installed fittings and glued below the thermally insulating ring exactly along its contour. The canvas, which produced in the center, carefully trim the cross-crosswise and remove the surplus, after which the fixtures of the lamps are inserted.

Montage bunk tension
ceiling. Part 2
Step 7. To hide the gaps in baguettes, plastic ousters are installed. It is necessary to do it carefully, so as not to damage the canvas, putting the oscillator groove on the rear tooth of the baguette. If the walls are not yet covered with wallpaper, this operation is postponed until the end of the wall repair.
Bunk stretch ceilings are not only stylish, but also conveniently: you do not have to regularly update the finish, because the correctly installed web does not lose shine and elasticity of 10-15 years. Original design and worthy appearance Create a cozy atmosphere and comfort in the house.


