Hand-made crafts from various materials.
Features of wood and plywood crafts for your summer cottage
How to make a craft yourself
What crafts can be done
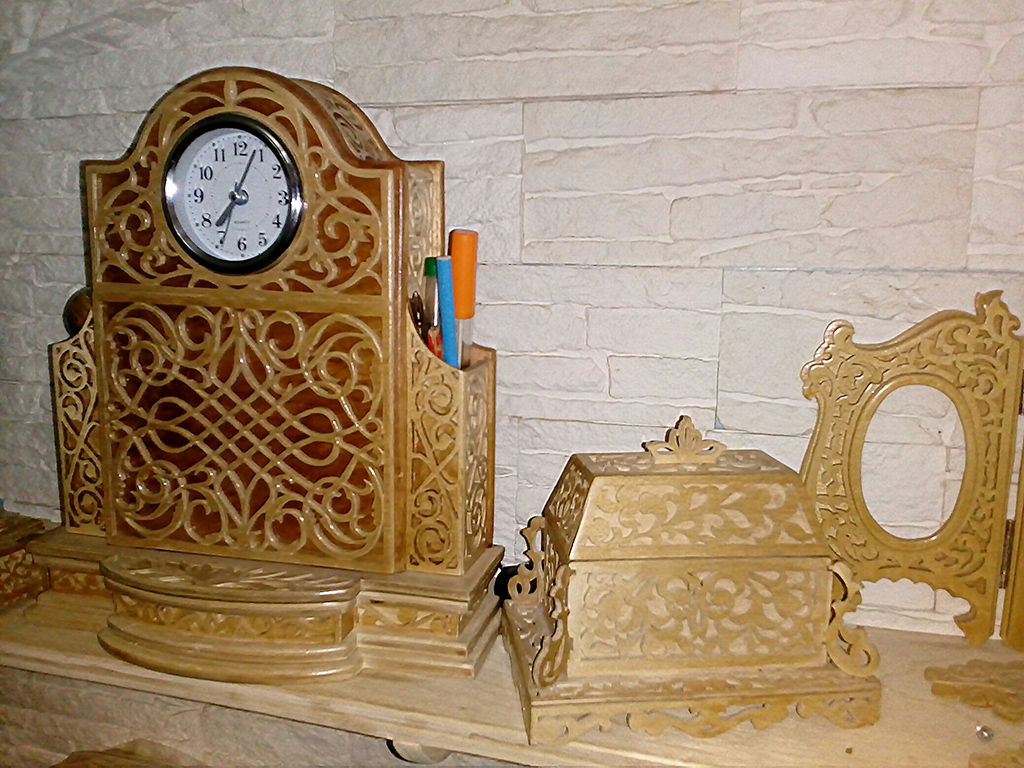
Photo gallery - crafts made of wood and plywood for a summer residence
One of their main distinctive features is the ability to create such products from any available materials. Crafts made of wood and plywood for your summer cottage will be an excellent decorative element. They can also be of practical use, be useful in everyday use.
Plywood crafts for summer cottages
Plywood is a thin board made of wooden plates by gluing. It is great for crafts, as it is quite often found in a summer cottage, and it is not involved anywhere. The same can be said about various wooden utensils, as well as simply twigs and tree stumps.
Wood and plywood have a number of positive qualities that make them an excellent starting material for crafts. Here are the key ones:
Craft material is not hard to find
The cost of wood products is quite small
There are many options for wood crafts for giving
Plywood and wood are easy to process
Crafts made of wood and plywood for a summer residence will be an excellent decoration
The main disadvantage of using wood and plywood as a craft material is its poor weather resistance. After rain, the product may start to rot, losing its beauty. But treating the craft with a water-repellent agent can temporarily solve this problem.
Treat materials with a water-repellent agent to extend the service life.
The process of creating a craft can be divided into three main stages: thinking through the design of the product, preparing and processing the material, and assembling. The decorating process should be highlighted separately. It is not necessary, for the simplest crafts it can be thrown back. For more complex products decoration occurs after processing the material, and sometimes after assembling the finished product.
It is with thinking over the design of the future product that the manufacture of crafts should begin. In the event that the craft is simple, then there is no need to draw up the exact dimensions. If the product is planned to be complex in shape and with many components included in the structure, then it is worth calculating in advance the dimensions of one or another component, as well as the method of their fastening together.
Sketch of plywood crafts for a summer residence
The second stage is the procurement and preliminary processing of the material. If a wooden product is used as the basis for the craft, then it will have to be divided into its component parts. If it is solid, then the individual parts can be obtained by sawing off, if it is collapsible, then simply disconnect them from each other.
Marking the material into its component parts
The procurement of plywood sheets consists in the selection of the whole, as well as sawing off the normal parts from the rotten ones.
Now you can start the processing step. All work should be done with gloves. First of all, you need to give the plywood or wood the shape you need for the product; a household saw is best for this. Next, you need to get rid of external defects in the material, such as irregularities and gaps, if they do not become special elements of the craft. It is necessary to make the surface of the plywood or wooden part even, so that it is not possible to get a splinter in contact with it. This is done with sandpaper, especially difficult situations the plane will help.
Grinding the material before starting work
An interesting solution for wooden crafts will be the use of a groove connection when joining parts. This is quite difficult for a beginner to do; it requires special care and accuracy of actions. But, thanks to all the efforts spent, you will get a craft that will be easy to assemble, and then disassemble without violating the integrity of the structure.
Groove connection of wooden parts
When the details are already sized and smooth, you can proceed to the decorating part. Wood and plywood are fairly easy to paint as they have just been sanded with sandpaper. You can take any paint for outdoor work, including aerosol. One layer will be enough. After that, the product should dry completely.
Plywood and wood crafts are easy to paint
In the case of future use of the craft in the open air, it should be additionally treated with a water-repellent agent. For this, a suitable varnish or spray is suitable.
The final stage is directly assembling wood and plywood crafts for your summer cottage. It should be started only after the workpieces are completely dry. It all depends on the complexity of the product. For example, if this is a simple wooden box, then it is enough to connect the individual parts and nail them together. For more complex products, the assembly process will be more labor intensive.
Assembling a simple wooden box
For some items, the decoration phase continues after assembly. The corners are smoothed, the joints are closed and the thread is applied.
It is best for a beginner to start with the simplest products and gradually, gaining experience, move on to more complex ones. The crafts themselves can be divided into two categories: they are used simply for decoration and are still of practical use. Let's consider several examples from each group, differing in the complexity of execution.
Such products are intended simply to delight the eyes of the owners and guests of the summer cottage.
Wooden shoes will serve as an excellent decoration for the hallway country house... For their manufacture, a square plywood with a side of about twenty centimeters or a thin piece of wood of the same size is suitable.
Decorative shoe made of plywood
To begin with, the workpiece should be divided into two equal parts. On one of them, outline a cut line that coincides with the future shape of the shoe. And cut with a saw. It will be more accurate to do this with a power tool. Next, you have to process the workpiece by removing roughness on a flat surface, as well as smoothing out irregularities on the cut.
Painted boot for hallway decor
Before further work you should attach the unfinished product to the second part of the board or plywood and outline its outline. Prepare the second workpiece according to the same principle. As a result, they should turn out to be approximately the same shape.
The next step is to make holes for the laces. The easiest way is to mark several paired holes on one workpiece, attach it to another, and then drill them. It is advisable to smooth out the resulting holes with sandpaper, for a smoother shape.
After the craft is almost ready, you can start decorating. For example, paint a boot in some color or just leave an inscription on it. For greater safety, it should be varnished. After the craft dries, you need to complete the composition by threading the laces. Now the shoes can be put in a prominent place, surprising your guests with them.
A more complex option for decorative crafts will be a wooden keyboard. To execute it, you will need a piece of wood of the appropriate size, more desire, and a lot of free time. After all, the manufacture of such a craft will be extremely laborious.
Making a keyboard out of wood
It will also require a special tool for creating internal corner cuts and subsequent key engraving. But, as a result, you will get a high-quality decorative craft that will perfectly complement your desktop or any other place in a country house. The inside of the fence will be a rather original idea for its placement. Any guest will appreciate such a craft.
Ready-made wooden keyboards
Crafts made of wood and plywood for a summer residence are a reflection of your creativity... Working with products that have their own ideas and ideas is especially enjoyable. And with a little effort, its result will always delight you and remind you of your own thoughts at the time of creating the craft.
For such crafts made of wood and plywood for your summer cottage, there is a suitable use on the farm. But, along with this, they can also come out beautiful.
A commemorative photo can be placed in a custom-made wooden frame. The design of this product is as simple as possible, a plywood sheet of appropriate dimensions is used as a basis. And for framing, four small pieces of wood are suitable.
Drawing of a simple frame for a photo made of wood
First of all, they are procured necessary materials... The plywood sheet is adjusted to fit the photo. Two pairs of thin pieces of wood are cut according to its dimensions. They must be cut so that when they are framed, they are joined end-to-end.
The pieces of wood for the frame must be joined together
After finishing preparatory phase the materials of the craft are carefully processed so that they are smooth.
The assembly of the product itself is as simple as possible. A plywood sheet is taken vertically, a photograph is superimposed on top of it, a small piece of wood is also installed at the very top, and then fastened together. The connection can be made with nails or special glue. In the second option, the plywood sheet should be larger than the photo. This is how all four pieces of wood are connected. Remains of glue are carefully removed. If the fastening took place with the help of nails that went through, then their sharp tips must be bent so that they could not be injured.
After all these steps, the photo frame is ready. You have received an easy-to-use and practical craft made of wood and plywood for your summer cottage.
Ready-made wooden photo frames
It will be much more difficult to make a bench for suburban area... First you need to decide on its dimensions and approximate design. After that, prepare and cut out the required number of wooden blanks, as well as connecting elements. Carefully process everything, paint, varnish and proceed directly to the assembly itself.
Figured plywood photo frame
This product can also be designed with a variety of decorative elements, such as carved legs or a curved back.
A hand-made hanger will become a product that simultaneously includes external beauty, ease of manufacture, and practical use.
Original plywood hanger
For its manufacture, it is necessary to prepare a sheet of plywood approximately half a meter long and thirty centimeters high. Next, you need to draw a sketch of the future product on it. The easiest way to do this will be by attaching a real hanger to the sheet and tracing its contours.
Drawing of a plywood hanger in the shape of a tree
Next, you have to carefully cut the workpiece, carefully process it, smoothing out the bends and roughness on both sides. As a completion, you can put some kind of inscription on it. Such a hanger will have a pleasant appearance, and also perfectly replace the store version.
Plywood hangers will add zest to the interior of the cottage
Infinitely many products can be made from such materials for a summer cottage. And not of the same type, but as diverse as possible, which will combine both beauty and practicality or each function separately. Crafts made of wood and plywood for your summer cottage will be an excellent decoration for a country house or plot.
For mankind, since ancient times, wood has been the main building material. It was widely used for the construction of buildings, the manufacture of various household items, decorative items, toys, etc.
In the process of the development of modern woodworking production, mankind has invented the latest lumber such as plywood and chipboard.
The improvement of woodworking tools and devices has expanded human capabilities for the use of these materials. Making objects from plywood is one of the most frequent applications of this material.

On the modern photos private farmsteads, apartment decor, household items and toys, you can see a diverse range of plywood crafts.


Such Construction Materials of woody origin have many advantages that make them one of the first in construction.

Positive aspects of application:

The main disadvantage of these materials is their poor resistance to environmental influences. From dampness, water, the material swells and rots, from the hot sun it can warp. To compensate for these shortcomings, the chemical industry has produced a lot of protective equipment for lumber processing.

Making crafts with your own hands from plywood is available to everyone. These products will not only beautify the site, its buildings, diversify leisure, but can also become an easy, pleasant means of introducing children to the work of children.
In theory, fabrication is divided into several stages.


This is the primary stage in any business. At this stage, it is important to determine what needs to be manufactured, the needs for the product, the timing of readiness, the materials used.

Determine the place of installation of the structure, the possible impact on it by a person, external natural factors.

Assess opportunities in terms of the availability of materials, time and tools.

Think over the stages of production, the sequence of processing parts and the structure itself.

Having made a choice of crafts, having developed a production plan, it is important to think over design features its assembly and further installation.

If the design is simple, consists of one or several elements located in the same plane, then there is no great need for accurate calculations. Here, small errors will not affect the general condition of the product.

Volumetric or mechanical objects, consisting of several elements interacting or fastening together, will require more attention and thought.


It is necessary to clarify the dimensions of the structure itself, each of its parts, the methods of their interaction, the order of connection, installation at the place of belonging.


In this case, you need to make at least a sketch, and best of all a drawing. Drawings of handicrafts made of plywood are more desirable to be performed on a sheet in a small cell, and if the structure being manufactured requires great accuracy - on graph paper. The scale is chosen arbitrarily depending on the size of the object, the accuracy of working off the fastened elements.

In the production of a solid product, a plywood sheet is selected corresponding to its size. For the manufacture of a volumetric structure consisting of several elements, sheets of appropriate sizes are selected.

Required tools and accessories:

A sketch of the craft or its elements is applied to the selected sheet. Depending on the required accuracy, it is sawed, which is carried out with a hacksaw or a jigsaw. The most accurate plywood items and crafts are made with a jigsaw.

Attention. When installing the saw blade into the jigsaw, its teeth should be directed towards the tool handle.

After cutting the sheet into elements, they are cleaned with sandpaper, files and file files. The degree of cleaning is determined independently, the main thing is that the surface is smooth, without splinters, the joints provide a reliable connection.

At this stage, it is important to remember about the joints of the parts. Before assembling the product, it is necessary to perform anti-corrosion treatment of parts and attachment areas, paint if necessary. The most difficult connection is the connection of parts with grooves, but such a product is easily assembled, disassembled, transported.

When the structural elements are made, you can start painting them in parts or assembled. It all depends on the product itself, whether it needs further painting or not.

Paint or varnish are selected depending on the type, purpose of the product, the room or the area of the courtyard, the house to be decorated.

After complete drying of paint, varnish. It is advisable to treat crafts exhibited on the street with anti-corrosion or waterproof compounds.


Crafts made can be roughly divided into two categories:

No one is indifferent to the look of their summer cottage. It is always pleasant to relax in a beautiful, well-kept place. To create a relaxation zone in the country, in some areas of the garden and vegetable garden, it is enough to install several sculptural figures or decor items. This will please the eye, however, not everyone can afford it.

Much easier to create beautiful crafts from plywood yourself. Their production does not require high artistic ability, practical skills. It is enough to be able to transfer to plywood the image you like, cut out and decorate according to the original. It is necessary to think over the artistic motive and the style of the crafts.

Plywood product options:


It all depends on the imagination of the household, desire, perseverance, creative inspiration. The financial component only complements the initiative and diligence.

Plywood is thin sheets of wood-based material connected by an adhesive base. Its thickness can range from three to thirty millimeters.

You need to know that there are types of it that are allowed to be used only for outdoor work. The glue base of such plywood is very toxic and can harm the health of residents.

For the manufacture of crafts used inside the house, it is necessary to use plywood of the FC brand. It is advisable to make crafts made for installation in the yard from FSK plywood, this is its more moisture resistant type.

When making crafts with an electric jigsaw, sheets of maximum thickness are allowed. When using a hand jigsaw, as a rule, they use three-layer plywood, up to nine millimeters thick.

You can buy plywood for crafts at any hardware store. The main thing before purchasing is to decide on the type, purpose and place of its installation.

Hand-made items will decorate a home, a courtyard, a garden, park area... Will give them a special charm and originality. They will improve not only living conditions, but also create a wonderful atmosphere of comfort and well-being.


The electric jigsaw is used by DIYers to create beautiful plywood and wood products. Such crafts are used for a variety of purposes. They can be decorative or serve as household items. Every home craftsman who is interested in this lesson should know the peculiarities of working with the tool.
How to use the "miracle jigsaw", and what can be cut with it, you should learn more.

The jigsaw is a versatile device that is used to cut shaped products from various materials. All that is required is to choose the right canvas. It is important to figure out how to cut out complex shapes. Many novice craftsmen need to figure out how the bevels of the boards and the various constituent elements of crafts are made. Electric jigsaws work best when cutting wood conifers... However, the thickness of the elements from which the cutting is carried out should not exceed 3.8 cm.

The blades that will be inserted into the jigsaw often bend and leave beveled edges. A straight cut is usually obtained using a well-sharpened blade. In this case, do not put too much pressure on the tool during operation.

Start the saw at the fastest speed first and then select the angle of the blade. This will result in fewer chips. In materials with increased fragility, holes must be drilled. This will allow you to saw off the workpiece without unnecessary risk. As a result, the part is not chipped.

To cut quickly, use coarse blades. However, it should be borne in mind that when choosing such consumables, it will subsequently be more difficult to sand them. Blades for electric jigsaws are manufactured in such a way that the cut is made with the blade upward.
Choosing a blade for your electric jigsaw is a major consideration when cutting wood and plywood. Often a jigsaw lies idle in the household of a home master. However, when it is necessary to complete a complex pattern, this tool is needed more than ever.
Quite often, an electric jigsaw is used as a tool for cutting a hole in a countertop or when installing a kitchen sink. Such a tool is also used for cutting metal. When using other saws, it is often impossible to accomplish the assigned tasks. The jigsaw is a versatile device. Both a beginner and an experienced one can work with it. House master... As a result, excellent results can be obtained using different materials- plastic, wood, plywood.

The jigsaw is used for a variety of tasks. Its main function is to cut curves of shapes in wooden products... Getting smooth curves with this tool is pretty easy. Keep the base of the tool flat on the workpiece. When the preparation is completed, you can start the main work. Then the engine is turned on and the device is slowly moved along the line marked in advance, at a distance of 2 mm from it. Fine grinding is done later.

The saw should be moved at such a pace that the blade can easily cut through the material without any deviation. The jigsaw works great when crosscutting boards. A stop must be used if you want to get a perfect cut. Beveled cuts using a jigsaw are quite simple to perform. Before work, you must firmly fix the workpiece.
When making an oblique or vertical cut, the distance between the blade and the stop is set the same as on a circular table. It is difficult to work with a jigsaw when it is necessary to make an accurate and long cut. In this case, a circular saw is used first. The final cut of the element is done with a jigsaw. It must be firmly pressed against the inside of the marked line.

First, it is competently organized workplace... This condition is especially important for high-quality cutting performance. If the space is arranged correctly, it will be convenient and comfortable to work. This condition is necessary to create a quality product.
The thrust structure is a special machine. People call it "dovetail". Such a table is made of a rectangular board. It has a wedge-shaped cut that goes into the working area. Dovetail fastened to the edge of the table.

Working with an electric jigsaw is carried out while standing or sitting. The workpiece should be located at a distance of 40 cm from the eyes. It is necessary that the lighting lamp was installed in front of the master. It is placed at an angle to the surface.
The saw blade in the jigsaw must be fixed in a strictly vertical position. The teeth should point down. Before work, it is necessary to tighten the blade well. The degree of tension must be adjusted by compressing the frame. The device must be resting against the edge of the table. Then you should tighten the lambs with pliers. When the frame is straightened, the blade will stretch.

To cut out small parts or shapes with sharp contours with a jigsaw, you need to choose small files. This requires the use of canvases with a large number of patterns per inch. When used, the jigsaw will not jam when turning. The cut is neat and thin. If large-sized plywood products are made, it is required to use blades with large teeth.

To obtain a neat cut, a number of conditions must be met:

At work hand jigsaw it must not be guided along the marked line. The canvas should be drawn along the inner side of the contour. This is due to the presence of a cut after sawing. After completing the work, one of the clamps should be loosened. The frame of the device must not lose its elasticity.
You can make a beautiful and spacious jewelry box for Valentine's Day or International Women's Day. To complete such a craft, you will need to use an accurate drawing. The work is divided into several stages.

Before you start cutting out the details of the box, you should prepare your workspace. For this, a special table is installed. The craft will be created on it. In this case, the following rules are observed:

However, it is not always possible to set the jigsaw table in the right place. For an ordinary apartment, the workbench is usually placed on the balcony, if it is insulated. At the same time, you can work on crafts in any weather.
A plywood sheet must be used for the box. When choosing a workpiece, you should pay attention to the fairly frequent defects - cracks or knots. The workpiece is selected with a thickness that is indicated in the diagram. To translate a drawing into material, you should:

After such preparation, the craft template should be transferred to it.
Before starting sawing, you should transfer the prepared pattern to the plywood blank. First you have to print the drawing on paper. To transfer, you must have tracing paper and a pen. First, the template is attached to the workpiece with tape. Having a blank in front of you, you should think about how to cut out different elements of the box, saving as much as possible the available material.

During cutting, it is required to adhere to some rules:

When leaving the cutting line, it is necessary to correct the line with a file during assembly of the product.
Advice! In the process of work, your hands will get tired. At the same time, performance drops significantly. Fingers and eyes are seriously tired. All this can lead to hand injuries. That is why it is necessary to take breaks from work.
Before assembly, it is necessary to familiarize yourself with the product drawing. Combining the details of the jewelry box does not require delicate work. Before gluing different elements, you need to make sure that they can be put together without any problems. After several assemblies of the product, you should start gluing the parts without any difficulties. Typically, a PVA composition is used for this purpose. During work, it is necessary to eliminate glue drips.

When the material is prepared, and the drawing is printed, you should begin the process of translating the diagram into a blank. In this case, it is necessary to take into account some rules of work. Many DIYers tend to translate the drawing onto plywood using only copy and pencil. However, you can also use the "Black Ribbon". When this tool is selected, the drawing is glued to the workpiece. Then the scheme is washed off the plywood with water, which allows you to leave only the marking lines.
Then you can make holes in the details of the future steam locomotive. The parts of the locomotive contain parts of the grooves that are cut from the inside. To perform such elements, holes should be made in them with a hand drill or an awl. The holes must be at least 1 mm in diameter. In order not to spoil the surface of the table when creating holes, place a plank under the workpiece.

Now you can cut out the parts. Take your time when cutting. The basic rule is to hold the jigsaw at right angles to the workpiece being cut. All elements must be performed smoothly, avoiding irregularities.
Many of us spend a lot of time on garden plot... At the same time, we want to be surrounded by coziness, convenience and beauty. Hand-made plywood crafts are a wonderful way of self-realization and decorating a garden and vegetable garden.
Nice to play the guitar after a bite of sausage. If mice are not caught, it will be bad.Working with plywood is easy and pleasant. The material is affordable. In the simplest version, crafts will additionally require paints and some self-tapping screws. Few tools are required, see the maximum list below.

 You can make decorative crafts for garden beds and fences, heroes of fairy tales and cartoons for a playground, birdhouses, bird feeders, flower pots and so on from plywood. Asking the question what can be made of plywood with your own hands, we conditionally divided all the figures into two groups: simple ones, which are made from one piece of plywood, and more complex ones, which are assembled from several parts.
 "Cartoons" for children and adults
 Almost all of the examples above are cut from a single piece of plywood.
For making crafts with your own hands, it is better to use a sheet with a thickness of at least 10 mm. In this case, the image will not warp and will last longer. At the same time, it is preferable to use moisture-resistant plywood in the garden and vegetable garden.

 There is no dispute about tastes - the choice of your favorite option is yours
 The procedure for making a figurine from plywood is as follows:

 Guys from our yard
 It is convenient to fix the finished product with self-tapping screws to a fence or wall. Look at the photo: you can "fasten" hair, buttons, shoes, a wire tail and so on to the craft.
It is important that these elements are securely held, serve for a long time under the sun and rain, and do not pose a danger to people.
 Animals, as always, are beneficial: the deer holds a pots for flowers
 With your own hands, you can make a variety of decorations for a summer residence from one piece of plywood. We have selected several interesting options.

 Why does a dog need a hare if it has a bone?
  These birds are clearly not friends.
 Storks, swans, chickens: no one will fly away from you!
 The grandmother is solving an important problem: what would she cook for her grandfather and granddaughter?
  Grandfather understands well that there will be no lunch without firewood
  The granddaughter wastes no time and decides to milk the goat.
 It is wrong to say that bulky plywood crafts for the garden are much more difficult. Of course, you will have to cut out several parts with your own hands. But some of them should be painted with the same color, which simplifies the work.
 It is difficult for a donkey to understand how one can sleep for so long, he is a donkey!
 All parts are prepared according to the scheme described above, and then fastened with self-tapping screws. Of course, the three-dimensional figure looks more interesting. The photo clearly shows that it is necessary to use a material with a thickness of 15-20mm. Each detail has its own shape and size. They can be placed optimally on the sheet of material and plywood can be used sparingly.

 The dog guards, the cat helps: in general, everything is in business
 It is especially pleasant when a hand-made craft not only decorates the yard, but also performs a useful function. In the photo you can see just a few examples.

 Is the watcher on the lookout for birds - or a hedgehog?
 It's better to make templates yourself. Firstly, it is not difficult, and secondly, you can make templates for your own and a new drawing when you get tired of repeating other people's ideas. Note that there are a huge number of children's applications for colored paper crafts, which are quite simple to cut out of plywood.
The easiest option is to apply the drawing directly to the plywood. Moreover, if you had five drawing classes at school, it is not at all necessary to copy what you have already done.
Otherwise, a grid should be applied to the drawing you like with a pencil. Then, on a sheet of material, the same grid is drawn with a pencil. All elements of the picture are transferred to the plywood "in squares". Conveniently, the squares in the drawing and the workpiece can have different sizes, that is, the drawing can be transferred to any scale.
The most convenient and modern way to do the work using a computer, which we did. Almost everyone has a Microsoft Power Point program, where you should copy your favorite picture. The program preliminarily sets the size of the sheet for printing on the printer 29.7x21cm.


We have a piece of plywood measuring 57x77 cm, and we set the size of the picture based on the availability of material. You need to understand that the program takes into account the size of the entire image.

Then you need to print fragments of the picture on the printer, sequentially shifting it relative to the sheet for printing. For the convenience of printing, a grid of sheets for printing should be applied to the drawing and grouped with the image.

Now the sheets should be glued into a single image and cut along the contour after the glue dries. A paper template is laid on a sheet of plywood and outlined with a pencil. Subsequently, separate parts of the drawing are sequentially cut off from the template and also transferred with a pencil to the workpiece. You can cut it out!
It will be very disappointing if a self-made craft peels off and warps from the first rain. So it is better to take a number of measures to save your own labor.
First, it is better to use a moisture resistant material. Secondly, it is necessary to soak it from moisture, for example, "pinotex". You can use acrylic and oil paints. It is important that they are for external use. If you want to leave the natural color of the wood, the craft should be covered with a transparent yacht varnish.
Prepare that the figure will have to be repainted every two to three years. If the plywood begins to delaminate, it should be putty before painting, for example, with silacryl sealant. It is very effective to hide the craft from bad weather for the winter.
Let the video help you in your work. It remains to wish you good luck!
(17
estimates, average: 4,24
out of 5)
 Asking the question of how to take such a free time, it is worth trying to do sawing. With the minimum cost, you get maximum pleasure and ennoble your house or dacha, it becomes possible to make unique original souvenirs as a gift to relatives and loved ones, and all this with your own hands.
The person who received such a gift will be very pleased, because the main thing is that you spent your time and did it with all your heart. What will be useful in this hobby?
Before taking on the work, you need to decide what you need?
First of all, it is the material. In this case, plywood is a material made of several layers of wood veneer (the minimum number of layers is 3), glued or bonded with a synthetic compound, in such a way that each new layer is laid perpendicularly. The thickness of the sheet depends on the number of layers.
When choosing, you need to consider a few details:

If in the future there is no possibility to process (grind) the material, then it is worth taking plywood of the type Ш1 or Ш2, this will greatly save time to achieve the desired result.
The next step is a tool for completing your planned work or craft.
In the course of doing crafts with your own hands, you may need:

Everything you need has been listed above, so what can be made from plywood?
A large number of things can be done by hand. In this case, plywood is taken as a basis, here is an incomplete list of products:

 It all depends on your desire and taste, any coloring picture is perfect as a template, imagine that you are making an applique, only instead of paper there is another material (plywood).
Take any picture you like (with the proper skill and imagination, you can draw it yourself), transfer it to a plywood sheet and, using sawing along the drawn contour, give it the desired shape. And then polish, bring to mind the processing and you can start painting or burn out something interesting and varnish. Done, beauty on the site!
For assembly work, you will have to look for drawings on the Internet, for example, a drawing of a box.
And here are the details:

Connect the walls of the casket at the corners into a lock.
Following this scheme, you can assemble a wonderful chest.
Many more options for templates and drawings of various products and figures from plywood can be found on the Internet. In stores they sell special kits volumetric figures, a great activity for a child and an adult!


