Reading time ≈ 13 minutes
Surely almost every home there are old furniture items, which I do not want to throw out due to valuable memories, but also in the interior they do not fit. Services of professionals will fall out. How to renovate old furniture do it yourself at home?
Commercial transformation
In the era of consumption, we are increasingly just getting rid of the broken and unsuitable thing. If it concerns homemade old furniture, the situation is different - old dresser, a servant or sofa is not just a wood product, but the whole treasures of memories. For example, looking at old tablewho bought a great-grandmother, you can remember how he was going together big family. Other products will remind you of your childhood.
However, after a few decades, such items lose their attractive species, break and do not fit into the interior modern apartment. However, antique things can be tried to return a beautiful view.
Restore the old furniture is independently quite difficult - it will be painstaking and, most likely, a long process, requiring patience, attention to detail, clear execution of technology. But the task is quite real and ran away.
The advantages of restoration do it yourself:
Before starting any workflows, it is important to decide on the venue. Dust, unpleasant odors finishing materials, a little mess - all this will certainly accompany the workflow. Therefore, all work is desirable to carry out in a non-residential room. In a private house, everything is perfect in the garage or outdoors, but in this case it is important to follow the instructions on temperature and humidity when working with paint coatings.
If you live in the apartment, then small items can be restored on the balcony or loggia. When working in the room you need to remove carpets and textiles, but flooring And other working surfaces with film.
To restore various products, such tools will be required:

Wood restoration materials
FROM high quality tools The work will move faster, and the end result will be more neat and attractive. But if you do not have your own tools, they can be rented or ask for friends (unless you are going to update the furniture in large quantities and on an ongoing basis). It also makes sense to buy tools if you have to repair with your own hands.
When working will need to use such materials:
Tip: Specific materials for restoration (for example, special wax for furniture or edge for finishing) It is advisable to order in specialized online stores. Standard materials For repair you can buy in any construction supermarket.
Immediately before restoration work, the product should be prepared.
First, disassemble the product to separate items: remove the drawers, remove the doors, glass, unscrew the accessories and fasteners. The glued elements are not necessary to disconnect!

Removing the old coating of sandpaper
For greater efficiency, you can combine several options. When working, be sure to use personal protective equipment: masks, respirators, gloves. Special attention is paid to the corners and rounded places. To work with a hairdryer, a certain skill will be required and experience in order not to move wood and effectively remove the layer of old coating.
If there are any damage on the wooden surface (chips, deep scratches, cracks, etc.), they need to be treated. To do this, use special means. It is desirable to choose the color in the tone of the wood from which the subject is made. If after filling defects it is required to simulate the structure of the wood, use such materials:
Be sure to remove excess materials. After drying, walk on the coating of fine-grained emery paper - it will help to align the surface, eliminate the transitions between the restored areas and the rest of the area, remove roughness. Carefully wipe the surface with a soft, wet cloth, dry. Further actions will depend on the selected restoration method.
Video: Methods for cleaning from the old coating.
There are several options for updating old wooden furniture. The most popular are staining and lacquer coating, among the options more complicated - decoupage and veneering. Consider the features, pros and cons of each method.
This is the most common way to update the old product with an unsightly surface. Most often, painting is used for items from inexpensive wood (pines), but furniture made of noble woods can lose its magnificent look due to painting, therefore it should be very carefully picking color. To work on the tree it is best to choose acrylic paints - They do not smell, quickly dry, stable. You can purchase a ready-made mixture of the desired color or a white base and several colors to create, for example, a gradient or multi-colored surface with clear transitions of shades.
Important! Some paints require pre-applying primer - it contributes to a better clutch of the colored coating with the base. Be sure to specify and implement this manufacturer's recommendation.
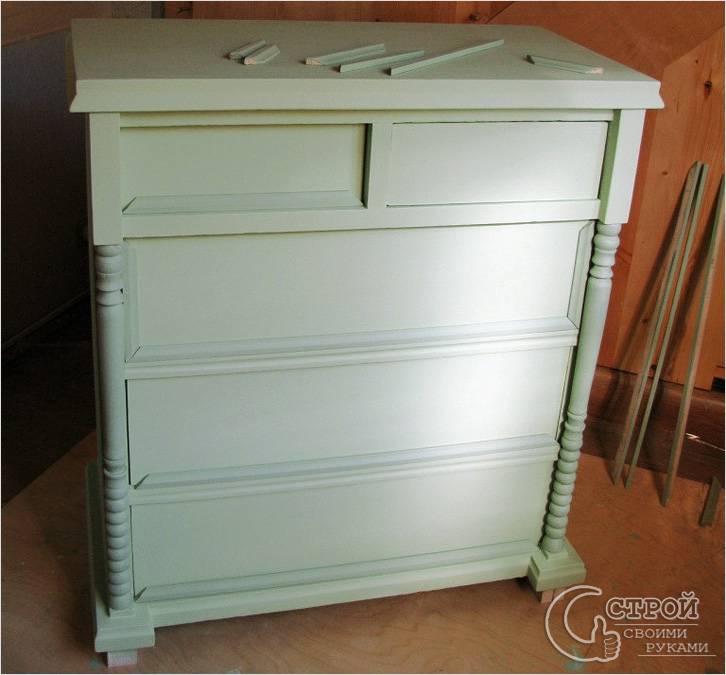
The photo below step by step shows the master class for beginners - how to update the old furniture with your own hands on the example of the chest:

The process of restoration of the chest
At first, the chest of drawers were dismantled, washed away from pollution, sandpaper was removed the top layer. Next, a layer of primer was applied. If the furniture is dark, you can use light primer - this is an excellent substrate for light finish coat. After complete drying, a layer of paint in the form of a gradient is applied. The necessary tones were created from the white base and two plates of blue and green shades. Next, with the help of the pulverizer, multicolored compositions were applied. After complete drying, the paint surface is desirable to cover with a transparent protective varnish.

Ready product
Example of alteration of an old written table:

Painting is capable of giving old things stylish, modern view
Furniture in the style of the 50s or 60s can be harmoniously enter into a modern minimalistic or Scandinavian interior, if you repaint it in a calm monophonic color.

Changing bedside
Ancient servant, thanks to repainting in a gentle blue tint, will become excellent cuisine in the style of country or Provence.

Update Servanta
New color, fittings and bases are able to drastically change the type of old furniture item:

Update bedside
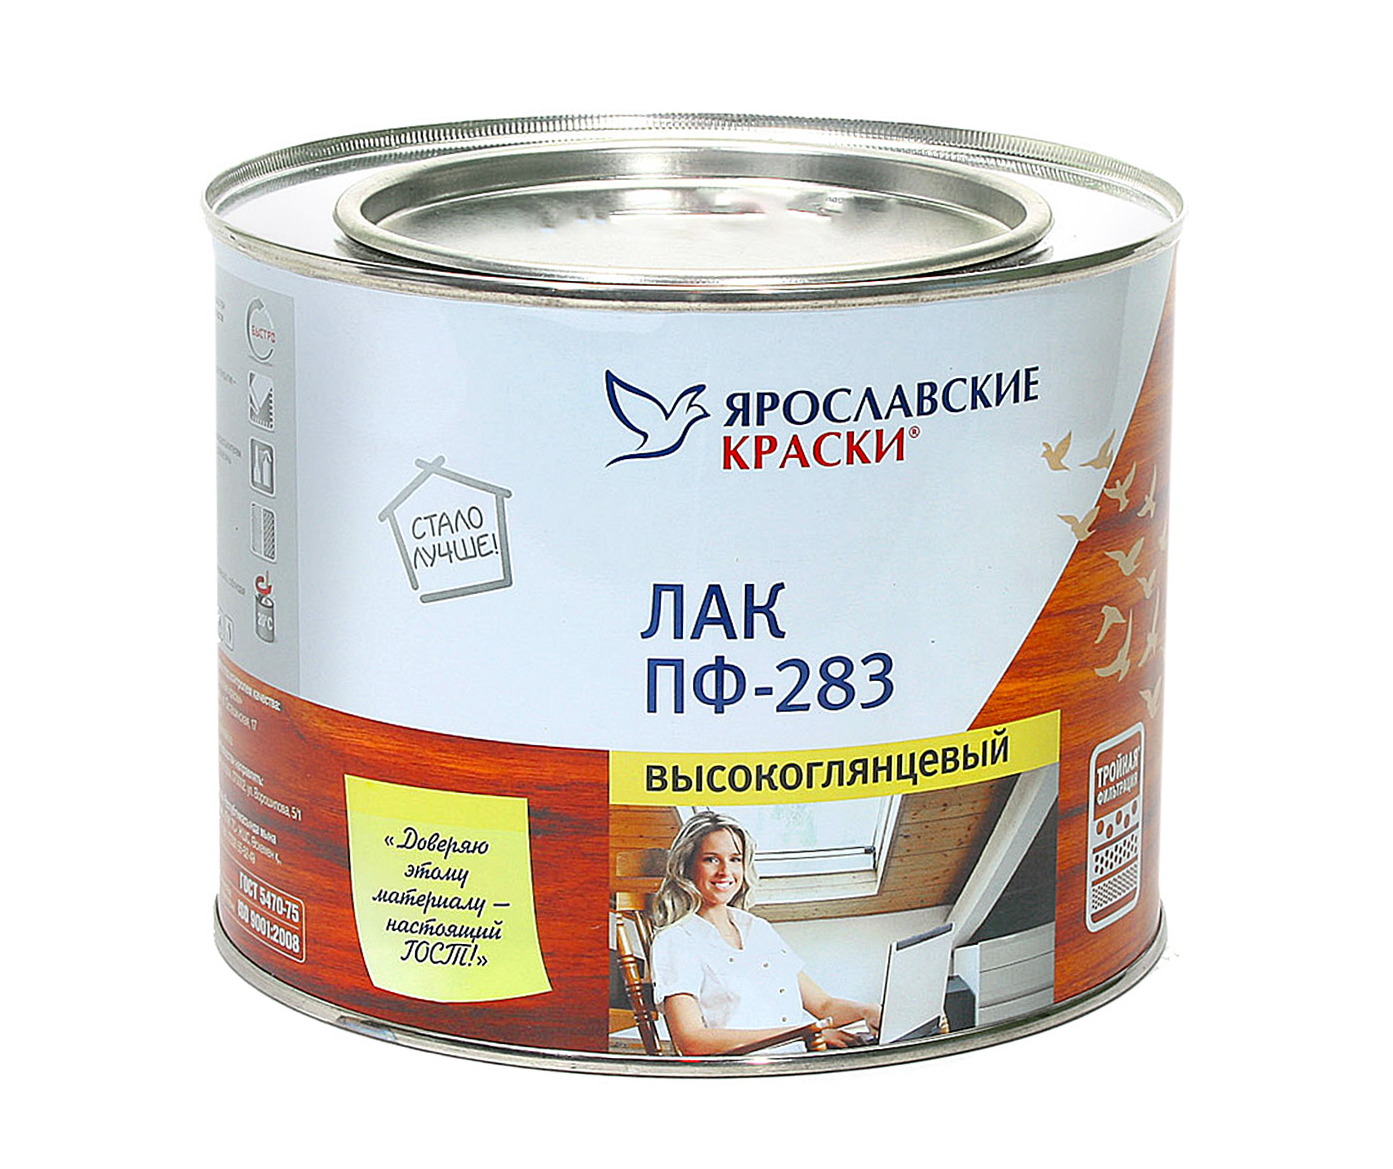
Most species of varnishes require pre-primer surface. Next, you need to apply a few thin coating layers, waiting for the complete drying of the previous layer. If the varnish is presented in the form of an aerosol, the canchiber must be threatened before work. When working should be observed to the distance to the surface within 30 cm, with a closer distance, drips may occur. After drying, the surface must be sanded with fine-grained sandpaper, wipe and apply a new layer. Depending on the manufacturer's recommendations and the desired result, you can apply 3-4 layers.

Classification of varnishes
When using vehicles, it is possible not only to maintain the natural color and texture of the tree, but also protect against the attack of bugs, mold, larvae. The compositions are on the aquatic, alcohol and oil bases. It is recommended to use exactly the last form - such versions are convenient in applying, they do not raise wood fibers, easily overlap with another color layer.

Treatment of an old lacquer
Also, the wooden surface can be updated using wax processing. Modern means (except bee wax) may contain inorganic components and oils as part. This coating group retains a beautiful natural look of the tree, its texture, protects against moisture and damage to pests. Liquid species are suitable for giving the color and masking of small scratches, the solid waxes are used and for sealing deep damage.
Important! Furniture objects that are often in contact with clothing should not be covered with oils and waxes to avoid bundle and damage.
Prepare furniture for restoration can be algorithm described above. Next apply the composition with a dense tassel, a tampon or a sponge for washing dishes. The first layer rubbed in circular motions, then along the fibers of wood. The second layer is applied in a couple of minutes after the first and rub the fibers across. After drying, another 1-2 layers are applied and the surface is polished with a soft cloth.

Cabinet update
An excellent idea of \u200b\u200bupdating the old furniture is a decoupage. This technique allows you to maintain a vintage, ancient type of product. With the help of a decoupage, you can make facades and doors of the cabinet, worktop, seat or back of the chair, plane all the entire product.

Decoupage and dresser coloring
Preparatory work is similar to those described above (removal of the old lacquer / paint layer, climbing cracks, purification from dust). Further action algorithm:
Instead of special decoupachable napkins, you can use conventional dining room multi-layer napkins (only top layer), wallpapers, textiles and lace.
Lacquer-covered furniture does not come out of fashion for many years. An attractive view of its surface will decorate almost any interior, give it a special chic. But as it were, neatly did not take care of such furniture, over time, scratches and even cracks appear on it. In this case, you should not be upset because there is perfect solution - This is the restoration of furniture with your own hands. Of course, this procedure should not be carried out with cheap instances of the chipboard. By and large, it's just a lost time. The old furniture that was done on the century is subject to recovery. Polished Soviet is also easy to update at home.
Repair of furniture with their own hands begin with an initial examination of the degree of damage to the surface. This procedure determines the sequence of further action. The degree of damage is different and is determined by natural aging or mechanical impact. List some signs:
When any signs appear, you do not need to be upset. Restoration of lacquered or polished furniture - a simple solution to the problem, such work can be done neatly, without losing the value of the product and without disturbing the surface structures. After restoring the paintwork, your favorite things will delight for a long time.
Before updating the old furniture, remember that it is not always worth changing the lacquered layer. Some natural aging factors give the vintage furniture of a special charm and increase its cost.

Completed in everyday way to eliminate small defects, which covers the furniture surface, is wiping with a cotton swab, impregnated with alcohol. After processing the damaged area, the position can be corrected for a while. But in some cases this method can harm the decorative layer. Therefore, it is not necessary to experiment, it is better to choose a specialized composition.
Imagine the characteristics of some varnishes for furniture restoration:


After selecting the polishing agent for polishing the furniture, it is worth defining with the color of the coating. Very often use colorless varnishes to preserve the structure of the tree. However, when the lacquered furniture is updated, they try to choose a lacquer in the tone of the surface.

Before starting restored furniture, you need to prepare a number of instruments and materials. So you will need:

The process of restoring wooden furniture with their own hands consists of several stages. As an example, a children's bed restoration will be presented:
1. Preliminary preparation. Before updating polished furniture, it must be disassembled. Next, we apply a solution for cleaning to the surface, then rinsed thoroughly with warm water. This procedure will make it possible to soften the old polishing, the varnish cracks and sucks in some places. Its remnants need to be removed using a scraper. Next spend grinding sandpaper. You need to start with larger abrasiveness and complete the shallow. The surface should become matte and homogeneous. Next, the dust is cleaned with a brush or a damp cloth.

2. Apply paintwork. Depending on the selected vapor material for the restored furniture, the amount of layers applied. Each subsequent layer is applied after it is completely afraid (drying at least 8 hours). If acrylic varnish is used, then the composition must be diluted with White Spirit to apply the first layer. Next, the restoration of furniture is accompanied by a surface grinding, after which another 2-3 layers of undiluted varnish are applied.

3. Stage grinding the reduced layer. Grinding of renovated areas is carried out neatly sandpaper with the smallest graininess until a homogeneous matte surface is obtained. Next, everything is thoroughly wiping with a rag. Repair the old thing allowed us to get a completely new bed.

On video: Restoration of a cot.
Oak products are sufficiently strong, therefore the restoration of oak furniture is mainly partially performed. In this case, techniques are used as decoupage or artificial formation. Consider in more detail how to renovate wooden furniture partially. For this prepare the following tools:

Consider how the restoration of the old furniture is held with your own hands on the example of the old table countertops. When updating some sites, they must be fenced from others. Therefore, with the help of painting tape, we protect the unnecessary surface area. Then we carry out such operations:
Important! All work must be carried out with the horizontal location of the surface. This will prevent the formation of heights and divorces.

As a result, we get a table with decoupage elements, which by and large will not differ from antique products.
On video: Chair in the technique of decoupage.
Now let's talk about the ways that can be applied at the initial stage. The emergence of any minor unit defects do not require global surface restoration work:


Repair of wooden furniture is a simple, but labor-intensive process that requires exposure and patience. Performing the correct all stages of the restoration, you can extend the service life of your favorite things. Basically, options were considered how to restore the old furniture with their own hands, which was still made of natural wood. At this time, the furniture is mainly produced from chipboard sheets. It should be noted that the repair of cabinet furniture does not differ in principle. You can use all algorithms presented above.
To buy new furniture, it will take a decent amount that is not for everyone. In addition, the repair itself and the new finish cost no shelter. How to solve the prevailing problem? The answer is very simple - the second life of the old furniture. It is enough to pay a little time and strength, as well as use inexpensive materials. Thus, any inconspicuous element will become an exclusive and original, which will allow him to fit into the new one. The restoration of the old furniture is carried out with their own hands in accordance with the recommendations and rules. All the subtleties of the process and will be considered in this article.
Any type of work requires careful preparation to improve the result. It also belongs to the furniture restoration: before starting to finish, it is worth thoroughly prepare the surfaces, regardless of whether it is wooden or soft. Since the main part (body) is made of wood, then special attention is paid to it.

To carry out proper training it is necessary to follow a simple algorithm of action:
Note! To not forget anything and completely eliminate defects, it is worth writing them on a sheet of paper. This will not even forget about the most minor losses that will affect the general appearance.

If it is necessary to remove the polishing layer from furniture during its restoration, it is necessary to prepare in advance:
Note! The compositions for removing the polishing layer can be two types: thick and liquid. Thick compositions are used in the restoration of vertical surfaces. Liquid absorbed in the most hard-to-reach corners and carved elements.
In the example, consider the polishing removal technology with the help of a thick composition:

It is very important when restoration of old furniture adhere to security rules. Work only in a well-ventilated room. To protect the respiratory organs, put the respirator, and on the hands - rubber gloves.
Note! When applying a thick composition, it is important to adhere to technology, that is, to follow only one direction. This will allow the layer evenly to lie down.

After removing polishing on the surface, defects and damage in the form of deep cracks and scratches can occur. Before proceeding to the restoration, it is necessary to eliminate them. For each of them there is its own technology and means.

Note! Experts recommend using a polyester or water-based powder.

The dresser is part of the furniture set of bedroom, children's room or living room. A large number of things may fit in it. When changing the interior, he may not fit into the room not to throw it out, it is enough to hold a restoration. To do this, choose such a tool as:
Note! During the restoration of the chest for the children's room, you can use stencils. As a result, it turns out a bright and original elementwho will like the baby.
This is how the restoration process looks like:


And here is a video restoration video:
Fastest extended furniture in the kitchen, since it is here that people spend most time. Due to the high price of the headset, not everyone can afford every 5-10 years to acquire new ones, and the old people do not fit into the interior after repair. In this case, it is also worth using various methods and methods of restoration of kitchen furniture.

For example, despite the fact that stools over time lose their attractiveness, they are still functional. It is enough to pay a little time and strength to renovate. This can be done by step by step instructions:

There is another way to quickly restore chairs with backs - these are covers from any textile. To do this, it is necessary to make measurements, make the pattern and sew a cover on it. This restoration is called tissue drapery.
Note! With the upholstery of the soft part of stools or chairs for the kitchen, it is recommended to use dense textiles or artificial skin. They are less susceptible to wear and wiping, so they will serve longer.
For the final decoration phase during furniture restoration, not only paints and varnishes can be used. So, today, designers and furniture makers use various techniques Restorations, with which you can make a vintage and exclusive element from the unspoic element.

Painting with paints. The most affordable and simple method of restoration is painting paint and varnish materials. To do this, the main color is applied to the prepared surface, which should be suitable for the color of the room or other decor elements. After a complete drying with stencils or copying, you can appare the contours of any drawing, and then paint. You can find such patterns on the Internet.

You can perform the decor in such a technique in conjunction with children, as it is very simple and interesting. So, various patterns are cut out of fabric and paper, many use napkins for these purposes. The obtained elements are placed on the surface, for example, the table, and then stick them, not forgetting to smooth out well. After covering the layer of varnish.

Technology combines two methods at once: decoupage and varnishing. With it, you can give furniture a view of ancient. To do this, apply a layer of varnish, and while it is not completely dry, covered with a crockel varnish. When drying, small cracks will be formed, which imitate the surface of the antiques. In the future, they can be filled, for example, gold paint. The most interesting is the combination of contrasting colors of paints and varnishes.
Veneering. This technology received its name thanks to the main material - veneer. It is represented in the form of thin sheets of wood most different breeds. Elements are cut out of the sheets according to predetermined measurements. Thus, with the help of the usual stationery of PVA, they are fixed on a pre-prepared and projected surface. For smoothing it is necessary to try the surface with a hot iron.
Note! The most advantageous on one object of the furniture will look at a combination of several techniques. For painting a wooden surface, experts recommend using acrylic paints. For lacquered furniture, you can apply car paints in the cans.
As you can see all the elements of wooden furniture that have not lost their strength and functionality, can be updated using various technologies. Thus, it is possible to restore during repair work And every time old cabinet It will look more spectacular and better than the previous one. In addition, he will fit well into the existing interior.
See how to renovate the old wooden chair in the decoupage technique:
Restorations with their own hands are subject to exceptionally high-quality wooden furniture - it must be understood and recognized.
Inhale the second life makes sense only in what served as faithfully for many years. What was done by masters with a capital letter.
Agree, the furniture from the Chinese chipboard is unlikely to fall under this concept. Her destiny is disposal.
Old furniture in which the soul particle was embedded, should not die. Such things are the elegant decoration of any private house, any spacious apartment. With the mind of "refined" wooden furniture can be a key accent in the interior, inspire to create interesting design solutions - From classicism to Provence.

If small frivolous "injuries" is present on the furniture - scratching, scratches - then they can be simply painted. Than? Any artistic paint: the only thing - it is necessary to carefully pick up the color. You can hide the "pumped" place with a special composition or a common transparent nail polish.
With deep scratches and cracks successfully fight with the help of furniture wax. You can find transparent or colored, soft or solid samples. Heat and rub the tool. In the case of the use of transparent wax, the plot from above will need to paint enamel or color varnish.

Transparent wax is able to help your "property" repeatedly - it is more profitable in economically.
In the presence of chipping or deep holes on the surface of furniture, it will have to go to the store for putting on a tree. The means should be applied neatly, thin layers, giving each of them to dry well. When the defect is completely eliminated, the site must be handled by sandpaper, wipe and hide varnish.
If the condition of your situation is so serious that one varnish, paint and putty can not do, only the capital restoration of wooden furniture will help with their own hands to change the atmosphere in the house.

Restoration technology step by step
Note! Water should not penetrate deep into the wood - just rinse.
If there is a need to glue individual elements of the design, you should use two-component epoxy glue. Both surfaces are lubricated (withstanding a certain pause) and tightly compressed. During the day, things do not concern.
In some cases, the restoration of the old wooden furniture may require replacing the backs, walls, doors, legs. What to do? Certainly contact experimental mastersSo that they make an identical part. At home, it is not always possible to actually turn such a scrupulous thing, because machines, cutters, etc. will be required.


Restoration of oak furniture, as well as garbage furniture, ash, ate - a definitely worthwhile event, throw out such only if you can do nothing at all.
Grandmother left you antique Soviet furniture of the 1930s? Parents awarded the old cabinet of the 60s? Do not rush to get rid of them! In this article you will learn how the restoration of Soviet furniture is fulfilled with your own hands, or rather - how to update the old furniture so that it began to please your eye again. Photos of successful experiments are attached. So…
Most of all in the old furniture is irritated poorly closing doors. If you are going to take up such a thing as the alteration of Soviet furniture with your own hands, you will first have to buy new fittings, find the material for sealing the loose holes (you can use a putty, dowel or corks), get a screwdriver and a screwdriver, and then pretty work on the repair Doors.
We also advise you to look at the rest of the fittings. Sometimes a simple replacement of old-fashioned handles may be enough for the cardinal transformation of furniture. As for the staggering legs in chairs and tables, then they will be able to put them in order in any workshop.
Before switching to the alteration of Soviet furniture, it should be cleaned carefully. Restoration of Soviet furniture with their own hands begins with removal of the mud and soot, which is recommended to perform with a conventional sponge, soap made on the basis of any vegetable oil, and warm water. To clean the most problematic places - corners and cracks - use a soft toothbrush, for narrow slots - wooden dowel, pointed from one end.
Flash and frown surfaces of Soviet furniture must be put in order. For grinding, use sandpaper or a special grinding tool (who has what is). Any cracks can be carefully close in a putty, after drying which this place will need to be collected again.
Tip: Before spacing and painting the surface, it is worth treating the primer - then the grip will be better, and the appliant paint or putty will fall evenly.

The fourth stage of the restoration of Soviet furniture with their own hands is decorative finish. Coloring, lacquering, painting, decoupage of furniture, decoration stickers - Here you will have to make sure and choose the most suitable option. Perhaps you will inspire the ideas given in this article.
Let's start with the most popular and simple way Update old furniture. Here you will learn how to paint furniture of Soviet times.
Painting of furniture should be performed only if it is made of cheap tree species (pine, etc.). If your Soviet furniture is made, for example, from oak, it is extremely recommended to paint it, because it will decline its cost forever.
Restoration of Soviet furniture with their own hands is usually done with oil paint. How to paint furniture:
If you restore the Soviet furniture of the 50-70s, which was made in a minimalist style, then for its painting, black color is perfect, as well as pastel light tones. With this finish, it will become an excellent accessory for the modern interior.
If you want to more creatively approach the painting of furniture, and you do not own hand painting, then use templates. They are sold in stores, they can also be printed from the Internet and cut on tight paper. Before applying the drawing on the furniture, stencils should be fixed with adhesive tape.
Restoration of the chest do it yourself:


Also read:  How to update the old cabinet:
 How to redo the old bedside table and chairs:


It became very fashionable to paint furniture with a thin lace. Just secure the lace tissue on the surface of Soviet furniture, then apply paint. The result is amazing!

If Soviet furniture is made of valuable wood, as we said above, it is better to cover the fresh layer of varnish than to paint paint. How to update old furniture through vapor?
First, when remaking or restoration of Soviet furniture is performed with your own hands, it is best to use oil varnishes. They approach all types of wood and form very durable, shiny and moisture-resistant coatings. The only minus is a long period of drying (up to 12 hours). For comparison: Lac Shellac dries in 1-2 hours, and nitrolakes - and at all for 30-40 minutes.
General rules for the alteration of old furniture:


We also want to give you an example of a special way of lacquering, which is performed using a special varnish - cracker.
For the alteration of the old furniture today there are a lot of varnish varnish varnish: with the effect of patina, gilding, etc. The most common one is applied with a thick layer on top of the main paint layer, after which it is covered with different color to highlight cracks. Also, the multiple varnish can consist of two components: the first is applied to form a treated surface, the second - to create decorative cracks.

The restoration of Soviet furniture with a cracker is perfect for lovers of antiques and country style. As, however, the next our method is decoupage.
The ownership of decoupage technique will help you turn the old Soviet furniture in the real designer masterpiece. Decoupage of old furniture is performed using the following tools:
In search of inspirational ideas and materials for decoupage, the Internet will help you. For example, we especially like these 2 examples of how to update the old Dresser by the Decoupage method:

Original furniture in Provence styles or Vintage is ready!


 How to update the old wall
Those who are interested in the alteration of furniture do it yourself - here are your ideas, how to upgrade the old Soviet wall with decoupage and new paint:


Liked? Then read: !
Restoration of Soviet furniture do it yourself Updated: October 27, 2015 by the author: Margarita Glushko


