Want to make a real crossbow, which will not only look like a look at him, but will shoot? Then do not pass by and read our article dedicated to the topic how to make the crossbow with your own hands. In the article, we will not only tell about the intricacies of this case, but also show the whole process in the photo. The topic is especially relevant in the summer when you can go to nature and shoot on targets. And the thing made with your own hands will delight not only the eye, but also your friends or acquaintances who see such a product will certainly conceive the goal and the desire to possess them!
Among ordinary tools created by itself, definitely wins onions. However, crossbows also enjoy great popularity. If you want to make the crossbow with your own hands, you should only read the instructions below. The medieval design is chosen as an example due to its simplicity. Such an arbelt does not require welding metal, it can be done at home, it also does not imply the presence of springs, as in its other, more advanced variations.
All you need for the manufacture of a simple medieval crossbow is a desire to make. Initially, you need to find a suitable stick for the basis of the design. It is recommended to use the cherry, because after drying the wood saves good characteristics elasticity. When a suitable branch is found, it should be carefully chopped it up, completely remove the bark and leave to dry in a warm place.
Usually the drying period is about 5-7 months.
Step-by-step instruction:
In addition, it is recommended to immediately bend a stick to the stick so that it does not cracked in the future when processing and fixing, as well as during operation. If there are no cherry in the district, you can use the elm or other alternative wood.
It should be remembered that for good strength, durability and elasticity of the bearing part of the home crossbow, it is necessary to stand pretty. Moreover, in this case, the chances of a crack will significantly reduce during the operation of the crossbow.
To have the ability to practice and to eliminate the need for re-waiting, it is recommended to prepare several sticks at once.

On the bed of the improvised crossbow, you can use any type of board or dry wood. It all depends on how accurately you want to repeat the medieval model of the gun.

When the wood is selected and processed, in its front, you need to make a recess to accommodate the arbulence. You can make a recess by any tool from the mill to the metal to a conventional knife.
The next step of making a crossbow with their own hands at home is the drilling of holes for the bolts for the bow. They are placed at a distance of 8-10 cm from the front of the bed. Previously, the holes were made heated by the metal, so you can also use this method if there are no suitable tools at hand.
Moreover, if you have no bolts at hand, you can use the same tree.

The top plane of the bed must have a groove in which the crossbow bolt will be located. Often such a chute make round, but it is recommended to ascend it with triangular to improve the accuracy of the bolt.

When everything is ready, you can fix the bow. It is applied to the made cutout in the front of the bed and firmly brings the rope to the bolts installed earlier or their wooden alternatives. This will be enough, but for more dense fixation it is better to use glue.
The latest element of the homemade crossbow is the organization of the desired mechanism. Usually use the easiest lever type. The crumple drawing is shown below, as such a system acts.

When the brake lever is descended, the pin is instantly allowed, and it starts the bolt forward. It is important that this system has no safety mechanisms, so the bolt must be installed solely before the shot.

The created crossbow must have the power of tension of about 40 kg, so the design will not fall into the list of cold weapons. The tension is carried out by hand, so additional mechanisms are also not required.

Above in the photo schematically depicts crossbow with all the necessary dimensions. Its basic value is to understand what sizes should be part of each other. All its length is 732 mm, with a height at the point of attachment of 223 mm. In the drawing "Pistol" handle (like a pistol), for a reliable and convenient grip.
The second hole is made to relieve the structure, since the overall thickness of the plywood handle (can be made of wood) 30 mm. The shoulders of 302 mm long are a universal option, their total length is 532 mm. For the first time, it is enough to do exactly according to the dimensions specified in the scheme, and after testing to make adjustments.
If you do not want to buy an expensive crossbow (and prices sometimes roll over $ 1000), you can make the crossbow with your own hands. It is not so difficult, as it seems at first glance. The crossing design is quite simple. Crossbow can be made from what is available at hand, replacing missing materials on similar. For firing on targets, homemade crossbow is quite suitable.
General view of the crossbow, which can be made with your own hands according to the drawings
In the design of this crossbow, the developments of manufacturers in the field of weapons are used. The drawings presents the globe block construction. When you follow the instructions and comply with all sizes, you can make a high-quality and good crossbow with your own hands even at home

To begin with, it is advisable to carefully examine the drawings of the crossbow and start assembling with their own hands. Make a crossbow with your own hands - the task is not simple. But thereby increasing interest in work! After all, the homemade crossbow can bring greater joy and respect for the performer.
Crossbow device: bed, shoulders, butt, trigger, sighting devices, block system. For the manufacture of beds applied natural tree, Whole or glued bar, mostly solid rocks. The exact dimensions of the crossbow can be viewed in the drawings. The shape of the crossbow choose themselves, guided by the convenience and ergonomicness of the bed, desired by image. When choosing, it is also necessary to consider whether you can make such a form correctly.

The use of a log from small arms, makes it possible to significantly reduce labor costs for the manufacture of crossbow. The main thing is to pick up suitable size. The trail from the barrel, remaining in such a bed, must be scored by wooden bars, firmly putting them on epoxy glue. The butt and the applying lining of the crossbow can also be made of wood. The butt will be attached to the guide and serve as the basis for the trigger.

The proposed for assembling with your own hands, the crossbow has a block design. This allows you to compensate for the load when the rigger is placed and save power. Block crossbows are most popular among hunters, because You can wear an arbelt in the corded state long enough. Such a design is actively using Horton in the production of its crossbows.


Pay special attention to the processing of guide arrows and theetics. The clarity of their finishes greatly affects the accuracy of firing. The lines of the guides must be immaculately straight and smooth. The optimal choice There will be grinding on milling machine And the subsequent treatment of sandpaper paper with small grain. Next should polish the guides. View the size of the groove of the guide for the arrow can be in the drawings. Cross, with shoulders attached to it, is installed from the end end of the bed. Usually it is made of aluminum blanks. The tree can also serve as a suitable material.

The creft sight should consist of a whole fly. Also, an optical sight can be installed on the crossbow, providing a mount for aiming plank. Vertical amendments are performed entirely, reinforced on the lid of the trigger, and the horizontal - a flour, reinforced on the bracket of the elastic element.
Variants of the designs of sights and aiming devices for the crossbow can be much, depending on the possibility of manufacture, availability of ready-made sights from ordinary weapons (pneumatic rifles), etc.
It should be borne in mind that the trajectory of the flight of the crossbar (arbalet bolt) is eliminated, so the whole must be achieved significantly above the flies. The angle of exceeding the aiming line will depend on the test of the starts, the tension of the tension of the tension, DRECTENCE OF PREPELS, etc. In our crossbow at a distance of 50 m, it consumes about 6 °.
Content are the constructions of the whole, which are allowed by its clock or lacking during transport. It will also be convenient if the whole can be adjusted manually, lifting or lowering the bar. Thus, you can tar bullies under different conditions (distance to goal, weight of arrows).
Arbelt, the manufacture of which is described above, is described above, it is racchitan for the printing bolts with a diameter of 8 mm and a length of 450-470 mm. They can be easily made from a duralumin tube with a thickness of 0.5 mm thick. A front of the bolt is attached to the bolt and the inner, rear - plumage, as they do for the launch of onions. It should be borne in mind that the twitching bolt for the crossbow, unlike onions, should not have a cutout for the ladder, it should be flat. It can be chopped out of a tree in the form of a plug and insert into the end of the tube, pre-lubricating glue.
For the manufacture of homemade crossbow, you will need:
* Barbed non-resinous wood rocks, size 700x10x40 mm.
* Second sheet springs car Moskvich.
* Profile pipe 50x50x2 mm. 10 cm long.
* Profile pipe 15x15x1.5 mm.
* A small segment of a 2 millimeter sheet metal.
* Metal stainless steel 4 mm thick. and 0.5-1 mm. (for trigger).
* Steel corner 50x50x4 mm. 35 cm long.
* Rod d \u003d 8 mm. 40 cm long.
* Bolts with nuts d \u003d 8
* Stainless steel molding with VAZ-2106 doors 2 pcs.
* Metal rollers 2 pcs., Lifting the glass mechanism from the door of the car VAZ.
* Cable d \u003d 3 mm. 3 m long, two loops end.
* Epoxy resin, wood medilion, wood varnish for outdoor work.
* Two small springs (stretching).
* Dozen nails for rubberoid, one nail two hundred, tube d \u003d 6 mm., Small washers.
Tools will use the following:
*Welding machine.
* Circular hand saw.
* Electric drill with revolutions adjustment, carbide drills for metal d \u003d 3, 5, 8, 10 mm.
* Bulgarian, cutting discs for metal, grinding discs on wood.
* Keys, Passatia, screwdriver, vice, narrow chisel, knife.
* Fire, sandpaper.
* Protective glasses.
Item 1. Production of bed.
Take well dried wooden barberI had from the birch, sketching the bed sketch on it. The size of the butt is done for themselves (under your height), and the box depending on the length of the arrows that you will use. I use the arrows of 440 mm, but I had to save on the butt, left only 300 mm, and the total length turned out to be 740 mm, did not risk anymore.

Having drawn the markup to the selection of the guide, for the plumage of the boom, the width is 5 mm, the depth is 10 mm.

Using a circular saw, we cut the grooves for the entire length to the end of the trigger (lock).

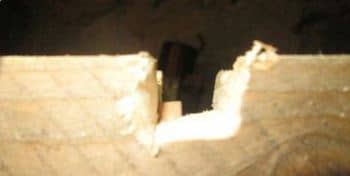
It should turn out something like this.

Using a drill d \u003d 12 mm. We choose the cavity under the trigger, flatter the ledges of the chisel and the knife. We drill a hole under the trigger, we melt the chisel and a knife.

Item 2. Manufacture of a lock or trigger.
As the basis of the castle, take the type of "nut". So that nothing rust, we will use a stainless steel, take a sheet with a thickness of 4-5 mm, if you fail to find such, make a set of several sheets glued together and taken on rivets. Blacks in the form of parts on metal.


With the help of a cutting disk and a grinder, cutting on the markup of the workpiece.

In the center of the "Out" we drift a hole under the rotation axis d \u003d 6 mm.

We proceed all sides with a file.

Grinding emery paper, achieving a completely smooth surface.

It should turn out something like that.

Pull the remaining elements of the castle, whispered.

The trigger lengthening with two thin stainless steel sheets, fixing on homemade rivets.

On the sharpening machine we achieve the desired form of blanks.

From the thin sheet of metal we make the case of the trigger mechanism.

We drill in the body whispered three holes d \u003d 2.5 mm, one for the axis of the attachment and two under the fastening of the springs.


Attach the spring smoking spring spring.


Let's look at the table as the details in the corded state become.

And as after a shot.

We apply one sidewall of the case on the inside of the mechanism and drill at the place of the hole under all axis.

From the nail of two hundred, with a diameter of 6 mm, we will make the axis for the "walnut".

We scream with the sharp end of the nail.

We measure the length of the future axis, we spawn.


From thin nails for rubberoid, we will make the remaining axis rivets. Bulgarian delete foals on nails hats.

Now they will adhere to the body.

We will install whisper on the axis in the case, we use intermediate washers.


We cut off the excess length of the nail, leaving 1 mm. On both sides for the rolling.

Using anvil, rolling the hammer end of the axis.

Drills the hole under the axis with a strut, whispered sprout for fastening.

From the appropriate tube, scold a spacer sleeve on this axis.

We move towards one side of the housing.

We install the axis, the sleeve and engage in the spring.

We collect half the hull together.

We pump up extra long, leave the protrusion of 1 mm. Under the hammer.

Rolling.

Now you can put the largest axis-rivet castle. We combine holes.

Take the previously measured and scaled axis d \u003d 6 mm., Immediately we will immediately begin the hammer on the one hand.

Install in place.

And also rolling, the main thing is not to rearrange, so that the movable mechanism does not appear inside.

Item 3. Installing the lock mechanism in the bed.


If something interferes well to sit down in place the castle, we are refined by the chisel or knife. After installation, check how the trigger goes.

If everything is fine, you can drill holes for fastening screws and tighten them into place.


Now we need to decorate with the door of the VAZ-2006, they are from stainless steel, too, which is very good. To give them additional stiffness, epoxy resin was flooded inward.

After complete hardening, after a day, we will be drilled in each four holes d \u003d 3 mm., For fastening screws.

Making tripers for the heads of self-tapping screws so that the rovers do not engage when it will slide it.

Small emery paper polished hole outlets to remove all sowers that damage the cable.

Finished guides set on the bed.

Monitor the screws do not pass through thin places.

We check the lock to go without hooks about guides.


Paragraph 5. Production of an arc or shoulders.
From the same donor doors, remove with the help of a grinder, the rollers of the glass raising mechanism.

Of these, we will make blocks on the shoulders, and the arc itself from the second sheet of springs, the old car Moskvich.

We produce pads, for fastening the springs to the lie.
To do this, out of the corner 50x50 mm. He drunk composite elements to collect with welding, such a mount (block).

We treat weld seams with a grinder. Drill the mounting holes d \u003d 10 mm. under the bolts.

On the finished sample and the size of the resulting pads, we make grooves for fastening in the bed. We are trying to land, we achieve a tight navigation and fastening. According to the estimated position of the future theater, we plan and make a cross-cutting groove in the sidewall bed, 70 mm long. 10 mm width, the lower tenants will go here.

Bend and weld the bracket for the leg (stirring).


Ears for blocks.
Of profile pipe 50х50 We will make eye for mounting rollers-blocks to the arc (springs).

The most difficult thing in the manufacture of an arc itself from the springs at home is to drill holes. It is necessary to drill a drill on low revs so that the drill is not burning, constantly apply water. If possible, drill the drills of different diameters, from thin to a thick with a step of 0.5-1 mm., Constantly sharpen the tool.
Fresh braces for short M8 bolts, stake hats.

The refrigera to the block is fed by two M8 bolts with subsequent small welding along the edge of the mount.


Now we need to open the bed with a lacquer and dry.
We establish a block with an arc on the bed, sedentible with a hammer for a tight landing of a metal tree.

We insert and tighten the bolts on the M8.


From the long bolts M10 we will make a reduced length with a short thread bolt-axis under blocks.

Anchor will take the tube and make spacers for the axes of blocks from it.

Drill in the ears of the hole d \u003d 10 mm. To install blocks. We install hard tips of the loop on the cable.

Install the block with a cable on one side of the shoulder. The nut does not delay much so that the roller does not pinch.

In the nut and bolt we drill the hole under the heel.


We set the stud and press it with a nut in the direction of unscrewing.


Wake up the cable through the hole of the bed and do the same with the installation of the roller on the other side of the shoulder.

Paragraph 6. Top of the castle.
From the profile pipe 15x15 mm. We pump up two segments of 120 mm. From the sheet metal weeping with a grinder of two (g) shaped blanks, one rectangular plate (on the top) and a triangle (on the back).

We combine all the details together, we clean the welding seams with a grinding disk so that it would be a solid detail.

From the old folding steel meter, make the elastic boom holder.

The photo shows the reiki fastening bolts under an optical sight.

Also, the only bolts at the same time pushed the arrows holder.

The rack of the sight ( dovetail) From the same sheet metal of 2 mm., with rapid sides for fastening optics.

The square lattice on the optics rack is visible to lift the back and thereby tilted the sight, for the correct targeting on the target further 25 m.

We install the lock bracket on the bed and drill holes for fastening, screws and bolt M6.


We spin small screws so that they do not enter the boom plumage channel.

Tighten the tapping screw.

Additionally, we serve the hole and install the last bolt.


Install an optical sight.


In addition, to shoot from such an instrument will be interesting and himself. Everything is done quite simple, here you can quite do manual tools. Crossfather turned out quite powerful as for training shooting. It uses double shoulders, which increases the rigidity of the bow and allows you to throw with a high speed of the arrow from the tree. As a tip for arrows, the author uses selflessness, but you can show fantasy and come up with what is more interesting.
Materials and tools that used
List of materials:
- Bar;
- PVC pipe;
- two self-pressing;
- strong rope;
- wooden rods for arrows;
- adhesive tape (for plumage).
List of tools:
- hacksaw or pendulum saw;
- Lobzik;
- Ribbon grinding machine;
- drill;
- marker;
- roulette;
- screwdriver;
- construction hairdryer;
- vice;
- oil for wood processing;
- Paint for painting onion (optional).
Crosspost manufacturing process:
Step one. Cut the blank
The first thing we cut the wooden bar, it will be used for the manufacture of the base. We need to be needed to cut the pipe. You should have two parts, long and short. Size view in the photo.


![]()
What to say in the first lines of this article: in Russia, the CIS countries and most countries of the world hunting with crossbow illegal, and the arbalet themselves (if the indicator of their tension exceeds 40 kg) is equated with cold weapons. For wearing and use of them, the penalty is assumed. Why, in this case, I give advice on the manufacture of objectively dangerous thing capable of delivering the readers to the problem? Because the ability to hunt with the use of the most diverse weapons, including self-made, and even illegal, may one day come in handy to each of us. There are few people think about it until food stores are fulfilled by stores - but too much in an unstable time we live in order to say with full confidence that it will always be.
In one of the previous articles, I wrote about the hunt: with the help of this non-serious at first view of the weapon, it is easy to extract a small fur beast, bird and reptile. From the crossbow you can also shoot the game of medium sizes. Of course, we are not talking about toys from legal weapons stores: You may have seen such on sale - elegant, light and low-power. The weak crossbow is designed for sports shooting - it should be understood how great the difference between it and a real combat device. That is why the latter under the ban. The arrow released from a powerful combat armor pierces a person, even if he is in a kevlar armor.
But so far the BP did not hit, we are with you peaceful hunters, and the use of deadly weapons against people do not think. Why I write now about homemade Arbalet for hunting? Why not buy ready or not to order experienced Masters? Because legally nothing worthwhile for you. And illegal weapons are generally better not to buy, if you do not want to get problems with the law. Yes, to have something slaughter in the covers and be able to use them - it is useful, but no live soul should know about what you have it. It is better not to devote even friends and relatives - not to mention full of foreign people like sellers and couriers.
 How to make a crossbow at home?
So how to make the crossbow with your own hands? First of all, decide which power weapons you need - its design and materials directly depends on this. For hunting for ducks and hares, the simplest device with a wooden arc is suitable. On the beast, the latter is already needed. There are also so-called composite arcs, which are a combination of several materials (traditionally - wood, deer horn, housings, but now different plastic varieties are used more often). Them specifications Excellent, but it is almost unrealistic to produce such a detail "on the knee" to the knee. In order to avoid injury among readers, I will not even give here a description of the assembly of the composite arc.
My opinion: it is advisable to use a metal arc. The power supply will not be superfluous - in addition, the wooden parts fail to fail, which is also fraught with injuries for the arrow itself. Since your goal is to make a fairly powerful crossbow, look for familiar or in the secondary market of springs from Soviet cars. Nothing better for use as an arc, mankind has not yet invented. But if you still failed to get this rarity, take any elastic metal strip of 2-3 cm wide and a thickness of 3-4 mm.
The bed is most often made of wood (spruce, aspen), less often from metal. The more powerful planets are planned, the more durable and massive should be this part. The design of the bed may differ, but the groove for the arrows on it should be, as well as the butt and fastening under the trigger, arc and other functional elements.
As the instrument, an inelastic rope of synthetic fibers, a steel cable or a guitar string is used. Perhaps you will be surprised, but it is the first of three options to demonstrate best indicator tensile strength. Durable, cheap and accessible - what else is needed? .. But what: impregnation from bee wax It will extend the life of a synthetic theater, protecting it from moisture and friction.
The mechanism of crossbow, rollers and fastenings is the most interesting. "On the knee" make them difficult if you do not have the skills of working with the metal. Below, I cite the drawings of the homemade plain crossbow (1) and a powerful combat (2). All parts that cannot be made independently, order in the workshop, providing drawings of interest to the details.
Drawing a simple crossbow (1) * Click to increase the size *
 Battleframe drawings (2) * Click to increase the size *


How to make arrows for crossbow?
Bolts - arrows for crossbow, make your own hands easy. For these purposes, the tree is most often used, less often - plastic and metal. What is the tree better? The wooden bolt has optimal weight: light plastic arrow quickly loses speed, and the cutting of steel wire is heavy and will not fly away. The tree should be extended along the fibers for better flexibility, and then dried well. At the end, we leave the propyl, in which the tip will be inserted.
The tip itself needs to be cut from the steel sheet (thickness is not less than 0.7 mm) with metal scissors and modify the grinding stone - align and sharpen the edge. Tips insert into the propyl, smearing it with epoxy. It is still possible to climb a thread for the fortress, and on top of apply a layer of epoxy.
Options for manufacturing a bolt of bolt is also a lot, but the best, in my opinion - bird feathers. Ideally, goose, but they will fit even from the tail of pigeons, koi to find a city inhabitant is much simpler - they are lying under their feet. Split feather in half, every half cut in half and glue to the arrow. For the fortress, we adhere to threads.
This is what happened in the end:

It is important that all bolts are the same by weight and length - it will be easier to target your homemade crossbow. And it is necessary to target it: the hunt will wait, first you need to make a good new weapon, feel it. Even if you have experience shooting from the crossbow, this one will be a little different, more "yours" - like any thing made by your own hands.
No similar articles.


