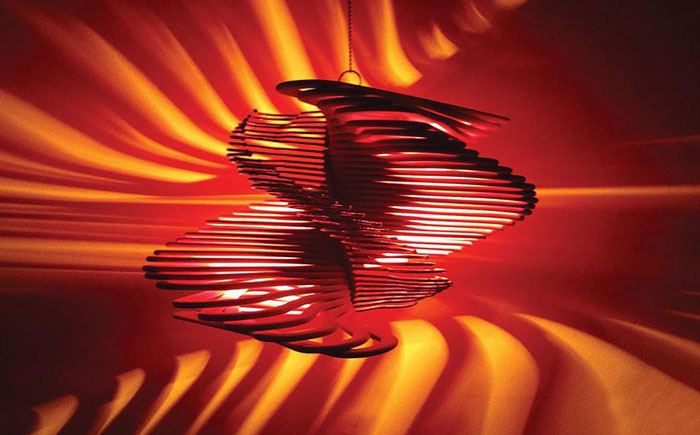
The flooring is called a high portable (mobile) household lamp, tabletop or outdoor. It is believed that if his height H is more than twice as much as the largest diameter of DA lamp, then this is no longer a lamp, but a lamp. However, the geometrical face in this case turns out to be very vague. Therefore, determining the flooring, it is better to proceed from its aesthetic meaning: unlike the table lamp, the flooring is able to enter the number of paramount of meaningful elements of the interior design and even become key in their row (see photo below); Especially when it shines in a native room.

Collect the flooring completely with their own hands means not just to decorate the room, but to express myself and your vision of his appearance, without tormented with the choice of finished samples. Of which, most likely, no one completely like you. Make the flooring is easy, but because it is narrow and high, it is necessary to ensure its stability. Descriptions suitable for this technological techniques and is dedicated most of article material; Regarding the overall design, we will restrict ourselves in the main visual examples and instructions on their technical implementation at home.
Constructing your unique and unique flooring, let's go from the bottom up: from the stand at the rack to the lampsuit. On how to make a lampshade for a lamp, we will stop more, because Shador lamp, first, more than a table lamp. Secondly, it should be easier to ensure that stability - and stronger or very simple and cheap in the manufacture, in case the flooring is still a leakage. Thirdly, the lampshade lamp must have good lighting properties, since Torshor is at times, it is necessary to fully or partially, provide general lighting. And finally, the lampshade lamp must be beautiful - he means the same thing that the entire flooring in the interior.
The flooring is arranged in the same way as a table lamp, and it is no more difficult to make the flooring on its own, if you consider the following: working out the design, you need to keep in mind the contradiction between the mechanics of the flooring and its aesthetics; in desktop lamp It is not expressed so clearly. Namely: on the mechanics, the flooring should be as much as possible below and easier at the top. The low position of the center of gravity will ensure due sustainability on the support of a small area and a slow smooth drop when tipping - it will be possible to catch. However, aesthetically, visually, the top of the flooring should absolutely dominate his foot. To some extent, this condition contributes to the fulfillment of the first - large light lampshade at tipping further slow down the fall due to its aerodynamic resistance.
Torch design relatively small height (H / DA<3,5), напр. настольного, показана на рис. ниже. От таковой настольной лампы она отличается обязательным наличием несущей стойки из стальной трубы и увеличенным утяжелителем. Брать на стойку трубу со стенками тоньше 1,5 мм нельзя – резьба под патрон лампы (см. далее) получится недостаточно прочной и при опрокидывании торшера может сломаться. Мягкая диэлектрическая втулка предохраняет электрокабель (обязательно с двойной изоляцией; жилы от 0,35 кв. мм по меди) от протирания о сталь; делают втулку из отрезка ПВХ трубки или тонкого садового шланга, туго вставленных в отверстие несущей стойки.

Design of low latter
Excellent homemade decoration (decorative casing) The rack is obtained by a plastle with a polymer clay (plastics, cold porcelain) according to a template from pet bottles strut or foam slices. Clay is produced in various colors; In principle, and completely with your own hands. Dried by a combined method: to the initial curing at room temperature, and then to full strength under the air jet from the domestic hair dryer, the polymer clay is very durable in a layer of 2-3 mm; From it you can make a lampshade, see below, and as for the lack of flooring from plastics, then it is almost empty inside, just compatible in itself a light weight with visual significance.
Note: The decorative casing of the rack can be any of your taste, or not at all, but remember - mechanically heavy bottom and easy top!
With the help of plastics, decorative decoration of the floor strut can be made transparent, silicone. In this case, the polymer clay is used as a material for the destroyed injection mold.
As with their own hands from silicone, a transparent rack for the flooring is made, shown in Fig. Explanations are required mainly by pos. 3-5:

Note: A completely transparent rack of a silicone flooring can be made if it use a rigid acrylic tube as its carrier core. Glass is not suitable - fragile, and on it the threads under the cartridge lamp do not apply.
Sureness is particularly sustainable for floor lamp; Especially if it is a console, with the lamp attributed beyond the limits of the reference site, possibly moved in 1-2 planes and recorded in a specified position. In this case, it is necessary to sacrifice either convenience, making the base of the flooring small, but so hard to rearrange it by tale or telpher, or resistant and possibilities of light adjustment, pos. 1 and 2 in Fig.

A sufficiently convenient and stable floor floor lamp with light adjustment can be made in the style of steampunk. Human it means - from the details of old mechanics, but it will fit far from every interior, pos. 3. And sometimes in attempts to combine design sweeps with safety and ergonomics requirements are born products capable of frightening machines in the factory workshop, pos. four
Completely resistant floor flying, combined with a bedside table (Tumb) or a rack (servant lamp), see fig. Tumbler-lamp can be without fears and make any calculations to make a console with a rotary lamp. For budget odds or a small bedroom, this is the perfect solution: if you desire, the light turns the console either above the bed, or above the chair or table.

If I want the flooring to look exactly the flooring, he stood on his own on the floor and was rearranged without tension, then it is possible to make it a rather heavy stand according to the scheme in Fig. below. Visible details are made of wood or other well-looking and easily processed material, and the slab-weighting agent (approx. From 180x180 in the plan) can be any - uneven, rusty - because She is invisible. The carrier stand is attached to the stove, too, as you like - on thread, welding, if only firmly it was. The decorative base and the lining in such a scheme, as we see, do not experience destructive stresses, even if the flooring is tilted with a pink.

Fix the lampshade on the floor stand reliably and so that the type does not port, it is not always possible or difficult. For example, plastic although it is durable, but rather fragile, and a soldering on a shiny naked tube "to improve" is visually practically impossible. Therefore, the responsibility of the hold of the lampshar often has to impose on the bulb inlet bulb.
An ordinary hanging cartridge (left in Fig.) It is possible to use only if the lamp shade is attached to the rack; Then it is screwed by a shank on the thread of the carrier tube. To replace the light bulb, you will have to climb into the lamp to the lamp, and the probability of its breakdown when tipping high. True, in this case, the lamp with the cartridge is protected better, so the suspension cartridge is desirable to use with a flooring with a rack of sufficiently durable and viscous material, for example. From a tree, and lampshade mounted to her.

Cartridges with skid-skirts (right in Fig.) For fixing the lampshar, preferably in all other cases. Fastened to the rack the cartridge with threaded skirts in the same shank M10 or M12; For the lamp, the last option is suitable. If the flooring with such a tartrone belch, breaks first of all the skirts, so under the fastening on the cartridge, the lampshar frame (see below) should be made as easy and elastic.
What is the lamp shame, it seems to be known. Sharpecore lamp in general is the same as any other for the lighting lamp, and must correspond to the same conditions. However, in view of the lower stability of the lamp and the larger exposure to damage to its lampsuer, additional requirements are presented, see above. In the best way they satisfy the frame lamps.
The most durable frame lamp shade in the form of a truncated cone. It consists of lower and upper rims (hoops), ribs holding upper rims, stretch marks (rods), which keep the most frame on the rack, and possibly rings for mounting on the cartridge. Material, except for mounting ring - steel wire 1-2 mm; Ring - from sheet steel 0.35-1 mm.
The size of the conical lampshar of the lamp is given to the pos. 1 and 2 Fig. From the point of view of lighting and changing dimensions, it is desirable to withstand proportions. For example, if the diameter of the lower rim take, say, 250 mm, the top diameter will be 250/260 \u003d 1.5625x100 \u003d 156 mm, and the height, in the same way, 170x1.5625 \u003d 265 mm. Although, of course, preference in these circumstances should be given design: from incorrect proportions the appearance will deteriorate more than lighting equipment.

Note: The most durable lampshade with a mounting ring, extended by 20-30 mm down (pos. 2a), but, because The fastening of the high flyer is then clearly seen, then the fastening ring of its lampshar is often, on the contrary, they are putting up on the same up, pos. 2b.
Power schemes of frame lamps are given to pos. 3-5. Their comparative characteristics are as follows:
Details of the frame lamp shade are combined by soldering, except for fastening the mustlerans to the rings under the cartridge, where it requires a pre-mechanical connection. Solder - ordinary, village of any brand, fluxes - orthophosphoric acid and rosin light (non-ferted); Soldering iron - from 60 watts.
The solution of orthophosphoric acid for soldering is sold in electrical and radio logs. This is an acid of medium power, not flying, not very toxic, so only latex gloves will be needed from PPE. Part of the store solution will need to be used to prepare 6% flushing. You still need a fine naked copper wire. The sequence of operations to assemble the carcass of the lamp shade on the soldering is given in fig:

Collecting the frame, do not rush to solder immediately. 20-25 minutes of exposure after the winding of copper on the dry will not affect the strength of the laces, if the air indoors is clean and not overly stuffed. Therefore, first the frame is collected only on copper, check its evenness, the aloperation of the hoop, and then all the joints immediately solder.
The frame assembly is starting with the fixation of the mustles in the rings under the cartridge (pos. 3 in Fig.), If it is; Crush the loops of the musta under the passage. If the frame will be attached to the rack, it will be necessary to prepare a wooden bug that imitating her headband with deaf holes under the mustlera. The mustache is introduced into these temporary nests, clinks with matches or toothpicks, align in horizontal corners (yes, just like that!), And then then collect the frame.

Tightwork of the collected frame is made in the same way as the lamp lamp lamp, which there are appropriate publications. Here we mention only that the simplest classic method of tightness of the conical lampshair is a textile ribbon, pos. 4. And under the curly (shaped) frame (pos. 5), it is not necessary to make a complex sewing product on the patterns, especially since the seams will be shifted. Cut the shaped lampshade can be one sleeve of fabric on ribbons, pos. 6 and 7.
Note: Sometimes lamps of lamps are made of aluminum wire - it is easy and can be finished with hands. Soldering aluminum is currently not difficulty - special solders and fluxes are on sale. If you intend to do the usual rosin and seams, then aluminum parts under the soldering can be copied with the old "pioneer" way, see fig. on right. Instead of batteries, they take a telephone charging or a similar power supply (IP) - 3-9 V, from 400 mA. Toothbrush are wrapped with copper wire, pushing it across between rows of bristle beams. The wire is needed thickening, from 0.5-0.6 mm, i.e. It is its material that is spent on creating a layer of copper. The space under the soldering is sprinkled with copper cune powder (optional). The brush, wrapped and connected to the IP, is dipped into the electrolyte - a strong (thick-blue) solution of the same copper mood, and the work part with the effort.
Frameless lampshades are either molded behind a plastic factory, or made independently of polymer clay or girlfriend. The first, in general, the pop is a cheaper view. From the plastics on the smelted nerd, a real masterpiece can be made, see for example Lamp-jellyfish in fig. At the beginning, similar to silicone casting. Only at the same time after smelting the bool, the plastic shell is not filled and it breaks, but it is brought to trimming and decorated, if necessary. But such a technology is difficult, the road, and those who own it, probably know everything that is written in this article, and more.
The types of amateur-labeling lamps are not considered, but only individual samples satisfy the minimum requirements for lambing landscaper. For example, lampshade from threads, pos. 1 in fig. He perfectly softens the light. The light-cutting lamp is small, so that the lamp in the floor lamp with such a lamp is needed bright, but now it is full of LED light bulbs that consume little electricity and very weakly heat.

And in order to make a lampshade from threads, the air balloon is needed and lubricated with a vaseline, and to it - the simplest device for stretching the thread through the PVA glue, pos. 2. The hole with a diameter of 41 mm under the cartridge mount is cut into the finished lampshar. When the flooring is falling, the cartridge always remains safe, and a dropped lampshade straightened with his fingers; Perhaps you have to smear PVA.
Similar operational qualities possesses, and the lighting is superior to a native lamp shade from plastic spoons, see the next. Fig.:

Based on the bottle, a hanging lamp shade is obtained, like on the right in Fig. Large lampshade from spoons for flooring can be soldered on plastic 5-liter Baked, see eg. Master Class
Good soft, but bright enough, light, give LED lamps in paper lampshairs. Their main disadvantage - fire hazard - went back together with incandescent lamps. But others are fragility, impaired moisture and exposure to pollution, remained. Therefore, for a paper lamp latch, you need to take a letter, drawing or packaging paper, and paper products for the needs of the food industry or public catering institutions, for example. disposable paper plates; In the lampshar they will serve for a long time, see video.
Objects made with their own hands fill the house with special warmth and comfort. In addition, they are obtained exclusive. We offer an overview of the lamps that will completely change the atmosphere in the room, turning into an object envy from the moant of friends and relatives. Especially since they are made from everyday items, which are usually thrown away.


A cardboard package for juices or other beverages is a completely ordinary thing in most homes. Most often it is thrown away. But the Malay design Edward Chu spent a lot of time to cut them on hundreds of strips and build amazing lamps without drop of glue, simple origami principle.

Yaroslav Olenev offered to make lamps from disposable plastic spoons and became the winner in the nomination "Ecology and Design" from the magazine "Future now."

No less original application has found and Natalie Simpson for ordinary wooden hangers. It looks like they are amazing in the form of a chandelier.


Kevin Champions need to pay tribute, not everyone has enough strength and patience to ride 14 thousand bears to get a chandelier.

His vision on the problem of housing lighting in the Tire Hilden and Pio Diaz. Thanks to their lamps, the room becomes like a forest. All walls come to life and turn into trees.

Matt Ludwig Talented Welder turned out to be an excellent designer. For the JJ "S Red Hots restaurant, it made an incredibly original chandelier from the old drum unit.

Texan artists Joe O'Connel and Blinding Henkok from spare parts of old bicycles built stunning lamps and hanged them in a tunnel under the track.

It will probably be difficult to find a more original chandelier than the pumpkin from the Polish artist. It cuts stunning patterns on the peel, which are not repeated.

Original and stylish looks lagging with felt hats from Jeeves & Wooster.

One day Heather Jennings saw an amazing chandelier "Rhododendron" in the store, just cost more than 800 dollars. Then the designer decided that with his own hands it can be done at all worse. To do this, she needed paper molds for cupcakes.

Incredibly beautiful will look a chandelier made from ordinary metal four-headed twirl.

Still fresh in the memory of vases and cannons made from openwork napkins. Now it's time to knit chandeliers.

The strange option offers Fans Lego, he believes that the best way to store cutlery is a chandelier.

The big tucker is cut out of the tree, but the remaining and switch from the cardboard.

From several globes there may be a wonderful cascade chandelier, a great way to illuminate the staircase.
Make a modern flooring with her own hands from the girlfriend at home can everyone. Take advantage of advice and decorate your home with a new stylish lamp.
The lamp is an indispensable subject of the interior adding to your home of a special comfort. Under its warm, scattered light, things acquire a completely different, fabulous sound. The room is transformed completely, there is a feeling of comfort.
In the market of goods to decorate the interior, a great multitude of floor lamps made from a wide variety of materials are presented: with lampshades of crystals or fabrics, original solutions from fish scales, gold plates, wooden chips. One thing is invariably: only 4 things are needed for the lamp - the stand, leg, lampshade, light bulb. From which you can make the necessary parts, how to collect them together, consider further.
Alone to make the flooring is completely unclear. The only thing that will necessarily need is knowledge of the simplest electrician plus compliance with safety requirements. To create a lamp, there is no special rules - it all depends on your imagination. Abazhur can be associated, glue from paper, plane sparkles, shells, flowers. Lamps do it yourself - this is an opportunity to have fun with close and friends, as well as update the interior of the room without leaving home.
To begin with, we suggest to do a stand. If you have nothing suitable for home, for example, supplies from the old broken fan or a lamp, we will make a stand yourself from the gypsum. Gypsum - heavy material, durable and easy to handle. For severe stable stand, there are enough 3-4 kg of dry gypsum. They conceived a large, heavy lampshade - increase the number of plaster for the stand.
Now you need to choose a form for the future stand. Excellent for this will fit the form for baking a large diameter with removable sides. Silicone is inconvenient: it does not hold a form, and from iron with non-discontinuous sidewalls frozen plaster just do not pull out.

Pick up the "right" stick. The most practical - metal tubes. They are not very heavy, the electrical cable can be stretched inside, and not to leave hang out. So the floor idle will look more aesthetic, modern and stylish.
For the lampshade frame, prepare a net with a length of about 200 cm and the width equal to the desired height of the lamp. One edge of the grid start bending to get a circle. Diameter choose at your discretion. Cutting off the wires of the wire, start to bend the protruding pieces of the wire, creating a single frame. Tails do not cut, make them inside the lampshar. Around the perimeter for the strength of the form (so that the circle does not turn into oval) skip the aluminum tape. From the same tape, folded crosswise, make a frame for fixing the lampshar with a flappon. Frame do not secure to the lampshar. First, finish the design, then with a burning lamp, determine, at what height will be excavated by lampshade.
We start cooking a gypsum stand. Mix the gypsum with water to the condition of thick sour cream. Cover the form for baking by plastic film, lay out plaster in it. Top layer Align. Mark the middle and stick in it in advance the harvested metal tube. Be careful! The leg should stand in the gypsum strictly vertically, otherwise your future floor lamp will be curved. Gypsum will need about 10 hours to dry. During this time, you can decorate the lampshade for the future idle.
Since you have already decided on a height and diameter frame, it remains only to decide what to decorate it. Do not forget: the lamp must organically fit into the interior of your room. It can be one of the following types:
Remember, your grandmother once fond of knitting and macrame? Such laborers are very popular in Soviet times. This operation is slow, painstaking, requires skills and skills. It is possible to simplify it, putting each cell of the grid with fluffy threads and imposed on top of the colors. Do not know how to knit? Just wrap the grid with knitted threads with fringe. Get a gentle teddy lampshade.
Sea-style lampshade. All small pebbles and shells are suitable for his decoration, carefully brought by you from vacation. They can be glued directly on the grid or hook with wires from the wire. The basis can be painted in red by imitating a fishing net. Magnets will also perfectly fit into this composition.
Glamorous lampshade. Rhinestones, sparkles and glassware are wonderful decorations for your amusing. Transparent and translucent materials are unequally missing light, making the flooring center.
Tesser for children. Stylizing lampshade for the children's bedroom will help plush toys, stickers, glowing stickers. If you wish, suitable plastic toys can be glued to the leg, then everything is painted in one color, having achieved the unity of the composition.
High-tech design. Take the paint under chrome and paint her leg and stand. A lampshade with black wire, leaving small gaps. Cover it with black matte paint from the canister.
Rope ornament. Original and unusual lampshades are obtained from a twisted rope. It allows you to scale the existing framework, and you can create more original design. The lampshade of the balls from the rope of different colors looks very beautiful. To create a rope ornament, inflate the air balloon, soda it with a petroleum and put an ornament from the rope on its surface, in advance of the PVA glue. Give adhesion to dry, pour the ball - all, the lampshade is ready.
The easiest way to change the design of the lamp, without changing anything in the design of the flooring, is to cover it from above and on the sides of painted silk scarves. Effect You will see immediately, and the design will not undergo changes. Be careful, do not allow overheating, it can cause a fire!

Whatever you decide to decorate your lampshade, observe the same rule: flammable materials should not be near the heat source. We recommend using energy-saving light bulbs in the flooring. They do not heat, economical and will delight you longer.
Gypsum dry, you can remove the sidewalls in the mold and remove the stand with the leg. Since the gypsum is usually a matte faded color, we recommend the stand and paint the stack from the canopy. When it gets free, you can start mounting the electrician.
We screw to the wires of the cartridge the electrical wire and skip it through the pipe down. Display from under the stand and mount the switch. The most convenient will use the foot to turn on and off the flooring could not be flexing. Cut a wire convenient length, mounted fork. Then screw the light bulb and check if your device works. We try to lamp, we determine the height of the light bulb, fix the lampshade. All, the decorative lamp on the leg according to your own design is ready to use.
In the garage, the old floor lamp was lying in the garage, he worker, but not modern? Give him a second chance: change the design and rejoice in the new interior item.
Remove the ruined lampshade, leaving only the framework. Color the basis of fresh paint. Take the usual white tissue and cut the lampshar frame. White fabric - an infinite field for creativity. Collect it with acrylic paints, stick sequins, dry flowers, tapes - all that your heart.
Very beautiful looks highlighted wallpaper light bulb. It is only necessary to choose the right. To do this, take pieces of available wallpapers and see how they look. Finding the right, dear old lampshade glue for wallpaper and stick them. Cut the surplus with a pounding of 3-4 cm on top and bottom. These sciences then need to be sized inside so that there is no old lamp lamp. Let the glue dry, then install the updated lampshade and enjoy your work.
Work with the floor of the lamp. It seems to watch the leg with a rope or rope, which perfectly fit into the sea style. Wire winding of different colors will add the vestor of originality. Want more brightness - stick rhinestones on the leg and stand. Glamor will definitely be provided.
Creating things with your own hands is always a pleasant and creative occupation. Created from zero flooring or updated old garage will delight you and your loved ones in long winter evenings. If suddenly your idea you get tired, you can always add something new or repain your new lamp on the leg.
That's how easy and accessible can be done. outdoor lamp do it yourself. This unusual, but romantic lamp, adds softness in contact with any atmosphere.
Previously, we already did a regular table lamp, a table lamp of bottles, and today you need to get acquainted with such an outdoor lamp shopping list:
Equipment:
Mix the required amount of cement, sand and water, and after the formation of the required consistency, pour it into the container that you will use as a form to base your lamp. Insert the wooden wand in the middle, it will be a hole for the pipe under the electric cord after removing the stick.
Note: Use oil or fat to cover the bottom of the pot. Then the base of the lamp will easily remove from the pot. Cement can however hold pots in some areas. In this case, you must be ready to break the pot to remove the base.
Make sure the wand inside focuses in the center of the bank. Scroll it while cement freezes. So you facilitate yourself the task of extracting it. While the cement is still wet, take out the wand and get a channel for the cord. Then let dry the solution leaving the workpiece overnight.

After you removed the billet from the container and removed the wand, insert the cord into the copper tube and skip it through the base, as shown in the photo below.

Manipulate the copper tube so that the outdoor lamp is a beautiful basis of interesting and neat curves.

Take advantage of the pipeline to create a neat perpendicular end of the pipe. Connect the cartridge. Use pliers to close the couplings adjacent to the cartridge, i.e. Conduct the cartridge.

Taking advantage of the marker outline your shape of your abuzhurik on an aluminum sheet, as shown in the picture. Use either simple sharp scissors or scissors for cutting fuster and cut out the shape.

We fold our Abu shop into the cone and gently cover it with paint suitable for our project.

We wait until the paint will finally dry and install our mini-lamp at its rightful place.
The basis for work and comfortable location in the room is high-quality lighting. Due to the variety of light sources, which can be installed as your soul wishes, you can divide the room on the zones, allocate specific items and elements of decorative design, decorate the exterior of the house, adjacent territory and many other things. One of the most popular interior items creating homemade comfort is a beautiful lamp. At first glance, there is nothing special in the design of this lamp - a steady base with a long leg and lamp shade with a light bulb. But that comfort and the situation that creates this lamp cannot be overestimated. This device from the ordinary room creates a special fabulous world of coziness and heat. And of course, today trading networks offer us a huge variety of edges of the lamps. But after all, you can show a mixture, fantasy, armed with the necessary minimum of materials and tools and make a flooring with your own hands outdoor from wood, plastic, metal, cardboard and other available materials. How exactly - consider in this article.
If there is an old floor lamp, which does not work, it greatly simplifies our task. It is only necessary to adjust the dimensions and the shape of the old lamp, if necessary - to lengthen or shorten the height of the leg, paint and reorganize the foundation as a whole.
Important! The obligatory stage of work to create a new floor lamp from the old is the replacement of electrically conductive parts - cables, forks, cartridges, light bulbs and switch.
And it remains the most interesting - to make a lamp lamp for a lamp or put an existing plander that is simpler, because the fastening to the base and the frame is already there, it remains only to trust the flight of his fantasy. As a result - from the old, non-functioning lamp, which dust in the storeroom, you get a fashionable, original floor lamp.

In order to make the flooring with her own hands outdoor, you can use a wide variety of materials and details available to you on sale or have at home. You can breathe new life into things that have not been used for a long time.
Getting Started to create your own unique design solution, you need to prepare materials. The main parts without which you can not do:
Important! For the metal foot of the flooring, it is better to use a three-core cable.
Materials may also be needed to create lampshar - paper, glass, textiles, depending on what plan it will be.
The basis for the future product may be the most varying, but the prerequisite must be observed - its sustainability. The lamp must be firmly standing on the surface, so the base should be heavy:
Important! For greater durability in the gypsum you can add fibrovolok, PVA glue and more water, to avoid cracks on the surface.

For the base, any massive solid material is suitable, available, the necessary form and with suitable holes.
Important! The floor lamp, as a rule, has one leg, but you can make a unique model with several points of the support, and then it will become a real highlight of the interior design, attracting views with its originality.
A lampshade is the brightest and memorable part of the future lamp. It depends on it, how the lamp will shine, how it will fit into the room. Production of lampshar for lamp - a huge field of ideas. The only restriction on the path of fantasy will make the style of the design of your interior.

You will need the basis for the lampshar. You can take ready, from the old lamp. Either make a new one with their own elastic wire, which will keep the specified shape and other framework elements. The side elements are fastened to base so that the joints are as imperceptible as possible.
If this fails to be avoided, do not be discouraged. To help you will come all kinds of decoration options, which will close inaccurate joints. For the manufacture of lateral side elements suitable:

Important! The outer surface is additionally decorated with ribbons, felt elements, beads and rhinestones, wooden parts, artificial colors, and painting. It is necessary to avoid heavy, massive elements that will make the light dim.
Make a lamp to the flooring personally can be practically from any available materials, even from those that, at first glance, are not intended for this.
When all the details are ready, they start assembling. It is important to adhere to all safety regulations when working with electrical appliances:

Important! All the places of fastening and connecting the electrocabyl should be carefully measured, in order to avoid short circuit.
Before you begin the creation of a new lamp, the following materials and tools should be prepared:
Making a lamp independently follows in stages. First of all, you need to start with the manufacture of the basis of the design.

The base for the lamp is made in the following way:
Important! The dimensions can be others, but it should be noted that the base should withstand the weight of the entire design of the lamp and not allow him to overturn from the slightest touch.

For a frame, we chose a wooden rack 1.4 meters. This height is selected, taking into account that our flooring can be installed near the chair or sofa, and the light will fall from above. But you have the right to choose another height, as you will be comfortable.
Before making a frame, the copper pipe is followed to wipe with alcohol for degreasing and removing dirt and lubrication. Then we do the following:

To collect homemade floor lamp:

Making lampshade is very simple. For this, the usual office basket for paper garbage is suitable. We do the following:
Torshinger do it yourself outdoor ready! Now you can put it near the chair or sofa.


