Any summer cottage is mandatory to be equipped with a fence and gate. If you have a car, then the process of manufacturing the gate should be paid to special attention. Today there are several types of gates that can be done. Popular or console gates are very popular. In this article we will tell you about how to make a rollback gate with your own hands.
Before proceeding with a detailed study of the issue of installation and manufacturing a rollback gate with their own hands, we suggest you familiarize yourself with their positive and negative parties.
Benefits:
There are also cons decisions:

As for the type of retracting designs, the gate is divided into console, suspended and retractable rails. As for the console, these are those skate gates, most of which are suspended in the air. The beam itself is equipped with a P-shaped profile, inside which the steps. Inside this beam carries the roller. Thus, the entire loading load from the movement of the canvas of the sliding gate is sent to the beam through the rollers. Console rollback gates are also subdivided at the location: at the top, in the middle, below.
As for suspended, there is also a beam here. But its emphasis is carried out on two columns, which are installed in the opening with their own hands. This beam has a special structure. Her edges bent inside. Inside the beam, rollers are installed, for which the movement of the sliding gate is carried out.
If we talk for the retractable design on the rail, then the roller is attached at the bottom of the console flap, which is moving on the guide beam when opened. This type of retractable gate is the easiest in the manufacture. However, if we speak for minus a skipping sash, it comes down to the fact that garbage, foliage can accumulate in the rail and snow. All this will impede the process of movement of the sliding gate.

What type of retractable gate is better difficult to say unequivocally. However, it is necessary to divide them according to some criteria. If you want great reliability, then you should give preference to the suspended sliding goal. This system has a long service life. Plus, they are very easy to use. Their operation can be achieved up to several decades. However, they have one disadvantage - the available beam creates height restrictions entering the car to you into the courtyard.
Important! Today there is one original solution that the deficiency levels. So, with an open sliding gate, the jumper over the entrance is simply removed, and then dresses as needed. This is especially effective if time from time to time is driven by large transport.
If you look at the question from the side of the price, then the retractable gate on the rail is the most accessible and cheap. You need to lay in the guide, weld the doorbell and reinforce the wheel. Well, the most expensive design is console. She is very difficult performed. However, in her direction there is a large number of positive sides, we will list some:
So, first of all, it should be understood whether it is possible in your case that it is a skipping cantilever gate with your own hands. After all, in some situations it is generally impossible. So, first of all, you should think about such nuances and moments:
If all these parameters have everything passes, then you can proceed to the execution of calculations. You can also prepare the gate with your hands drawings, schemes and sketches of structures. The cash of this will significantly simplify the fulfillment of the task.

So, first of all, the correct calculations should be made, without them anywhere. If you ignore this stage, then your project is unlikely to end with success. So, the process calculation necessarily includes the following:
When calculating the height and width of the slotted gate, the modern market must be taken into account. For example, if you need to build a profile, then there will be no problems here. But if you need to cut a sheet of professional flooring, then certain difficulties arise here. Plus to all, the final result with a flat sheet of professional flooring will be not very beautiful.
The weight of the entire retracting design is also taken into account. If this is not done, it will be difficult to choose the corresponding gate opening mechanism. After all, rollers and another mechanism must cope with the entire load throughout the operational period.
Important! If, according to the scheme of the slotting gate, the wind load is necessarily taken into account. Therefore, you should evaluate the feature of the winds in your area. But in any case, it is necessary to set a small margin of safety in the design of the skating frame of the gate.
So, the easiest way is to get a ready-made sketch from a specialized company. But in this case you will have to say goodbye to the enno amount of money. But if desired, such calculations are made with their own hands without attracting specialists in this profile. Next, we give the calculations that relate to the console gate.
Thus, the width of the gate cantilever sash will be equal to the width of the opening, the minimum distance between the centers of the carriage, the technological indentation of the closure / opening. In any case, ultimately the console flap should be more from the dimming, so that it overlaps all possible cracks and gaps.
This is one of the important points. So that the cantilever gates had a bane necessarily constructs counterweight. The cash balance will help ensure that the carriages accounted for a uniform load. Therefore, it is logical to assume that the counterweight will be great.
In any case, the counterweight size should not be less than 40 percent of the width of the gate. Ideally, when the counterweight has 50 percent of the width of the cantilever sash. So, if the cantilever sash has 4000 mm, then the counterweights must have 2000 mm.
To calculate these indicators, in advance should be determined from what material the slide gates will be made. For example, professional flooring has 4 kg / m 2. As for steel, the sheet, a thickness of 2 mm has 17 kg / m 2. So, if you take into account all the details and elements, the weight of the entire console flap, together with the frame, can reach up to 200 kg.
If you have already decided on these data, then you can choose the right beam, mechanism, rollers and the like. For example, if the gate have a weight of 300 kg, then the beam may have a thickness of 3.5 with dimensions of 9 × 5 cm. In any case, the safety margin is required.

If you do not calculate the possible load on the accessories, then everything can end the rapid way out. So, for the sliding gate, you must purchase the following accessories:
How to exclude the likelihood of negative consequences from the impact of wind load? In this case, it is necessary to repel from such parameters: a wind load of 12 m / s is up to 90 kg / m 2. All this mass is evenly distributed over the entire rollback gate. Moreover, the chosen fittings should also have a margin of safety so that with strong wind it does not fail to work. So, take into account the side point in 100 kg / m 2. It should be multiplied by 8 kg / m 2. The result will be 800 kg / m 2. On each support element will have a load up to 180 kg and it is a bit. So, the roller chosen by you or other accessories should have a margin of strength and be more powerful from the claimed mass of the web for a minimum of 30 percent. But remember, it will not affect the service life. This parameter directly depends on the distance between the centers of the carriage.

It is no less important to make sure the rack of the sliding gate. Also, supports under the roller mechanism should cope with all loads. It should be calculated in advance how the number of anchors will be used for fastening. On the pillars, the supports must be correctly calculated by the mortgages. As for the establishment of the foundation, its cost can take about 40 percent of the entire budget for the manufacture of console gates.
As already mentioned, the choice of components will depend on the weight, width and height of the retracting gate. It is worth highlighting several good companies that really produce high-quality components for the manufacture and installation of the console gate:
So, let's say in your case the rail will be used, having a length of 6 meters. How to make the right choice of components for it? To do this, take into account the length of the gate and add 40 percent to it. Possible loads are still thought out and the length of the beam itself is taken into account. So, if in your case the opening has a 4 meter width, then perform the action: 4 m + 40% \u003d 5.6 meters. Stripping from it, you should buy a set with a beam of 6 meters.

So, now we suggest you to consider the entire sequence of mounting the console gate with your own hands. Immediately note that the complex stage is the creation of the drawing of the gate. Otherwise, all the work looks like this:
So, now step by step, briefly read the technological process. But first we define a list of necessary tools that will be useful in the manufacture of a console gate:
So, when cash, the entire instrument and the necessary material can be made the gate with your own hands according to drawings, photos and videos. Therefore, be extremely attentive to them, as well as to view the prepared video in this article.
First of all, the foundation is made. For this, the markup of the future pit is performed. So, reflect the distance on the site, which is 1/2 equal to the width of the opening. From the gate towards the site, the width of the pits will be approximately 500 mm. The support pillars from the already existing fence can be used as support pins. If there is no such possibility, then a response pole is installed. To install it, dig a hole opposite the opening.
In the process of manufacturing the foundation, also fumble of the laying of an electrical cable. It can be laid in a special sleeve or pipe that is poured into the concrete. This must be done if the automation system is used.
As for the depth of the foundation under the console gate, it should be deeper than the level of soil freezing in your region. As a result, the depth will be around 2000 mm. Next, you should take a channel from which the mortgage will be manufactured. Its styling must be performed so that it helps as closely as possible to the pillar of the support. The direction of the chawller must be perfectly coincided with the future move of the sash. Plus to everything, the channel must lay strictly by level.

At the next stage, the foundation is filling. Concrete must slightly hide a mortgage element. After the fill must go at least six days. As soon as concrete froze, you can proceed to the next process - setting the gate with your own hands.
There are several more ways to equip the foundation under the console gate. So, there is a pile-monolithic foundation technology. To do this, in the soil you should pinch two reinforced post. They are connected to each other with the help of a channel.
Important! This method does not require a large amount of concrete. As a result, it is considered less laborious and less expensive. Also need less time on waiting for its drying.
Under each reinforced post, the ground is removed using a garden bora. The diameter of one column can reach up to 300 mm. These holes are located as close as possible to the fence. Moreover, there must be a trench between them, which is filled with concrete.
Another way to bookmark the foundation is reduced to score the pile-screw foundation. This is the easiest solution, because you should not carry out earthworks. Also excluded the process of concreting. All the essence of the work is that piles are tightened into the soil. Previously, they should be treated with epoxy resin to eliminate corrosion formation.
At the next stage, until the flooded foundation dries, you can begin to weld the rolling gate frame. As a basis, you can use the ready-made drawings of the gate. Cutting the cantilever sash can be made of profile pipe. This is an excellent solution, because their further cladding will not create any difficulty.
So, to weld the frame of the roll back gate, you need to cut all the elements of the corresponding sizes. Put them on a flat surface. First it is recommended to weld the tacks to be able to check the diagonal and the evenness of the entire retracting frame design. If everything is fine, then every seam is carefully welded. After that, welding seams should be polished with a grinder with a special grinding circle. Before installing them, you can handle the frame of the anti-corrosion composition with your own hands.

The next stage is the installation of a rollback gate with your own hands. First perform markup. You need to pull the lace, which will designate the direction of the console sash movement. Next is the fastening of the adjustment sites. After, determine the extreme positions of roller supports. From the edge of the opening, 150 mm along the mortgage element should be retreat. Cut the first trolley tangent. To determine the position of the second trolley, then from the total length of the sliding gate, take 100 mm on the plane of the mortgage element.
Having done all the calculations and measurements, the installation of a rollback gate is done with their own hands. Welding weld to the second trolley adjustment pads. After that, the cantilever flap is in the opening. Immediately regulate it in terms of level and in all provisions. If everything is clearly, the final fastening is carried out.
So, this process looks like this:

Among other things, you need to check the cart fastening the cart correctly. To do this, inside the carrier profile at the place of attachment to the site should be sent to the nuts located on top. After that, the gate must open several times in a row, and then close. If during these tests you found that the sliding gate moves relatively freely, the nuts should be tightened back. If it's hard, then this is a sign of cash of a skew in the perpendicular plane to the movement of the sliding gate.
After performing full adjustment of the cantilever gate, you can start the installation of the end roller. Its installation is performed inside the carrier profile. Fastening occurs through special fastening bolts. After that, the lid to the gate profile is welded.
Tip! Some of this fastening are done with bolts. But taking into account the load, it is better to privar.
It is worth considering another important nuance. During the period of snowfall inside the carrier profile, snow can be scented. As a result, it will prevent the normal movement of the sliding gate. So that this does not happen in your case, it is recommended that the inside of the retractable gate is tortigid the stubble of the carrier profile.

When installing the gate with your own hands, the retaining of the retainer and rollers is also performed. Rollers must capture the top of the cloth of the sliding gate. Brackets, in turn, are sent towards the supports of the support.
Another element is a trap. It is installed below. Its cash allows you to reduce the load on roller carts when the gate is completely closed. To perform the correct installation of the trap with your own hands, the cantilever gate is completely closed and so define their location. Also mounted and upper trap.

The final stage of the work comes down to paint the frame of the gate. For this, a special paint is used, able to cope with straight ultraviolet rays and sharp temperatures. The color is chosen in color of the facing, for example, a professional flooring or color of the fence. Before applying a layer of paint, you need to make sure that there are no other protruding elements on the entire surface, which will spoil the entire appearance. After grinding, the surface is treated with acetone, in order to degrease. Next is applied by a layer of primer. It is much easier to apply paint with a spray with a spray gun. This will exclude the formation of flops and the like. Painting is carried out in two layers.
Next, cladding the retractable gate is performed. One of the available materials is a professional flooring. Its fastening can be carried out using rivets. Some use screws for metal. Installation of sheets is performed by one or two waves with their own hands.
You also need to install the lock with your own hands, if it is assumed. The lock is crashed into the profile pipe. To protect it from direct rain drops and other precipitation, you can cook the protective cover for the lock.

If you decide to install automation to a rollback gate with your own hands, it is extremely important to make the right choice of the automation system. It should be resistant to negative environmental impact. As for its choice, be sure to consider the following parameters:
So, here we considered all the features of manufacturing a rollback gate with their own hands. As you can see, there are a large number of nuances that are extremely important to consider. We hope that this material was useful for you and got plenty of food for reflection. To secure and assimilate the entire outlined material, we suggest viewing the prepared video for the manufacture of the gate of roll-out with their own hands.
Owners of private houses and garages have long appreciated the convenience of the entrance gate of the swing type.
This is natural, because such a design was almost the only one for hundreds of years.
Easy to operate and reliability have always been in price. So now dackets, and the owners of cottages continue to improve their constructive.
And if first of their basis it was wooden deaf gates, then their modern type can be represented by a high-tech automated complex.
As noted above, the swollen entrance doors depending on the material, there may be two types: wooden and metal. According to the design, it is customary to distinguish the gate of biscuits (duplex) and with one hollow (sash).
Very often, especially in the gates for garages, hangars and storage facilities, a combined type is used - a biscuit gate with a gate. Thereby saves the place and materials for a separate entrance. But in most cases, they are performed as "deaf" elements, and only some places (government agencies, hospitals, etc.) you can meet forged, lattice or tubular swing gates with the entrance to them.

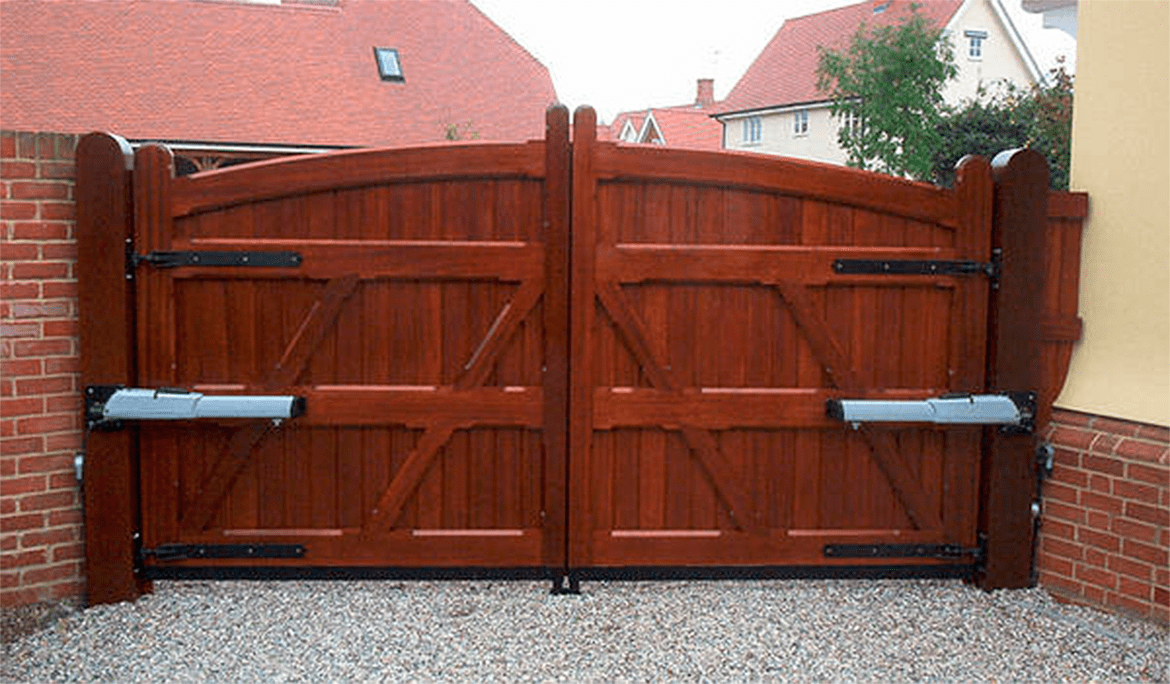
Another type of gate is a metal swing gate into two targets with the use of decoration and (or) lined with painted straw. The floors of the gate have a lightweight view, and the input (wicket) is made next to them.

This species is perfect for a private house. It received widespread use because it serves decades and practically does not require repair, unlike wooden analogues. Additionally, the design can be equipped with automatic, which will further increase their functionality.
Consider the drawing of the typical design of the gate of the professional flooring. It is based on the frame from the profile of a square or ordinary pipe with a diameter of 20 to 40 mm. Each sash can have one or two horizontal stable to enhance the stiffness of the structure (Scheme 1).

Other options are also possible, for example, one horizontal and two diagonals. This location clearly holds the gate geometry (Scheme 2).
Make a swollen gate with your own hands to any owner, if he sufficiently owns the skills of the assembly of metal structures. You will need the ability to use the welding machine, a brown, a grinder, a sprout and measuring instruments. It may also need painting.

Each gate sash is screwed onto the screws or welded on the loop to the columns. On the sash there are enough two loops with a diameter of 20 or 30 mm. The pillars are also performed in the form of a metal pipe with a diameter of 70 -76 mm, or a profiled 20 x40 mm.
As a support of the gate, you can use directly iron pipes (hinged pole), but depending on the design of the fence, they are mounted in brick (concrete) columns. To do this, it is necessary to provide two mortgage parts in the brickwork, for which the attached racks are welded. For diagonals (diagonal) and crosslinked, it is recommended to use a profile 20 x 20 or 20 x 40 mm.
The practice is established that the optimal width for the entry gates of private use can be considered 3 meters size. This is quite enough for any passenger car or truck. If you want to save, then you should not reduce the size of more than 20 cm. The height of the gate is in most cases, excluding lifting over the ground, is equal to two meters.
The shut-off gate mechanism, as a rule, consists of a "g" of the threshing pin (stopper) located at the bottom of each of the grotin. Based on the land at the place of fixation of the gate, there are holes from pipes, the inner diameter, which is 5 -10 mm more thickness of the stopper. There are no hard restrictions on the length, but still it is desirable to make them no more than 50 cm. In addition to the stoppers, it is possible to provide a horizontal shutter, through the line is broken.
As already mentioned the easiest and most practical option for the finish of the gate is the sewing straw. The professional flooring will be organically fit into the overall design, if the fence is to withstand in the same style. Usually, the professionalist on the gate is attached at a distance of 5 -7 cm from the level (base).
So far, we have considered the scheme of ordinary swing gates. But what if you suddenly get tired manually constantly open and close the sash, or for any reason it will want to upgrade them. In this case, engineers designed are developed so-called linear electric drives (automation).
This system consists directly from the linear electric drives themselves (2 pieces), as well as a control unit, alarm lamp, antenna and an electromagnetic lock. Automatic swing gates are powered by the voltage of the usual household alternating current voltage of 220 W. In the photo, all the elements of the system elegantly fit into the original design of the gate "under the antiquity".

It is very important before installing the automation in advance to provide carrier poles. As in the previous examples, it is advisable to be made of concrete, and even better from the brick.
There are three options for installing an automatic gate depending on the direction of the opening of the stem: outward, inward and inward with the refinement of carrier pillars. In each of them, the installation of automation is carried out in a specific sequence. In our case, it may be necessary to install outwards, or the last option (per person), since we initially considered the option for future automation.
The location of the system control unit can be different (left or right), it is important to choose the proper sections of the wires. Figure below shows an indicative layout of the location of the elements of the system and the cross section of the wire.

The drive for installation has a feature, it is specifically necessary to provide for the distance from the carrier pillar. If this is not envisaged and the gate must be made inward, as in our case, then you just need to carefully hollow out and place the places for them.

The price of linear drives ranges from 23 to 36,000 rubles. For example, the electric drive of the company "Doorhan" SWING-5000 (up to 5 meters), stands around 25 thousand.
The gate should be made in stationary conditions on the ground and the aligned surface (lafet). The dimensions of your gate must accurately coincide with the design drawings. That is, all the billets need to sprinkle with a grinder with a tolerance of 1 mm. Then, replacing straight angles, weld the details of the future perimeter of the gate sash, and then accenes and diagonally.
The markup under the loop is produced at a distance of at least 30 - 40 cm from the edge of the frame and the trail is welded to it. Hinges can be bought in the store or order in a lathe workshop. After the mounted pillar, they do the same actions with welding, by grab.
If everything is precisely in size, weaker a completely loop. You can not use welding, but then you will have to be screwed to screw through thick steel on the tapping screw. Painting the metal can be fastened to the professional sheet with screws with a pole.
Installation of swing gates is read from the markup of support (concrete or brick) pillars, according to the centers of the main axis of the gate. Based on the pillars you need to build an iron pipe with a diameter of 100 mm on the concrete. It must be burned to a depth of 130 -150 cm. Make it best with a screw (bera) of the corresponding diameter, leaving a concrete place for about 10 cm around the circle.

Exposing the basis of a brick column, use the level and check the vertical in both planes. A 20 mm clearance is needed between the grid, which can be overlapped with a selected metal strip, 50 mm wide. So the tolerance is necessary, since on hot days when heating the metal is expanding, and your gate can simply jam. Homemade swing gates will look no worse than the factory analogues, if you approach the process of their assembly with the mind.
There are many options for placing the gate, but they are simply impossible to describe everything. Each case is individual and therefore the manufacture of swollen gates can be called a creative process, where each owner can embody his own developments or take already existing ones.
Reliable, convenient to use and simple metal gates are excellent for installation in country areas, country areas and any other objects. The assembly and installation of the design under consideration can be performed with your own hands. It is quite simple and much more profitable than to entrust the same work to professionals. Most often on individual sites, swing metal gates are installed. This is the most simple in the assembly system, with the device of which you can cope with your own any problems.
Before starting work on a metal gate device, it is necessary to prepare a detailed competent project of the built structure. The most important thing is to determine the optimal dimensions.
So, if trucks will pass through the gate, the design width should be 350-400 cm. For passenger cars, there will be a fairly width of 250 cm.

As for height, for the gate in private territories, it is usually quite enough for the indicator in 200-250 cm. Everything, again, depends on the size of the car.
Additionally, refer to a project some gap between the surface of the Earth and the gate frame. Thanks to this gap you can open the gate to snowy weather.
The basis of the design of the metal gate is the framework. For the frame assembly, an ordinary pipe with a diameter of 2-4 cm is usually used. The framework can also be made from the profile with a square cross section.

Each shutter of the gate must be equipped with 1-2 horizontal ratings, thanks to which a higher rigidity of the system will be provided. Instead of the horizontal location, it is possible to choose other options, for example, place one transverse horizontal consumption and two diagonal.
For self-assembly, the gate need to own the skills of handling the bulgaria, elementary measuring instruments, a welding machine, a screwdriver, a brown. In the absence of proper skills will have to spend some time on training.

To secure sash, you can use screws, but it is best to perform a standard fastening with loops. For one sash, a pair of loops with a diameter of 2 or 3 cm.
The reference pillars are made from the profiled pipe 2x4 cm or a round tube with a diameter of 7-7.6 cm.
Supports can be erected directly from the pipes covered in the ground and fixed by concrete solution. There is also an option according to which the pipes are installed in the brick poles. A pair of mortgage details should be present in the brickwork. Cover racks of homemade gates will be welded to them.
The locking mechanism of the metal gate usually has the form of the letter "g" and is made from the iron pin. Elements of the mechanism are set at the bottom of each gate sash.

In the place of fixing the sash in the ground, special mounting holes are created. For their device it is convenient to use metal pipes. Select such pipes so that their inner diameter of about 1 cm exceeds the thickness of the locking mechanism. It is desirable that the length of these pipes does not exceed 500 mm.
To cover a metal frame, the most convenient to use profiled sheets. Modern professional flooring fits perfectly into the design of any plot. Pick up such a material so that it is well combined with the fence. Professional official is usually fixed at an altitude of about 50-70 mm from the base.
Pre-prepare everything you need during the implementation of the work under consideration.
1. Pipes of the sizes mentioned earlier.
2. Brick.
3. Cement brand is not lower than M400.
5. Metal profile.
7. Hammer.
8. Rivets.
9. Self-tapping screws.
10. Pencil.
11. Measuring tools (tilter, roulette).
12. Emery.
13. Bulgarian.
14. Tassel and paint (if you plan to paint the gate after installation).
Prepare materials for the assembly of glowing supports and collect them into a single design. As the basis can use pipes and metal profile. You will also need a channel. It is important that the width of the shelf width is at least 10 cm. The stronger the support is, the longer the entire design is.
Mortar support poles will be exposed to an increased load, especially when closing and opening the design. Therefore, at the stage of installation of supports, you will need much more responsibility, rather than when installing the adjacent fence.
Supports are swapped into the ground and poured with concrete solution or the same brick base. There is also an option to install a support directly to brick bases, but for the newbie correctly perform this installation is very difficult.

Sheds Make out of garage loops. Pick the number of loops according to the size and weight of the sash. In most cases, there are enough two hinges for each sash. If the sash is very massive, increase the total number of loops up to six pieces.

To both sides of each loop, weld steel plates thick of about 5 mm. Plates should be welded throughout the area of \u200b\u200btouch.
Make these racks from the square of the square cross section. Cut a couple of pieces of one length. Directly the length of these parts should be approximately 20-30 cm less than the height of the carrier sash.
We weld the plates of mounted loops to the finished columns. You should get two identical in size and spatial design.
Secure ready-made designs on installed supports. Mounting, follow so that there remains a width of no more than 3-4 mm between the pre-post and supporting structure.
Cut the upper part of metal products of the appropriate length and secure the cut at the upper points of the support racks.
Fully secure all structural elements using a welding machine. Follow the welding point.

Install the central racks in the number of two pieces in the center of the metal gate. Installation Perform so that the order of 1 cm is left between the mentioned elements. Central racks need to be "tarning" with welding. Steel plates are thoroughly welded to the support racks.
To enhance the homemade gate, take the sheet of steel thickness of about 50 mm and cut it into 8 parts. Secure the parts received along the corners of the carrier flaps. At the end, it is necessary to divide the structure into 2 parts using an ordinary grinder to get two identical flaps.
If possible, make gaps a couple of millimeters in the loops. These intervals will avoid the displacement of the carrier flaps in the future.
At the end, you can perform the finishing finish of the finished gate to the preferred material, for example, paint.

In the modern market there are many means and devices that allow you to perform automation of homemade metal gates. If you already tired of moving the sash manually, buy an ordinary linear electric drive, and the problem will be solved!
The automation means under consideration consists of two linear electric drives and control unit. Also, the structure includes an electromagnetic lock, a special antenna and a warning lamp.
To power the automation tool suits an ordinary household power supply to 200 W.

The automation of the gate can be performed according to three different methods. The specific method is selected taking into account the direction of the goal sash open. They can operate inside, out either insurgently with refinement of support pillars. The newcomers are best to give preference to the option with the opening of the outflows outside.
The control unit can be installed on the right or left. Specific installation recommendations are given in the attached instructions. Also, the instructions indicate the requirements for the cross section of the wires. Specify all these moments before the start of automation work.
Directly the installation process differs for different models of automation systems. Specific scheme consider individually. You will find it in the instructions for your device.
It is important to know one overall feature of the installation for all systems - the drive must be placed at a certain distance from the support pillar. Information about the optimal distance you can also be found in the instructions for your device.
After installing the control unit, use the gate is much more convenient. You can control the position of the flaps from a special stationary console or portable device as a miniature key fob. There are also structures that are automatically disclosed when the car approaches them, but this option is more suitable for sliding gates.
Thus, there is absolutely nothing complicated in the independent construction of the metal gate. You only need to determine the optimal dimensions of the design, collect the basis, consolidate all the necessary items, and at the end, if such a desire arises, make simple work on system automation. Follow the instructions, and everything will definitely.

Good job!
Having conceived the construction of any type of fence for your country house or during the construction of such an object as a car garage, in any case the question arises about how to make the gate with your own efforts.
Before you start purchasing the various materials necessary for further construction, as well as start the work yourself, it is very important to understand the sliding gate as a whole, you want to quickly make a sliding gate with your own hands or any other kind.

If you do not pay attention to all different important details and choose this is not the best design, it is possible to obrace yourself for additional not only financial, but also time costs

One of the easiest options, which in practice, most often can be seen in a country house, is a swing gate with an additionally built-in or directly adjacent to the installed gate.
This design of the gate consists primarily of two poles. The wicket flaps, as well as the gates themselves, are installed on the loops, welded to the support pillars.

Depending on the wishes of the owners of the house and the councils of builders, they are sometimes fixed to the inside of the support, and sometimes to external. Actually, in the future, this will have an impact on how the goal flaps will be opened - out / inside.
Very often if the photo is a gate of such a look, we can see that they are made entirely of high-quality wood. An important moment to pay attention to: when creating sashs, they do not need to be too massive. Otherwise, the load on the installed loops and the reference pillars themselves will be too large.

It should always be remembered that the parts for the suspension in size, as well as according to the properties of strength, should ideally correspond to the weight of the selected sash.

Despite the fact that this design has a huge number of various advantages in contrast to many others, she also has its own minuses. For example, over time, the tilt of the support pillars may occur, or, which also also happens quite often, sagging.
However, it is worth it in mind that this kind of drawbacks can be manifested only in one case - if the installation technology was originally broken or if the weight of the sash was incorrectly calculated.

In the past few years, sliding gates became especially popular. In principle, the drawings of the gate of these can be found in free access practically on any resource. Their peculiarity is that they have a division into several subspecies and choose first of all necessary depending on the specific conditions.
It should be borne in mind that this option of the gate is suitable only when there is enough space along the fence that was installed. Otherwise, when opened by a movable sash, it simply will not be able to move.

Having so much to make a rollback gate, it is worth it in mind that their installation is somewhat more complicated than, for example, at the gate of the swing type. On the sides of the passage when installing this popular variety, the gates most often installed quite bulky pillars straight from white or red bricks.

They are later mounted videos. They support fixators, as well as brackets.

This is the perfect option for subsequent equipment, such as a garage. If you select the perfect protection in the form of a gate for a closed passage to the courtyard of the house, then this type of gate is not suitable due to the fact that they limit the height.
At the same time, such a gate should always be enough just to open and, accordingly, close by easy lift and the subsequent movement of the entire canvas sharply up into a smooth horizontal position.

Most often, the canvas for this type of gate is created from the metal, which is further trimmed or high-quality wood, or any other material.
Go to the setting of the gate should in any case, solely after absolutely all drawings and instructions are studied in detail. Only then are the materials that may need and the design is assembled.


When homeowners are engaged in the construction of fences around their real estate objects or in the process of building garages, there is always a need to solve the task of building a gate. First of all, it is necessary to accurately determine the appropriate variety of gates. In such a question, an important role is played by the miscalculation of the smallest nuances, since there are often situations when after installing the gate, it is necessary to carry out additional work on the arrangement of its site. It is for this reason that the design features of various types of gates must be studied before buying materials.
Each such design has its own certain differences, so it is necessary to study them separately.
Stages of construction:
The sequence naturally can always change.
Such materials can be used as racks:
Consider existing column installation methods:
More attention should be paid to the second installation method.
To assemble the gate, it is necessary to determine the size of the upcoming design. To simplify the work, it is recommended to create a drawing on which all sizes will be indicated.
 After that, you can start making parts for the frame for the drawings in advance. When performing welding work, you should always remember the safety technique. It is advisable to entrust this business to a qualified specialist. It should always be remembered that the number of rigidity ribs largely determines the stability of the future gate to external weather conditions. If pipes are used as racks, it is advisable to prevent water from entering them.
Also the gate can be decorated with products made by cold forging. After the gate is collected, you can put them on the loop.
In general, the installation of the swollen gate is nothing complicated.
Retractable gates are set a little harder. On both sides, the equipment of such a design is put by brick pillars, on which rollers holding on the altitude of the bracket and fixation elements are installed.
The main weight should always withstand a channel that is fixed to a reliably established foundation from the inside of the gate or on iron supports.
 Under the channel you can install a solid foundation or several durable columns. For the foundation you will have to equip the pit, at the bottom of which the pillow of rubble and sand is equipped. After that, a formwork with waterproofing is put in the pit. A reinforcing lattice is installed in the formwork, after which the concrete is poured into the pit.
A cower with reinforcement is mounted on a concrete foundation. This element is strongly pressed into the solution to its full immersion. When concrete solidifies completely, it turns out a sufficiently durable railway. Only after solidification of the concrete and the installation of the channel is engaged in the installation of the gate themselves.
 For a frame, you can use a square tube or a regular iron corner. Additional stiffeners are required to be welded to the square frame to increase the stability of the design being created. Each welded seam is necessarily cleaned by the slag formed. The frame is ground, after which is covered with special paint capable of protecting against corrosion. Only after that the framework can be installed on the frame.
When all the components of the design elements are prepared, and the foundation with the built-in console channel will become quite strong, you can begin the attachment of the components of the sliding system.

Console beams are mounted at different heights. When developing such structures, the definition of dimensions must be performed with particular accuracy, since the console can be deformed even with the smallest errors.

More information on the installation of a rollback gate can be obtained in this video:
First of all, it is necessary to design a lifting switching system. To do this, you need to change the dimensions of the opening and personally make a suitable sketch or find a suitable drawing. After purchasing all components and tools, you can start a setup, which consists of these steps:

After the assembly is completed, finishing and painting work can be carried out. At the bottom of the profile, there must be a special groove for the seal.


More information about the installation of lifting and sliding systems can be obtained by looking at this
Video:
For the sake of ensuring the safety of residential premises or an industrial facility, today it is customary to install fences and gates. Today, modern homeowners use three main technologies for assembling the gate. The essence of technology is the way they are discovered. To assemble any variety with your own hands for anyone will not be much difficulty.


