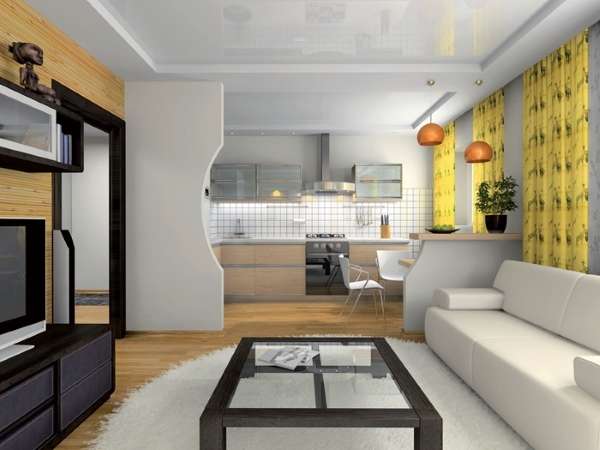
House decoration on their own favorite occupation of many hostesses, this article reveals how to make a lamp with their own hands. You can revitalize the interior of the living room, bedroom or hallway with the help of a primary means, only by changing the chandelier chandeliers, flooring or desktop lamp. Plafones for lamps made by their own hands can be used not only in a residential interior, but also in the halls of the cafe, pubs, pizzerias.
Products made for children's rooms must be made of natural non-toxic materials and painted with environmental colors.
In the manufacture, it should also be remembered for fire safety, so the flames from combustible materials made of paper, plastic, feathers or threads should be used only with lamps that have a small heating temperature.
You need to use LED or fluorescent lamps. They have a number of advantages:
In addition, such lamps are also called energy-saving, their only disadvantage can be called high cost.
It is also desirable that the wire connection to the baseman produced a specialist. No need to try to independently perform this operation, as this may lead to undesirable consequences. It is more convenient to decorate the already existing frame frame or make it from durable and not very heavy materials.
The following materials are used to create lamps: scissors, mounting knife, fishing line, wire, pliers, hot gun, in some cases can be replaced with super-glue. They should be used by an adult, a child to attract to gluing is unacceptable. Since in one case it will get a burn, and in the other you can glue my fingers or stick to the details of the future product.
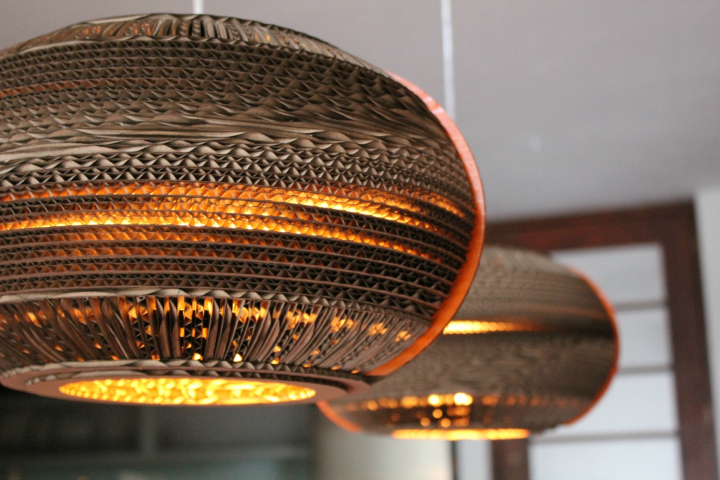
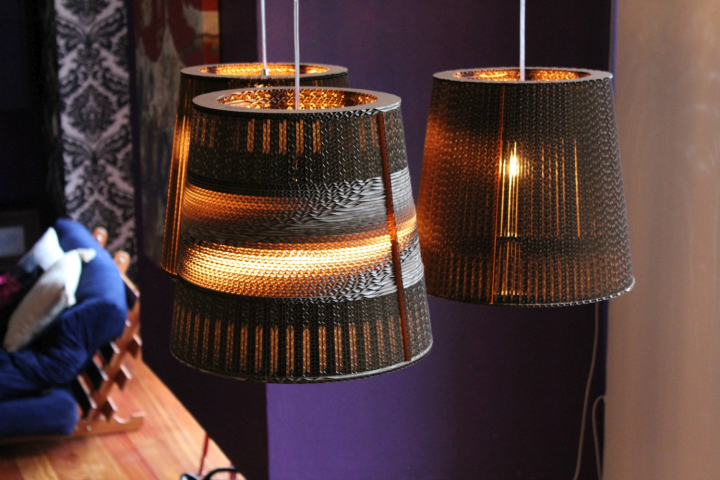
Many craftsmen make lamps from very unnecessary materials:
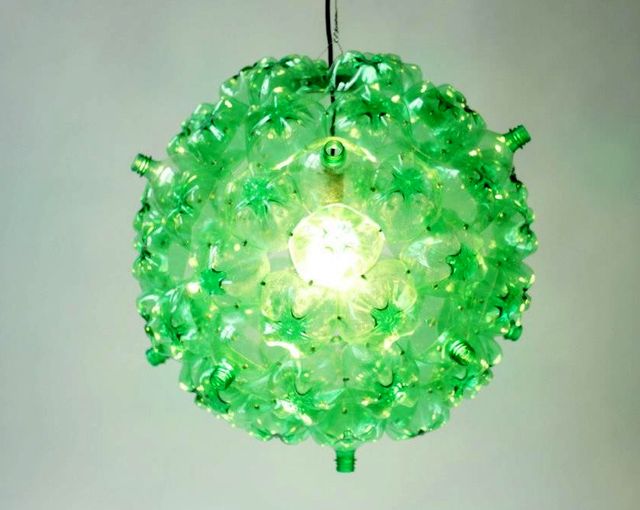
From plastic containers of different volumes, a homemade chandelier is easily obtained.
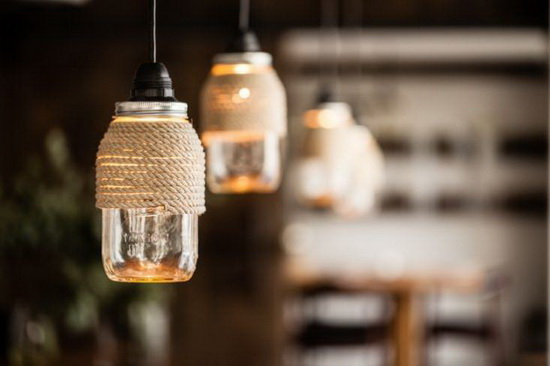
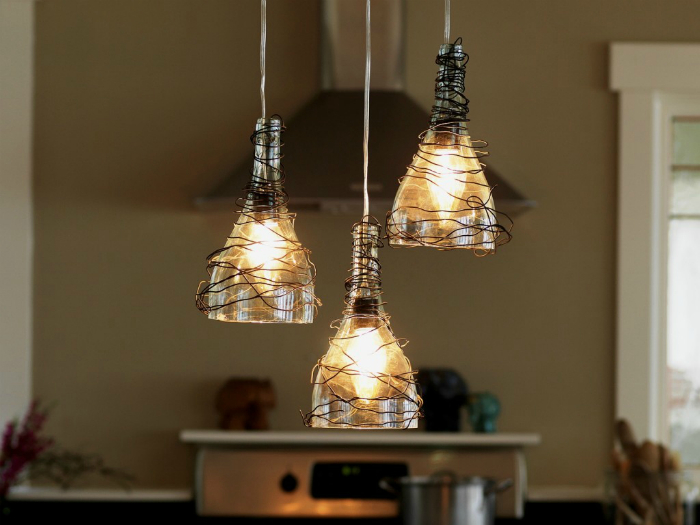
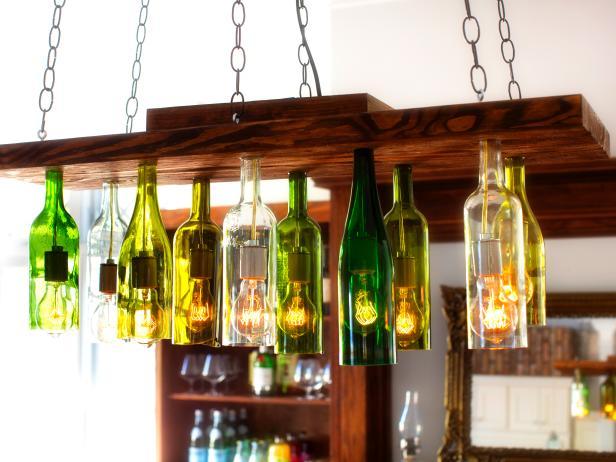
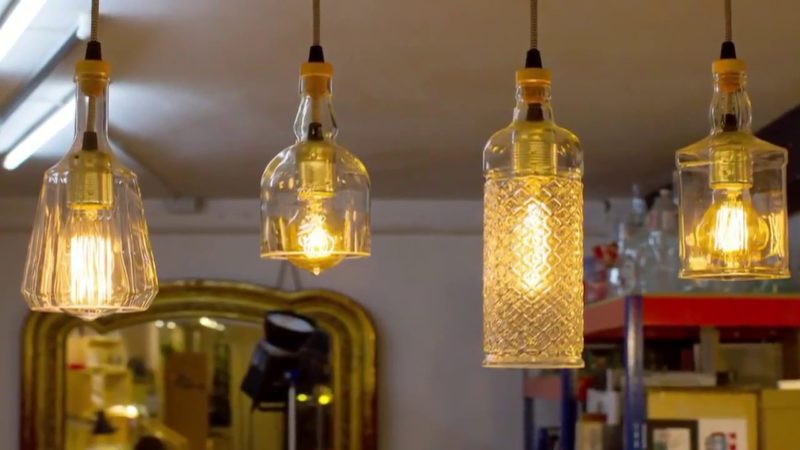
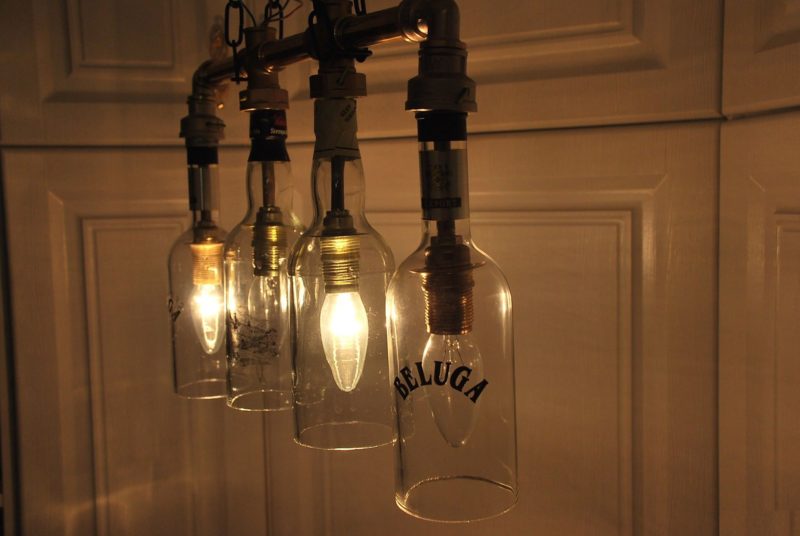
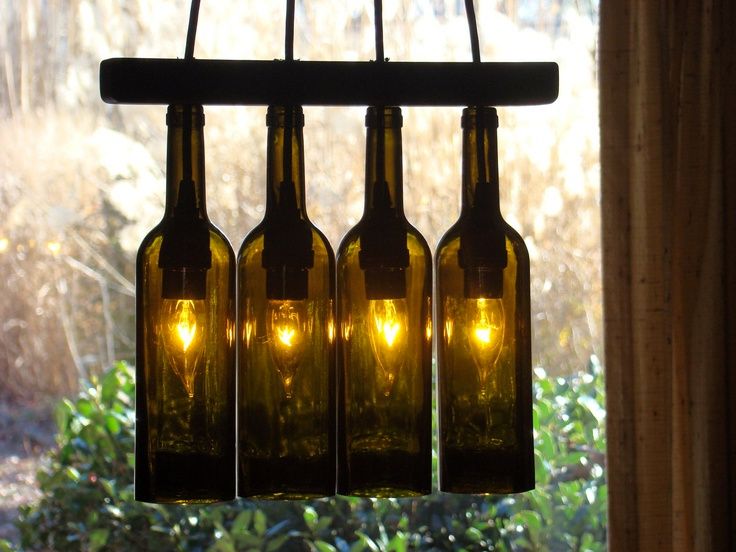
A very interesting option of a homemade chandelier is obtained from glass bottles. They are used to decorate the halls of food enterprises. It is also a good option for the kitchen in a residential building or apartment. It may be a plafof consisting of one or more bottles, which are cut down the bottom. You can do this on your own, but it is better to use the services of the workshop where the glass and mirrors are cut.
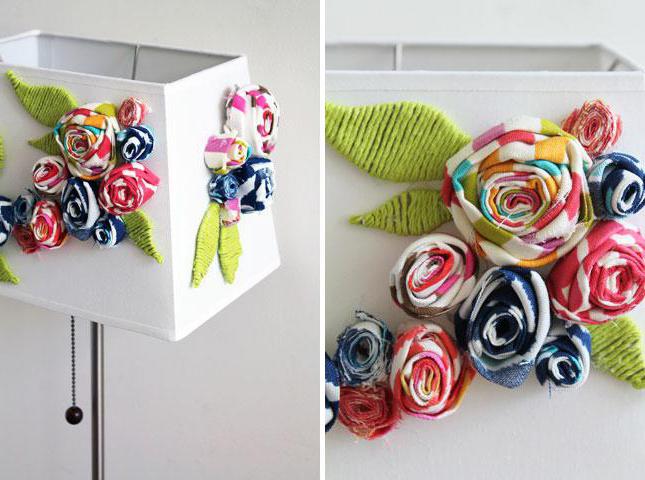
For lampshar of thread or ribbon, you will need: ready-made frame of durable wire, threads of different colors, scissors, glue.
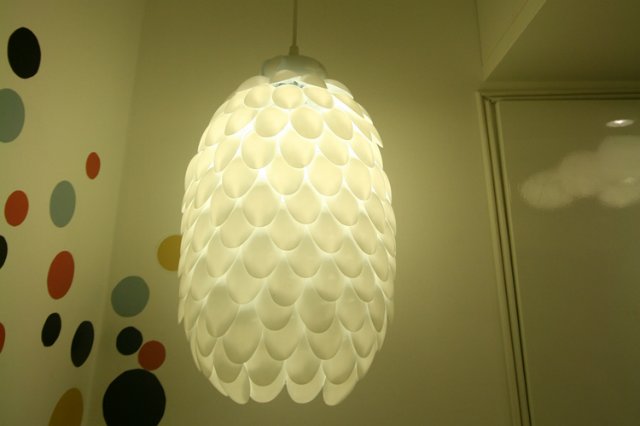
You can make a multi-tiered, color lamp from ordinary disposable spoons.
Paper or thin cardboard is suitable for the paper. Such a ceiling can be both rectangular and square shape. You must first consider the size of the ceiling, the larger the room, the wider there can be a design. In a small orphan or hallway, there will be a good ceiling with a diameter of 30 - 35 centimeters.
The frame can be made of wire, it will consist of the upper and lower part, consider the manufacture of a cylinder formation.
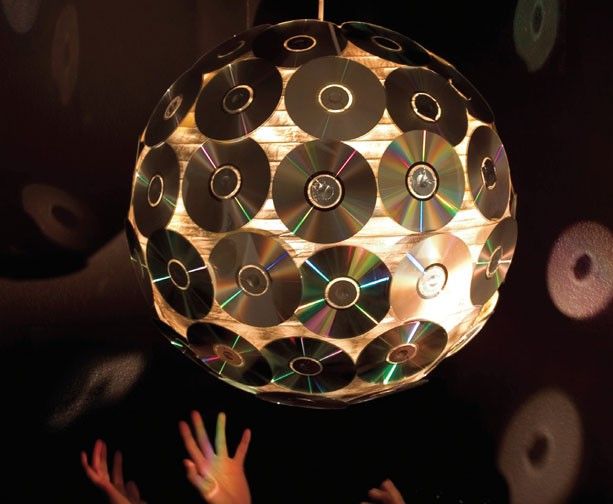
Such a ceiling can be decorated with mosaic from CDs. For this discs are cut by sharp scissors into small fragments, which are pasted on the outer surface of the pelvis. You can enclose only the bottom contour, and the rest to paint. Or decorate with such a mosaic all the surface of the ceiling. The more convex surface, the smallest should be disk fragments.
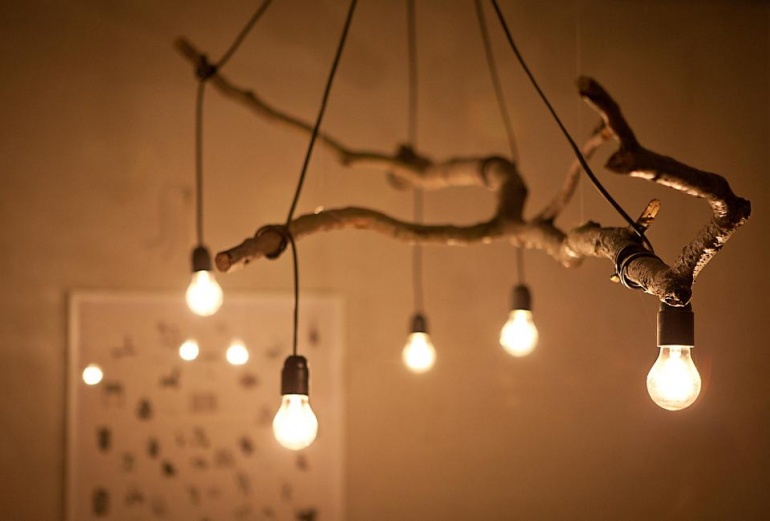
The original lamp can be made of a dry branch of an unusual form. It needs to be cleaned of the bark and coat with a verse, then, if desired, handle with a transparent varnish. The branch must be attached to the hook on the ceiling with a conventional fishing line. Then the wire with a lamp is screwed several times on the branch. It looks beautiful, the branch, accusing several wires.
You can make a lamp of plastic hangers. In detail told on the video:
The chandeliers of bottles made more suitable for the kitchen made. Designs made of glass or plastic will be easy to clean from dust and, if necessary, washed. For a kitchen, an entrance hall or a living room is suitable for a lamp of a natural tree.
For the children's room, the ceiling of painted plastic bottles is suitable, butcher from bright threads or paper composition. The last option can not be called durable, but it is precisely such an option to children. Girls will like a plate with butterflies, vegetable elements, boys fit construction with machinery, superhero or bright plastic plastic plastic.
In some cafes, the pubs are used for the decor of the hall the original lamps of bottles. It can be beer bottles. They can serve as a light bulb, and to be an interesting framed for the lamp.
With your own hands you can give a new look by outdoor Torsh. You can decaffeve with a cloth, threads, paper with slit patterns, it is also not necessary to leave the base and leg of the lamp. They can be painted with acrylic paints, put the glaze, decorate beads. The decor of the lower part of the flooring should elaborate with the elements at the top. The easiest option is to decorate a plane of monophonic color with lace or guipure.
The lower part of the bertow can be decorated with pompons of the same size hanging on a thread. They are glued with the inside of the frame of the glue. Pumps can hang both on the same and at different heights. They can be made of one color or combine a few shades.
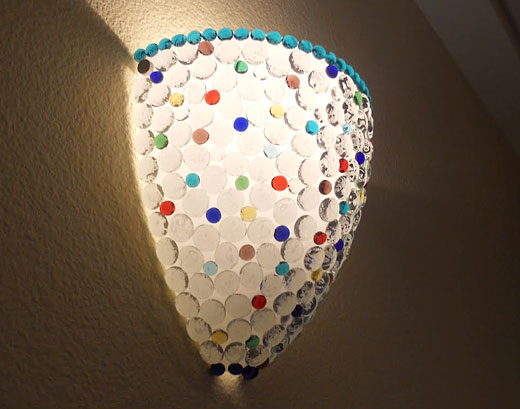
To decorate paper luminaires, you can use lace, dense fatin, beads of different sizes. Glass cans or bottles can be decorate glass pebbles that can be purchased in accessories stores. You can also use buttons of different sizes and colors. Small buttons can be glued even on PVA.
On New Year's holidays, it is customary to decorate the Christmas tree, but plaffers of lamps, lamps can be decorated. Here you can use the usual rain, cut off with your hands with snowflakes, figurines of the Christmas tree, decorative balls and the usual garland. If an energy-saving lamp is installed in a wall-mounted or floor lamp, then its ceiling can be decorated with paper snowflakes.
Wall sheds are installed in living rooms, bedrooms, children's. After repair, you can use old sconce, only changing their appearance. You can paint the luminaire case into a light color, and from above apply a bronze or silver paint brush to create a patina effect. If the glass is a glass, the liked pattern is applied to its surface using a glass stencil. Here you can use contour (they are used to create stained glass) or aerosol paints.