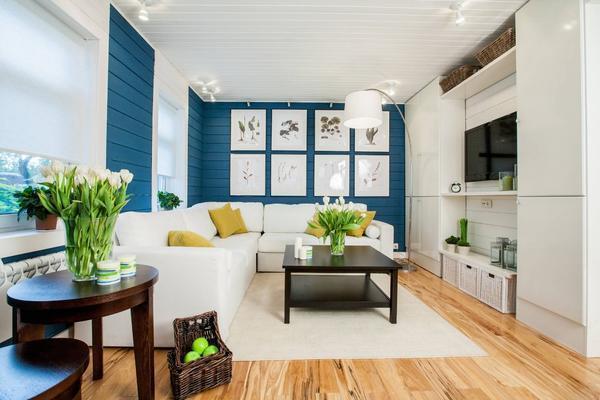
Original desktop lamps are unusual products with a design that rushes into the eyes and emphasizes the interior, makes it more comfortable as well as interesting. But self-made devices may well possess the same characteristics.
They are quite simple to make out of the girlfriend, decorate to their taste, and the design will be unique. If it is planned to use a rather time-consuming manufacturing technology, it is better to take the master class as the basis.
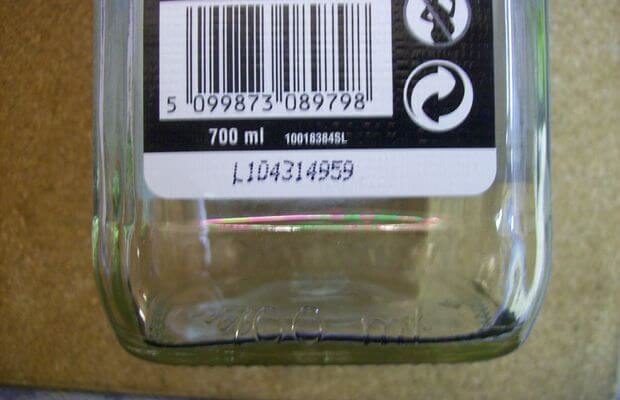
Homemade desktop luminaires of this kind are made using a wine bottle. Materials will also require greater tape. The drill will be used in the paper, and as an original idea for the light source, you can use a New Year's garland with small light bulbs (LED). Glass of bottles should be dark enough to protect against bright radiation of the light source.
Master class on the manufacture of a table lamp:
There are various ideas how to decorate such a lamp, and the master class to their implementation. For example, a bottle painting can be made. Another original option is the use of girlfriend, for example, crocheted coating for a glass chassis of the lighting device.
To implement such an idea, you need to use diagrams and master classes. The basis of a soft toy - pattern. The type of materials used is selected any, at its discretion.
However, it is recommended to pay attention to such features: not too thin or dense fabric. As an option - Len. You can bind all the elements of the scheme. The main thing is that in this case the binding was an openwork, not too dense.
First, all available parts are sewn, the base of the toy lamp remains open. The filler is styled inside. Then it is recommended to treat the tissue or a crocheted toy with a special makeup, which is used to seal the matter.
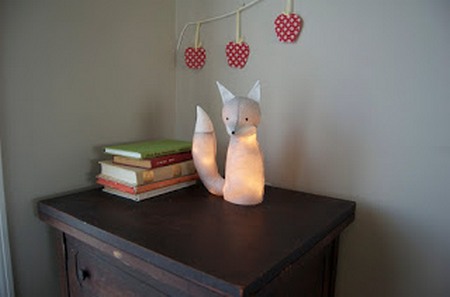
Soft toy night light
The product must dry well (1 day). Further, the filler is cleaned, which is easy to perform with a pencil-wounded bilateral tape.
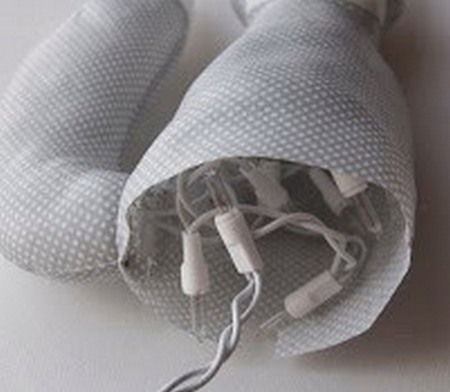
At the bottom you need to cut out a small hole for the output of the wire and place LEDs.
The bottom edge of the product suits the base to be as smooth as possible. A small hole is cut on the side for a convenient location of the cord. Inside the hook or stitched toy laid the LED cord.
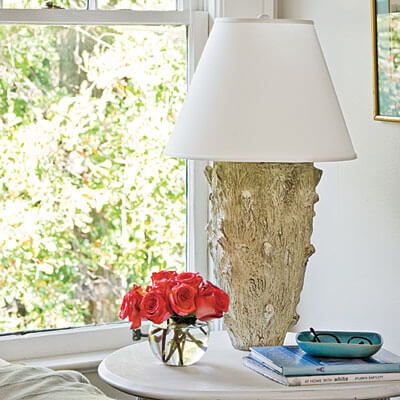
Another master class allows you to create a lightweight device from undergraduate materials that will surely find most users: a pot for flowers or a ceramic vase.
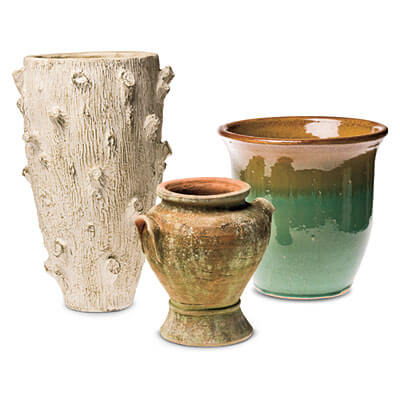
You will need a flower pot or ceramic vase.
In the work it is useful: a wired connector, a cartridge, a metal cutting tube, the length of which slightly exceeds the height of the pot. Also required plaster and spatula. To install a rod, a disk and two nuts will be required. Recent elements will enable the disc. This side of the bar is lowered to the bottom of the vase.
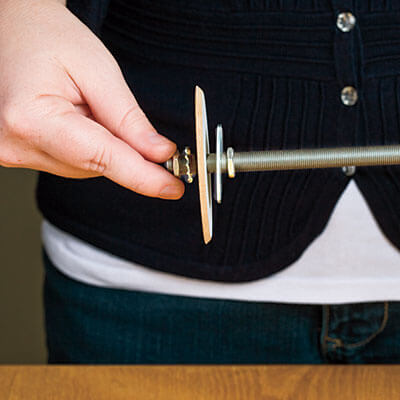
Attach the disk and the puck to one end of the carving pipe
So that the homemade lamp was stable and durable, the bottom of the vase is laid out a gypsum solution, which must be prepared in accordance with the manufacturer's recommendations.
Gypsum dries very quickly, which means that you need to act quickly and accurately. Before the fill at the bottom of the vase, a rod with a disk should already be installed.
A sufficient thickness of the layer of a gypsum solution is up to 1/4 of a vase height. Full pouring of the gypsum occurs after an hour.

Leave the disc on the bottom, and fill the pots in the pot.
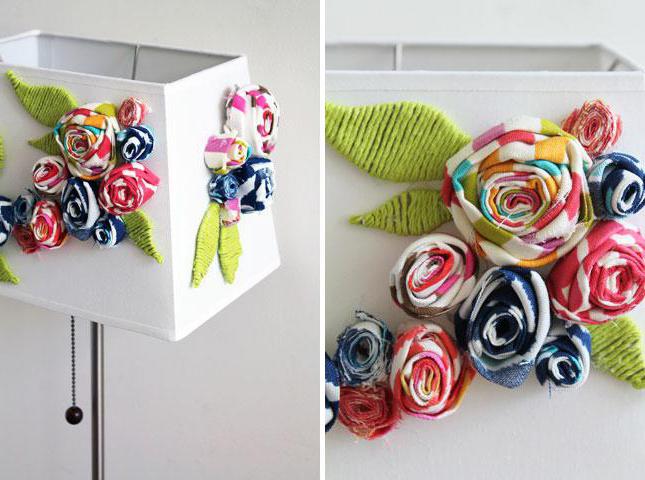
Next, the camera is attached to the cartridge. It remains only to install the lampshade. If you wish, it can be bought in the store, however, there are more original ideas: a crochet-bound lampshade, a product of fabric, etc. The feed cable is stuck through the upper edge of the vase.
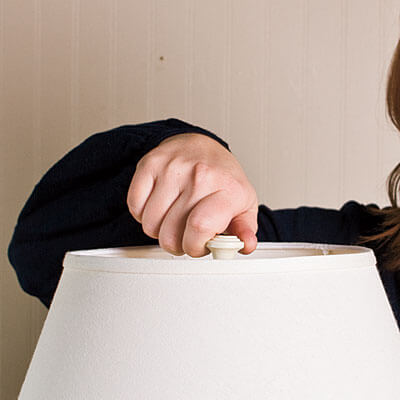
Secure the lampshade on top of the cartridge
To hide it, the lampshade must be located at or just below the edge of the vase. It is recommended to choose the plastic materials in accordance with the tint and style of the lamp stand, as well as taking into account the interior design.
The more transparent material is used (crochet, fabric, etc.), the more intense will be lighting from the lamp. For the manufacture of lampshar, the finished framework from the old lighting device will also be required, and the homemade analogue uses the wire.