Restoration of furniture with your own hands is not only fascinating. And not so much. One of the main principles of the ideology of the consumer society is very simple: 1.7-2.5 warranty period, and a landfill. Turnover, employment. Oh yeah, ecology. That is, not a dump, but disposal. What is some more turnover and employment. And the ordinary consumer, for which everything seems to be spinning - buy, buy, buy! No money - credit, credit, credit! From 1/3 to 3/4, according to various estimates, the intellectual potential of developers in the world works tirelessly for the time that the thing does not give the boss, it has not served too long. And the furniture also concerns.
The old Masters-furniture workers worked, knowing that the thing was bought for generations. Their aesthetics and artistic taste were worked out by centuries and therefore organically take into themselves the trends of modernity. Therefore, the old furniture is growing rapidly in price. Refresh old furniture - not only save a lot of money and give refinement to the dwelling. In the furniture, the links are firmly held, and in the relations of people surrounded by the revived furniture, psychologists note an order of magnitude less problems than lovers regularly update.
Each master puts into its products a part of the soul - this is not a metaphor. Form, texture, relief, drawing of their products, sensible master, says, says something, it expresses. He is not a beech and not a rigorist; Nowadays, he would find decent use and decoupage, and acrylic with Silicone, and graffiti from the can. But before you take for updating furniture with decoration, ask yourself: how do you understand this language? What did he want to say? Will your supplement be your supplement?
First of all, you need to figure it out, and did the antiques come to you? Then - do nothing before it is evaluating. Museums and collectors entrust the restoration of only trusted masters, and any amateurness of amateurs reduces the cost of things in tens, hundreds of times, right up to zero.
How to determine, not spending the subject antique furniture or not? For three signs: stigma, angles, fasteners. It is very important: to remove the fasteners you need a screwdriver under the slot, not too narrow or wide, with even, but with slightly linked corners sting. It is additionally necessary to wrap aluminum foil, so as not to scratch the patina on the metal, it also sharply reduces the value.
First of all, we take out all the boxes and inspect their corners. Roundedness without scaling - a sign of antiquity. Now we are looking for a stamp.
Stamp need to be sought on the back wall, the hint of the table top and the bottom. Dust and cobweb carefully removed with a soft brush or vacuum cleaner. If it is visible at least a piece of old stamp, go further. We also check boxes - there are stimples on their bottoms, and they coincide with the main - lucky, you can already call the appraiser.
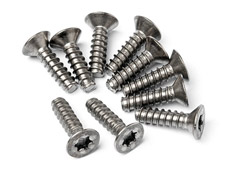
Fasteners - screws, screws, corners - carefully inspect. Carving a non-standard, step and profile float - it means old; Circled manually or on a primitive machine with a foot or inucery drive.
We also freeze the diameters of the bodies of screws and metal thickness of the corners. Machinery fasteners will be one-in-one, and old, handmade, is unlikely to be designed with an accuracy of 0.2-0.25 mm.
 The case of life - Grandma died; We decided to get rid of her old furniture headset. Obviously not antique, Soviet, from the fiberboard. The owner thought: But then there was no self-keeper? What then this furniture is outlaniorovanny? Cleaned the piece, as described below. It turned out - outside the most valuable veneer of the Karelian birch, and from the inside - also a very valuable "White Cuban cedar", Albinia, from which Humidors, cigar boxes do.
Then the furniture disassembled the plates (shields), the bottom of the CM-1 was removed by varnish. Then, heated by a household hairdryer, a cited wide spatula, not breathe, separated veneer sheets. The remnants of the adhesive perfectly removed the same CM-1. After that, the veneer was sprked out from the sprayer and dried under the yoke, paving purely white dense toilet paper.
Next month, three went to search for a direct bona fide buyer: as it turned out, the discovers' old furniture wakes up that flies on a fool. But! As a result, the amount accepted only for the veneer with great more than enough for the full new furniture of the apartment.
Full repair of furniture with updating and new decor includes the following steps:
Note: upholstery and other soft decorative furniture lifting belong to surface decoration.
All specified works may well be fulfilled at home. But before describing the operating operations, we will give a summary of the tools and materials so that in the future it is not scattered and not distracted.
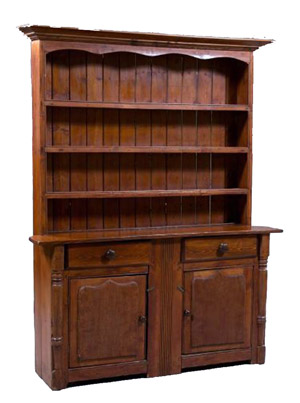
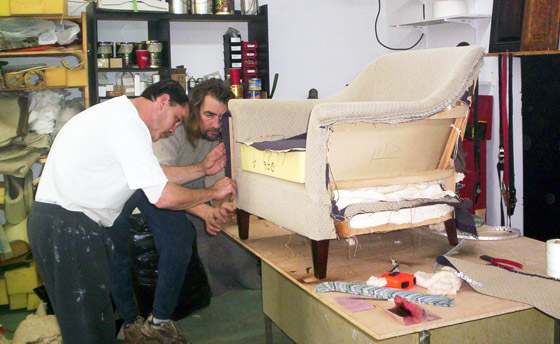
The stumbling block during the restoration of the table is not at all a tabletop, as it may seem: it is easily washed and cleaned with the compositions described below. The main problem is the bottom of the legs, they are blurred, and beaten, and mokley most. Here it is necessary to remove the plywood, the treatment of the tree, the restoration of the shape of the legs with a liquid tree and a reliable strengthening of their mounts, this is one of the most loaded furniture nodes.
At the same time, the bottom legs are not in sight and small flaws in the work will not be thrown into the eyes. Therefore, the restoration of the table is the most suitable start for an amateur furniture. Experienced masters and give tables to work to students.
From the tool for work on the furniture you will need:
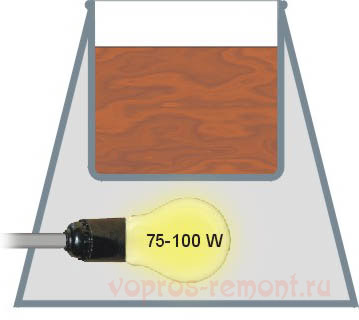
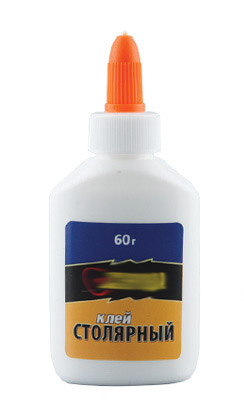
The restoration of the old furniture assumes that all work is made on the original technology. However, for yourself, if the furniture is not an antiques for sale, it is quite possible to use modern, fairly well-proven materials. In particular, joinery is successfully replaced by PVA; His praise even such arrows like bukinists. Relief retrograds give the same scheme of the melting, see Fig.:, Boiled on gas, high quality is no different.
Also, the wash is better to make detergents for dishes: their chemical reaction is neutral. No doubt and suitability for furniture of acrylic varnish, especially since it can be polished with any car polyrol. A complex relief is washed with a soft toothbrush from a natural hair.
But with the compositions containing organic solvents, you need to be careful. If they do not spoil the material, they give a temporary effect: the glossy surface will soon fade again. Therefore, we further provide recipes for different cases (which will be discussed below), tested on experience.
Note: If the composition contains ethyl alcohol, kerosene, vinegar, ammonia alcohol, etc. Chemically active substances, then its action must first be checked on a non-blocking section - the end of the plastic and inner corner.
Furniture wax (VAKSU) of different colors can be made from the molten white beeswax, the velvene griffing of colored pencils can also be burned into it; Colors can be mixed. In addition to the exact selection of tone, the method is also economical: the material is prepared by portions as they need. Another advantage - using both the addition of white griffel, can be in wide limits to vary the consistency of the mixture, while maintaining the tone.
Recipe 1. - Paraffin and color furniture wax 1: 1. The composition chosen by tone is rubbed into the cracks with a racking, until he warmed from friction. The residues are removed lounge (old and well-stressed) rag, moistened kerosene or turbidar. It is suitable for grouting small cracks in the tree.
Recipe 2, For small scratches - linen or burial oil and ethyl alcohol 1: 1. Apply a tampon from white flannels or bikes; Drying is polished with clean dry cloth.
 For paints paints - first the wet with a solution of food soda. Drying - cleaning from the plaque with dry rag. Then - the watches with an aqueous solution of ammonia alcohol (2 h. Per liter of warm water).
The varnish is cleaned with a tampon moistened with a washout solution for dishes, and then wipped with a swipon moistened in clean water. For highly polluted surfaces after wiping with detergents, it is necessary to wait 1-2 hours, the covering surface is slightly damp cloth. If, after cleaning the surface it turns out to be dim, it is rubbed a tampon, barely moistened with vegetable oil.
For the surfaces captured and coated with a kitchen, - grasp the talc, smeared it with a rag. Then wash with warm water with the ammonia alcohol, as described above. The second way is to wipe with a rough cloth, moistened with hot beer. And the method is completely safe for any polishing - wet-woven sleepy tea rag. The tampon wipe the surface before cleaning, and then dry rapidly wipe off.
For splashes from whitewashing and water-level paint - on a glass of wine vinegar 2-3 drops of olive oil. Wash off with light movements impregnated with a mixture of a tampon.
For white spots from water - the spot sprinkled with flour, and then wipe the tampon to disappear, barely moistened with olive, palm, corn or sunflower refined oil. Place with blahotka.
For white spots from the hot - rub the mixture of 1: 1 paraffin with the wax of the desired tone, covered with a wet and stroke the iron. Polish with cloth or felt. If the lacquer was not deeply laughing, did not swell, did not acquire a noticeable grain, then the stain sprinkled with a cooking salt, it dripped 3-5 drops of vegetable oil on it and withstand 2-3 hours. Then the mixture is brushed and crutged with circular movements before the stain disappearance. Finally, dissolving in a boiling beer a piece of colored wax, the cloth rubbing the hot mixture until the tone is restored.
Wood most of the rocks from the surface is well cleaned with a mixture: olive or linen oil, denature (it is denatured alcohol!), Turpentine and clarified lemon juice in equal shares. Oak is well cleaned with hot beer.
Notes:
- There are many recipes for wood surface cleaners. It is important to know that any of them with vinegar immediately spoil the red tree.
- Effective tool for cleaning the tree and masking small defects - rubbing green peel walnut. Wood resistance to rotten and pests increases, due to the saturation of the surface layer Tanin. But the peel strongly tints wood, so the processing of individual sites is almost never possible.
Furniture woven, cane and rotangling wash and purified with warm water with ammonia alcohol. It is convenient for this flusted brush from a natural hair used, i.e. Soft, or soft toothbrush, but also from natural bristles.
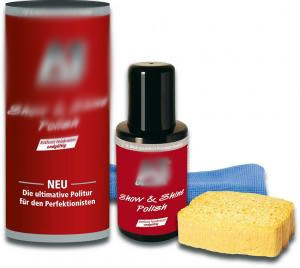
Polyrol fills the microcracks of varnish and pores of wood, so that the surface of the furniture remains a glossy and a tree array is protected from damage. The most common polyroli is based on wax and solvent: alcohol, turpentine, domestic (non-fuel) gasoline. For lacquered furniture, automobile polyters are suitable. The shelf life of the polyroline is limited, so we give two recipes for self-preparation with minor portions.
Recipe 3.: Beesh (can be colored) wax - 40% by weight; Gasoline or turbid - 60%. You need to measure the ingredients by weight, not by volume!
Recipe 4: Cererse (somewhat worse - paraffin, not stearin) - 55%; Pine rosin - 5%; Gasoline - 40%
Both composition must be rubbed into furniture, and they require regular applications: if you throw regular care, the furniture for several months fills. Therefore, we give two more recipes without organic solvents suitable for both varnish, and for open wood. These compositions, the furniture can be simply sprayed from the pulverizer or apply a clean rare without rubbing, and no special care is required. But the surface of the furniture should be clean, otherwise the dirt is incorporated.
Recipe 5., For old wood drying: a quarter of a glass of olive or palm oil and 2 tbsp. l. Spoons of clarified lemon juice. You can add 2-10 droplets of essential oil (coniferous, citrus, etc.) for smell (coniferous, citrus, etc.) or perfume fad.
Recipe 6. , For fresh wood, susceptible to pollution: a quarter of a cup of clarified lemon juice and 1 tsp. olive oil. Fondes add undesirable, they can react with the active components of young wood.
 Painting of furniture with a dense layer is made by oil paints or acrylic enamels. Nitro, glyphthalic and pentaphthalic paints for home furniture are little suitable: they are very deeply penetrated into the tree, the paint consumption is high, and its complete removal is impossible. But for the country and garden furniture, this drawback may be dignity. Under the oil paint, the surface is ground with oil, and under the acrylic - water-polymer emulsion.
For coloring with an emphasis of the texture of a tree, simulators use and dreated. The simulators are produced all the colors of the rainbow and penetrate the tree shallowfield, by 0.3-0.5 mm, so that then the painted layer can be removed with a skin. But the color of the mournirls looks somewhat unnatural; It can be seen that painted.
Adsis penetrate into a tree into several mm and give a natural look of the painted, because The color is achieved by the interaction of the drive with the tunnors contained in the wood. Therefore, the rubbers can be painted not every tree, but only containing tangible amounts of Tanin. From domestic breeds - Oak perfectly perceives the drive, and it is better and not attempting with birch. With any other - need a trial painting of a small area, because The tipper content depends on the time of tree exposure.
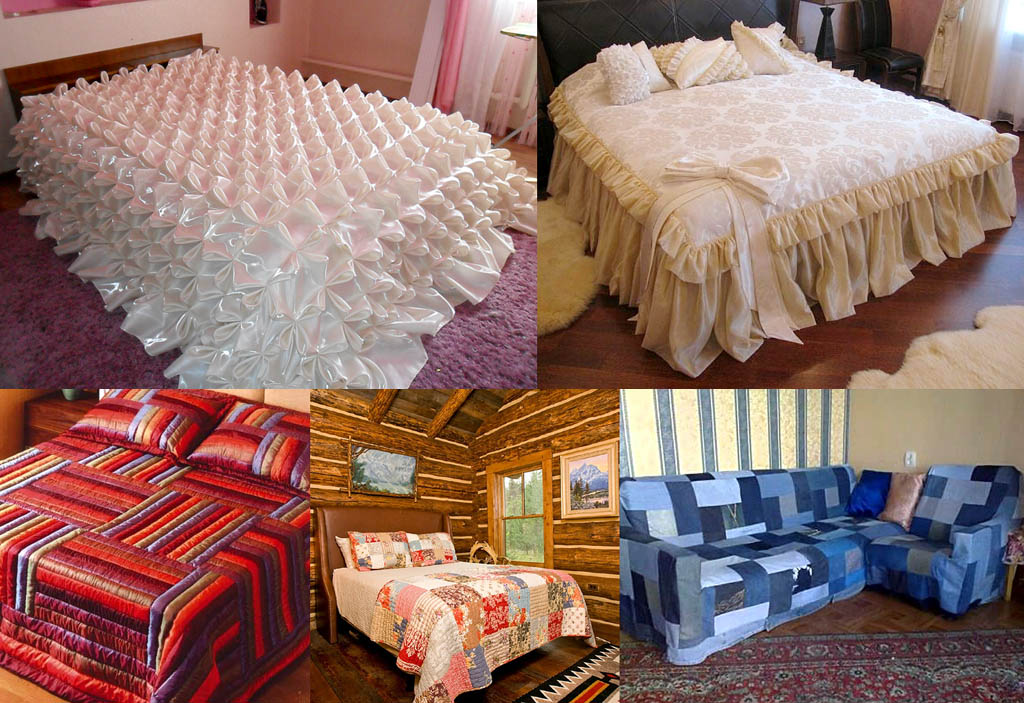
Drawing of furniture with your own hands requires a particularly attentive choice of fabric. It's not about her form, traditional jacquard, tapestry, velor, flock, Kurtyzan and Chinill; Swimating fabrics are absolutely not suitable - it is badly drawn, quickly lose. The case in the picture is a beginner furniture maker you can recommend only the small is not very contrasting.
Firstly, the pattern on the seat and the back should be consistent - left in the direction of the band or shifted halves of the flower immediately spoil the whole look. Expensive fabric will have to buy with a reserve of 15-20% on the combination of the pattern, and there is no guarantee that, having completed the work, do not have to understand that all the upholstery needs to be changed.
This difficulty can still be circumvented by applying the method of complementary tissue. For example, if the backrest upholstery will be a green jacquard with large leaves, then the seat can be used for the velor or tapestry tapestry. Say, at the bottom of the grass, and above - leaves.
However, the hauling of furniture is no wonder so called: without pulling the fabric it is not necessary to do. And then the drawing will also be drawn, and in a large figure, the contour distortion will be oh-oh-very noticeable. Furniture tightness with the matching pattern is a subtle art, and immediately did not get even among the famous masters. Therefore, the first furniture pancake is better to do with a small lack of drawing or at all monophonic.
On withc and lining furniture upholstery are linen canvas or jute burlap. Synthetic, sisal, etc. slippery fabrics are completely unsuitable: the upholstery will soon go, and the sofa covers is not a coat. Hemp is also not suitable: although the rough, but quickly grieves the dust.
Without sewing work, you can do only with the upholstery of a simple stool, and here it may be necessary to insert in the seat or back. The chain seams that make most sewing machines are not suitable for furniture: as soon as the abrasion of such a seam will reach a certain extent, he flashes in itself.
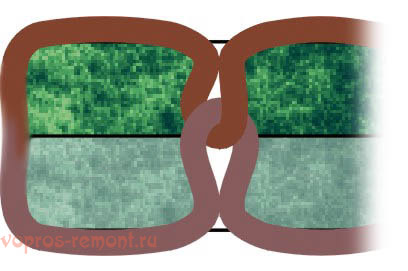
The furniture trim sew sailing seams, but the machines intended for them with a pneumatic or electrical mechanism of transmission of the thread are expensive. However, the simplest sailing seam, the diagram of which is shown in the figure, is easy to manually. If they sew a harsh thread or a rush, the loop is pulled out on the face with a thin steel knitting crochet. For manual sewing thin thread, a needle is suitable for a sewing machine in any suitable mandrel; Then the loop is left on withc. The second chassis end of the thread in any case is refueling into a regular needle and they do in the loop.
Each stitch is tightened alternately from the face and from the wrong to the thread goes into the cloth, and the overheet was in its thicker. If the thread is over, its ends from the offstage are associated with a direct node, and the continuation of the seam leads with interception of 2-3 stitches.
Note: The famous denim "eight" is the most difficult and perfect of sailing seams. Levi Strauss, threatening to sew workers pants from Genoese (Jenuis) cans, which, in the market in the era of the shift of sailboats, the steamers were at least broke, borrowed from seafarers and seam. So, if you have a machine with eight - in good hour!
Stuffing the furniture with horse hair is almost not done even for an exclusive; Vatin and felt also sprinkle their - modern synthetic materials are superior to them in all respects. If they are proper quality, of course.
The foam rubber is divided into a density brand (it is a specific weight in kg / cubic meters), denoted by two digits: 20, 35, 45, etc. The brand depends on the elasticity, which is important for packing. Check the quality of the foam rubber, squeezing it to the limit with your fingers: suitable, if you release, immediately shoots to the smooth, and the bad is gradually straightened, and a dent can remain. By the way, the foam rubber unusual for furniture can be an excellent insulation or filter.
Furniture Sinytec must be pure white and solid, firstly. Patchwork color is most likely made of waste; Perhaps toxic. Secondly, the matytender mat should be strong enough, not spread when tensioning with hands with a little effort both along and across the fibers.
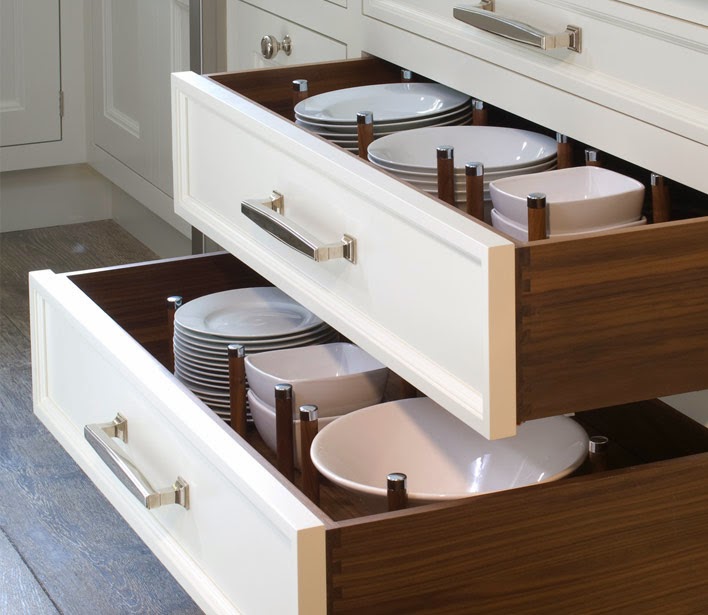
Some alteration may need for the base of the seats of chairs, bottoms and sidewall boxes. Furniture makers for these parts are used by Paneru since it appeared, and not in vain: for details are not decorative, but loaded, plywood is indispensable.
The old plywood often turns out to be burst, and then temptation arises: for the sake of "infant" to replace its board. For bottoms - no need. They are not in sight, and modern plywood brands of FB, FC, FSF or BS will stand longer and last longer than the array of the most durable wood species of the same thickness. Well, and the sidewalls of the boxes are a different matter. They are visible, loaded little, and for the sake of decorativeness, they can be made milk.
For sealing wide gaps and elevation will have to apply a liquid tree. The best is homemade acrylic: on 1 part of the resin with a hardener 3-4 pieces of sawdust. Overall and sorted sawdust of the set of shades and varieties are sold in construction stores.
The liquid tree on epoxy changes the tone of wood and over time becomes very fragile. As for the very cheap and comfortable in the work of silicate (on liquid glass) of a liquid tree, then it is suitable only for how to patch out: liquid glass is all known silicate glue, continuing and not waterproof.
The furniture delivered to the place of work should be suppressed in the new microclimate of the day 3-4, and better - a week, otherwise it can start cracking and breed right during operation. On the second day you need to remove and fold all the boxes separately. Indoor temperature - 18-24 degrees; Humidity - up to 75%. There should be no direct sunlight or warm-air fluxes on the furniture.
Note: decorative soft furniture casing is often very valuable, especially if the original wallpaper nails are preserved. Therefore, it is necessary to remove it first and very neat. It is highly advisable to consult with an anti-car-furniture maker about its further fate and cleaning methods.
 Threaded connections disassemble as usual: screwdrivers, keys, passage. The main condition is no rest on the tree. If the screwdriver does not strive to slip away or the screw turns, look closely, where and how to hold his body with priests, clocks or round-rolls. If it fell altogether - you need to let the drop-two spindlers or hours oil, wait half an hour and hop again. In general, patience and cutter.
If together with the screw got out of the cracked wood and tightly the threaded nest for him - not the trouble, then we will tell you how to put it in place to be tightly. And screw bite or saw no rush: Cap the brake fluid or kerosene, clamp the head with small priests, the nest is large, and the sharp jerk of two hands in different directions will hand over a clutch thread.
Firstly inspect the back of the connection. If the nail is bent, let's swing up with a flat screwdriver, break through the passage and pick up the pin to the hammer to get out the hat. Sucking - spindle or machine oil. It seemed like a hat - carefully pull the passatshams; The nail to the tree will hide. Walking nails need, pulling out, shaking under a hat behind the rod, otherwise the decorative hat can break.
If the nail is scored in vglukhuy, then try to shift and pull the parts bonded to them so that, again, the hat got out. Here the oil will help again. Suddenly the hat goes into the tree - attention, stop! Carefully breathe it, remove the top item from the rod, and pull out the most rod with the oil.
All old joinery adhesives of spirituality. To separate the adhesive compound, swing it along the contour with alcohol after 2-3 cm and cover or turn it off with a film or parchment paper. After 10-30 minutes. You can try to distribute, or repeat the procedure. Especially carefully you need to shoot a wooden decor: it dries the most.
To disseminate glued connections, a mounting knife with a segmented blade is very convenient: with a too strong nagged, the segment is packed, but the tree remains as a whole, and a very thin blade can be turned in almost any gap. Bashed in the grooves of the bottom gradually, from the end, come up with a narrow chisel.
Covenial compounds on the deaf wooden bosses - the impudent, in the marine - are simple, disclosed or pricked. Simple and relaxed simply. The glued swapped with alcohol, and the details are slowly melted. If the bell is Oblinen, the details first will disperse a little, but they will not go further. Then the heel is simply needed to repel the electrolls or cut into the same mounting knife. How to plant new brazenings will be described below.
Connections on the Us and in the thorn, if they did not completely fade, it is better to leave as it is, the grooves of the grooves with a liquid tree. If you need to disassemble the connection to the Us, first we look at whether it is not reinforced with a nail or brazen. The nail is drawn, the bells are drilled or revaled. A thickening connection of the type of swallow tail is discolored by deploying the details as a book. The glued connections are discharged with alcohol as described.
We remove the web and dust with a vacuum cleaner; Remains with a soft brush. Material upholstery of a vacuum cleaner and pass on it a new shoe brush, wrapped with a cliff wrapped. You don't need to tear and throw out: we will need a template for a new upholstery. In addition, the old after washing with a dry cleaning can still be back in place and long serve, and new furniture fabrics of the road. If we restore the furniture, then you look, and its upholstery will be valuable: with manual embroidery, tapestry, etc.

Doors, plastic and inner parts by my tampon, moistened in a solution of detergent for dishes, putting them in a horizontal position. Then also wipe the swipe with warm water and paper towel or toilet paper wipe dry. The solar dirt will not immediately fit immediately, so it is not necessary to wash it right away, but after 5-20 minutes, and repeat the procedure to pure varnish or wood.
The next step is to inspect the surface. It may well be that, after the elimination of small defects (spots, cracks) and the cleaning of the tree with the compositions described above, the new polishing and varnishing will not be needed: traditional technologies were calculated for centuries. It will make it easier for the cost, and the values \u200b\u200bof the furniture, on the contrary, will add. But in this case, you will have to be particularly attentive at further stages, so as not to spoil the original coating.
Tip: if the furniture is not lacquered and after all the cleansing procedures, the tree seems dirty, try to wear it with wax in beer, like oak.
If the lacquer is not suitable anywhere and need to be flush, then it is better to do it with non-toxic surfactant (surfactant) with crypts of the CM-1 or CM-2. The best way is a liquid washes in a horizontal position: on the coating scratch the grid in 20-30 mm increments and determine. Ordinary varnishes are removed by the layer at once, for acrylic you need to exposure in half an hour, cover the part of the film. Remove the lacquer with a spatula with a dull smooth corner so as not to scratch the tree. The procedure can be repeated. Gelery washes are suitable for use in the vertical position of the surface, but more expensive and act is not so evenly.
Note: Tree stripping on a wooden bar need to postpone the extreme case - and the tree is eaten, and there will be no mirror-smooth surface.
Most of the tree defects found on the clean surface can be eliminated with their own hands:
The purpose of steaming is to soften and warm up the tree, then the grout as it impresses it; Small cracks may come together and glue by themselves. For steaming, the household vaporone type searcher is ideal, but it costs a lot and for something else, no matter how advertised it, is suitable enough.
At home, not bad to disappear by an ordinary kettle with a dense cover on an electric stove. The water is poured into it a bit so as not to cover the drain holes inside, and the hose from heat-resistant rubber or medical silicone, also heat-resistant stretch. After steaming, the processed area is dried by a household hairdryer and, not yet cooled, raise wax. The remains of the vaccines are cleaned with a swab, moistened with turpentine.
"Herbalings" based on copper sulfate, old-time biocides, toxic and spoil the tree. Now available there is a wide selection of biological preparations against rot, mold, bug and complex. Most of them are applied once, but first seed should be checked the degree of wood lesion: several holes with a pin head on the surface can be conducted in a whole labyrinth of the strokes of the vertoon, due to which the board can be pierced with a finger.
Before you take for fasteners, you need to determine whether the value of old plywood has the value and, if so, remove it. The removal and alignment procedure is described at the beginning of the article.
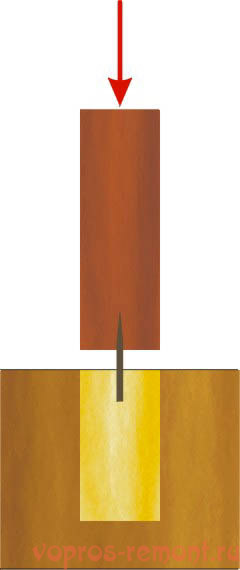
The strengthening of fasteners is most often reduced to the reassuring of the existing nests or holes from the old fastener, and then to the installation of new aggregates from the solid resistant tree (oak, male, doggies, acacia, rowan) on the PVE glue - it is pre-drunk in the well - and wedges See fig. Such a heater will be tightly in a long decade, it is necessary only that the wedges are oriented across the fibers of the foundation, see fig. on right.
Note: if the nest in the end of the plastic is broken, and the board is cleaved, the chips are wicked by PVA, compress the crying of the clamp through the plywood gaskets, and only after complete drying is made.

If the heater is a bubble, then it is left by the protruding, and before assembly, the retaliatory clins are pronounced; The wedges also make their solid wood or fiberglass 0.5-1 mm. If the heater goes under the self-tapping screw or the screw nest, then it is cut into the flush and passchlebel.
Holes for the self-tapping screw and nests are better drilled immediately. Under the sockets - on the diameter of their bodies and a depth of height. Under the self-tapping screw - a diameter of a 2/3 of the body of self-threadless bodies and a depth of 2/3 of its threaded length.
Note: this method of strengthening fasteners is also suitable for Viennese chairs and other openwork structures, but without subflinking - braided will have to take very small.
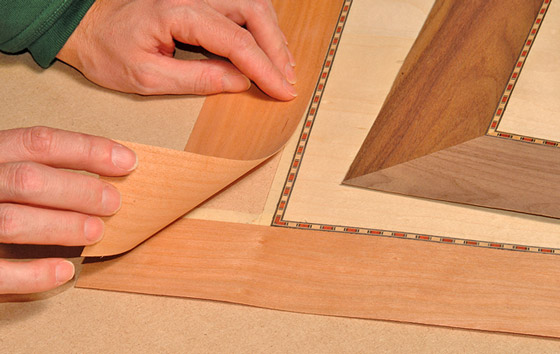
A completely triggered mustache and spikes (except for the palm tree tail) are lined with slim plywood or veneer pads. Blood technology - Normal for wood:
High-quality plywood is made in two layers: the hide from the peeled veneer of the businesswood and face is made of planed veneer of valuable breeds. Unfortunately, when chopping plywood, both layers are most often approaching together, and they have to be divided, and for this you need to remove the plylovka from all over the plastic and fansing it again.
The old glue is removed by surfactant, but the sticking has features:
Note: Smoothed in a cold meaningless - the essence of smoothing is not in accelerating the drying of the glue, but in the softening of the wood.
Under oil paints and varnishes are ground with olifa, heated to 60-70 degrees in a water bath. Under other paints and varnish coatings - it either or water-polymer room temperature emulsion. Under the wave (see below), primers are not required; The primer under the Khokhloma painting is described in acc. section.
The proscure for underscores the texture of the tree makes a versatility or drying; both - according to the manufacturer's instructions. Aniline simulators are bred in water at 70-80 degrees. For brightness in ready-to-use solution, several drops of alcohol are introduced.
Painting and artistic painting of furniture are made by oil, gouache or aniline paints on the relevant technology and the soil described above. It should be noted that the gouache and aniline will not be given on the tree of the dense layer, like the veil; They are most often applied on a background of oil or adhesive paint.

For furniture is suitable any of the traditional Russian techniques: Khokhlomskaya, Gorodetskaya, Polhov Maidan. Of course, the plots do not necessarily take the original mythological; These techniques give a durable persistent painting suitable for lacquer coating. However, Khokhloma, the most perfect and exquisite (see Fig), is written especially:
Surface decoration of furniture, other than artistic painting, includes the following main varieties:
We will not talk about thread, it is a separate and complex subject. We will analyze what is possible a newcomer at home.
Regular fascination of bare wood gives it a very exquisite appearance. Available in a wide range of wax mastic for furniture; Suitable for this purpose and any polish with wax out of the above. But it is necessary to mass regularly, otherwise the furniture will soon sweat, and it will be difficult to restore the softness and warmth of the surface.
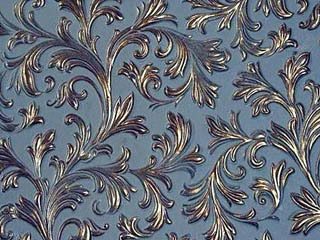
The furniture is not inhabited by a totelee or tapestries: they dust are dusting, require careful care. But now there is such a wonderful material as a linker, invented by the author of Linoleum by Frederick Walton.
Linker is a soft light linoleum, not suitable for flooring, but holding on vertical surfaces. The linker is produced by white roll rolls with an embossed pattern, up to multifiguric art scenes. The linker sits firmly on the glue, and paint perfectly lies on it. Using furniture patination technique (see below), it is possible to get a coating that would not reject in the versal time of Louis XIV, see fig.
True Wooden Inlay - Intarsia - for independent execution is not available. But it can successfully replace a mosaic from the tree - Marquetry. Make marquetry like this:
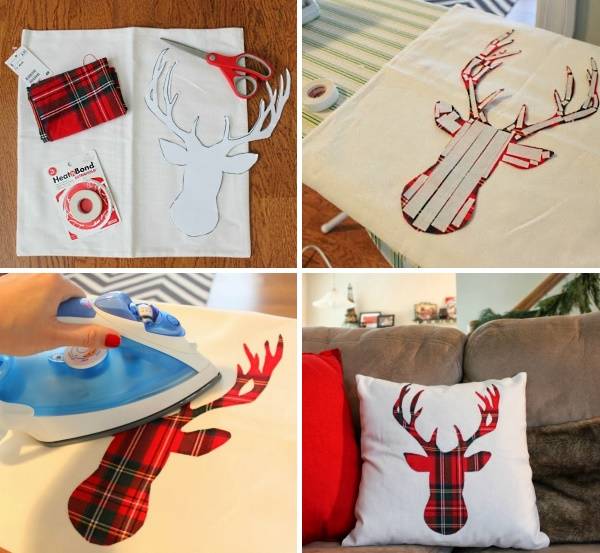
The simplest and affiliated tree appliqués is a decoupage. The sets of finished sets are sold, and the technique is simple: fragments made of colored paper are placed on the basis of PVA or acrylic and then covered with varnish.
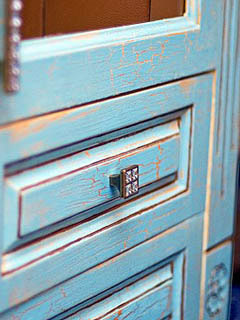
Many wish to form their furniture. Basic ways Two: craklers and patination. Patinating furniture is not at all the creation of an artificial patina on the metal; It is used not only to make up, but also for surface decoration in olive style, see fig. on right. It is necessary to know that crackering on patinated furniture is unlikely when appropriate: patinating most often under metal, and who where when did you see bronze or silver in the grid of small cracks? But we turn to the technique.
Craquelur on the furniture is made in the same varnish collapse as on painting or Venetian plaster. The paint is applied to the climbing, but still wet, giving an easy light paint. Thoroughly, the paint is tightened, pulls the still soft paint, and the grid of small cracks is formed on it. Craquelur can be covered with protective varnish.
Patinating furniture is a sequential application on it all the nusted layers of all the brightening paint, the oxidic shabby metal is simulated. Each layer is chosen. For patination under the bronze, the gold paint gold paint is finally applied, and on it - its bronze or bronze powder rubbing. Patinating under silver, as in illustrations with linker, can be made aluminum, and then zinc powder.
The main principle is patched from the depression on the bulge, because really the relief is erased on tops. Technique is as follows:
With the external simplicity of furniture patination technique requires a serious skill and hard hand, so it is necessary to master it gradually, training on a different kind of wreckage and waste.
For protective varnishing furniture use any furniture varnishes. The aged furniture for the form is better to cover with oil varnish, but it will dry for a long time and requires regular leaving with a vegetable oil with a vegetable oil with a chipidar. Nevertheless, the best furniture varnish should be recognized a transparent or tinted acrylic: it is suitable for any surface, unusually durable and racks and practically does not require care.
Polishing varnishes of "old" types is made by the cloth, blackening or felt, but acryl they are bluntfully, because of its strength. Acrylic coating is polished with a leather (so faster, but only smooth surfaces) or felt with ga paste. Kerosene dripped onto the heel to noticeable moisture, rubbing his goy and then polish the furniture. Paste leaves a bit: if the polishing went tight, but the Goe's greens is still visible on the buzzing, just dripping Kerosene. Footage of the goy on the furniture is easily erased by a rag, slightly moistened with the same kerosene.
Help furniture anew, even having templates in the form of an old upholstery, very, very difficult. Therefore, we leave the uphole to finally, after all the works on the tree. The second reason is paint, polish and varnish can get into the trim. It is also necessary to start the upholstery work with the simplest - with a soft chair.
The upholstery of the seat and the backs of the chair keeps on the plywood board - the basis. They are attached to the frame with either screws through the upholstery from the rear, or invested in the nests on it. Repair of chairs most often and comes down to replacing the worn upholstery, and this is a wonderful case to catch in upholstery. The sequence of work is as follows:
The back is dragging similarly, but the foam rubber needs one layer of 20 mm and the average rigidity, the brand is 25-30.
Throw the chair is the case more seriously, you will need to work with the spring block and, if it is folding, with a mechanism. In addition to the back, it will be necessary to clean the armrests.
And what if the upholstery is bordered with polished? Here's from this border and you need to start the facial upholstery: put it up with an inlet up, secure the stapler and unscrew back to the face to come out. But we will not get ahead.
Disassembly of the chair start with the removal of pillows; In the folding chair, then the mechanism will be visible, it must be photographed in order to collectively collect it. Then remove the sidewalls, they can be discolored tight. The "divorce" of the sidewalls can not: the pin-sliders of the mechanism can be broken; You can make it easier to join the nail, mate or rubbing.
After removing the old upholstery, you need to straighten the frame of the block; The appearance of it from the chair in which you can still sit, sometimes it is just awesome. Refnote two passages on weight in several pressure, not allowing unnecessary wire bending. Then the springs are then right - their tops should be a single plane and not be overwhelmed; Most often require editment average springs. Edit is easier to do without removing the block from the base; His bottom is deformed very rarely.
Note: fully remove the block will be necessary if the felt lining is broken under it with a moth: it is her favorite nest. In this case, a new lining is made from synthetic felt or overcoat cloth in two layers.
Then make the strapping and shrinkage of the block. In the factory, the new unit is tied with a grid or crossbar belts, but at home is the best jute twine, see fig. Its branches on the centers of springs are associated with straight nodes and block sitting on 1/5 height of springs.
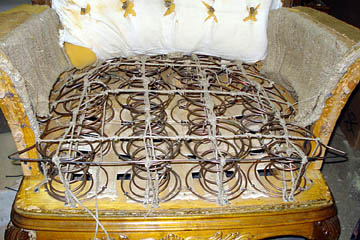
The uniform shrinkage of the old block can be achieved by applying wobbly nails or stationery mushroom buttons: they are not clogged until the end, and 2-3 twine turns are thrown into the rod. Tightening-relaxing its branches and seated the unit to the smooth. But do not clog the nails / buttons in the end or in the extends - from this all the upholstery will turn quickly! Only at the top of the base!
Having finished the shrinkage, nails / buttons are clogged until the edges of the edges of the hats in the tree are cut, and the twine tails are cut.
The trim is starting with the seat. Having completed it (see below), put in place and celebrate the marker on the back and sidewalls of its contour. What for? In order for a soft lining under the face upholstery of the back and armrests, do not bring to this line by 30-40 mm, otherwise the seat will not give it to the place, and there will be no fold / college.
We wear a cover, canvas or burlap. Vertical angles will have to be trimmed with an inside and flash - the exhaust fabric is no longer anywhere. Seat sailing seam - The casing is working at the same time with the block, and from the blossomed seam all the chair turns.
The next layer is a synthepon 10-20 mm thick in the contour of the seat with a release of 10%. It also makes the strapping from the twine, but stretch weakly, if only the twine crashed into the corners of the Mata. Further - two layers of foam rubber, the same as on a chair, and facial covering with trimming and firmware corners with inside; The cutting of the face makes the old with a reserve of 10-15% on the hood.
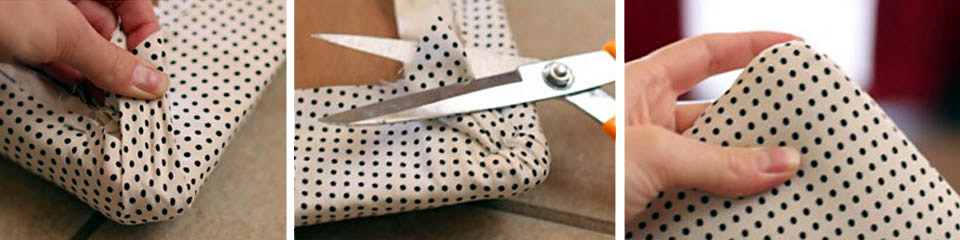
The face is superimposed in two stages: first, without trimming and firmware, the angles are pulled up at the place, temporarily fixing the buttons. Having achieved proper fit, the lines of angles say the tailoring fine. Next, the case is removed, cut and flashes the corners from the offline, turned out, wear and fastened with a stapler.
This is the most painful for beginner a part of the work: a crammed rag from the firmware of the corners leads and leads, so the corners must be made with a margin. It is better to even work in three stages: the angles to flash without trimming, to fix temporarily and cut finally, only having achieved proper fit.
Armrests are silent as the back of the chair; You can add soft foam rubber on top. But the back is chosen in two ways: if it is spring, then like the seat of the chair, and if not - like the seat of the chair, with a double foam rubber.
The sofa is stretched in a width chair with a box, so the repair of the sofa has only two features:
Note - joke or seriously, who knows: Suddenly it will be found that the old blocks of blocks and internal covers from the whale ocea (like from the bands of flexible plastic) - consider that you removed the jack-sweat into the lottery or found a treasure. Whale hunt for a long time is completely prohibited, and smooth whales, of which this very mustache was mined, it seemed to have knocked out. Therefore, the whale musty give incredible amounts, if, of course, the buyer is not a rogue.
Assembling furniture, if you have already disassembled it without turning into firewood, it will not imagine difficulties, especially if you guessed to take a picture of the disassembly of stages. We will give only four councils:
Restoration of furniture with your own hands - the occupation is difficult and painstaking, but grateful. Old furniture after restoration is able to serve for a very long time. She creates in the house of the comfort, heart, friendly atmosphere and acquires greater value. Restoration of old furniture feasible at home.