Classical restoration, or lamination, is to remove from the surface of the furniture of the old coating and applying a special varnish.
To give furniture an antique effect, it is covered with a crockel varnish.
Update the appearance of wood furniture will help paint with acrylic paints or varnish, as well as restoration in the decoupage technique.
Works are carried out in such a sequence.
First disassemble all the details of the furniture, except for the frame and glued parts.
With the help of a cycle, you remove the old varnish, dirt and paint.
Then eliminate various defects in the form of chips, chosen and scratches, and also restore the details failed.
With strong damage to wooden furniture, it is necessary to strengthen the design, and then make an assembly of disassembled parts.
In conclusion, the furniture is covered with varnish.
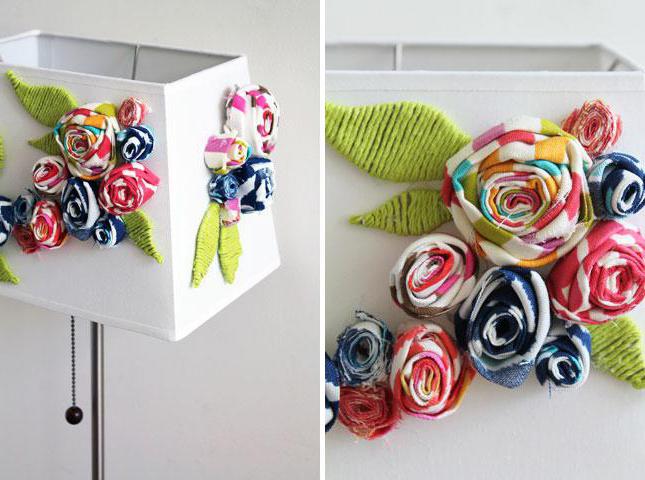
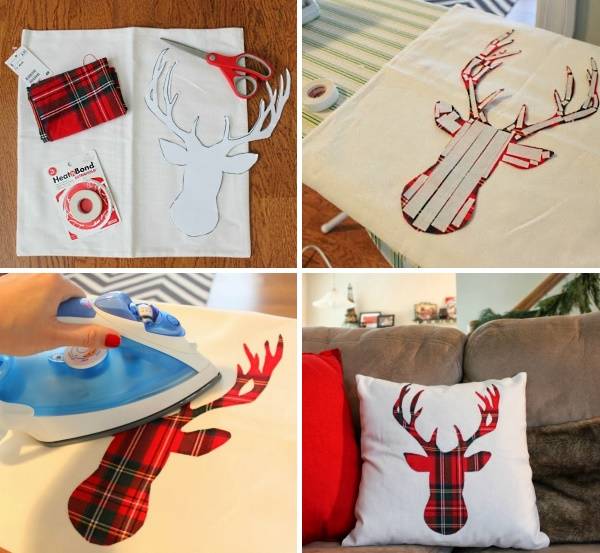
This type of appliqué, despite the unusual name, does not require complex technologies or expensive materials. For appliqué patterns, you can use conventional three-layer napkins. Execution technique as follows.
It is necessary to thoroughly clean the surface of the furniture with sandpaper, then cover the acrylic paint in two layers and wait until it dries.
Cut your favorite elements of a three-layer napkin and separate the bottom two layers of paper. If you wish, you can use the entire napkin.
From above, neatly with a brush is covered with diluted (in proportion 1: 1) PVA glue or special glue for decoupage and smooth the surface, removing possible irregularities and bubbles. Leave to completely dry.
After drying on top to the entire surface, apply a protective layer of special varnish for decoupage.
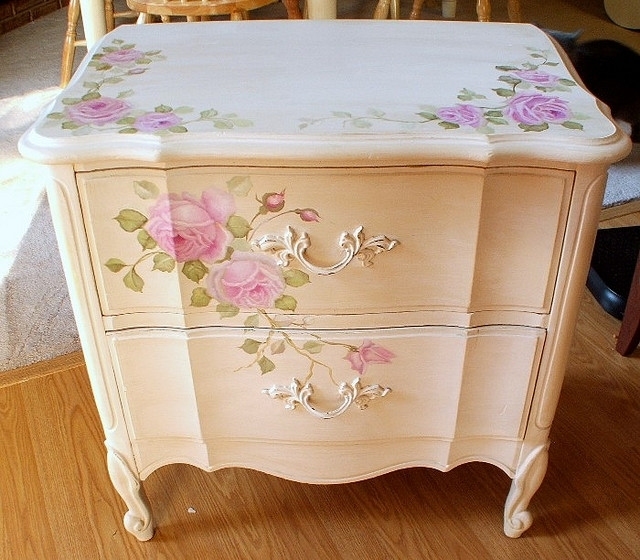
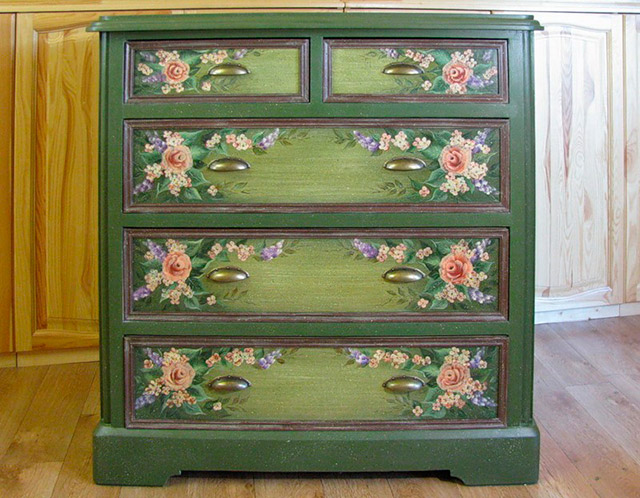
With the help of varnish and acrylic paints, you can decorate old furniture, give it a new and fresh look. If you have the opportunity and strength, you can try to paint the furniture manually, and if not, the painting can be performed using special ornaments and stencils.
A very popular current method for processing surfaces under ancient. Visually, the opposed surfaces are obtained as a result of processing with a special single-component crockel lacquer.
Lamination is also one of the restoration options. With the help of special glue, veneer and ordinary iron, you can transform almost any furniture surface.
First, we should apply glue on the surface of the furniture and leave it for drying, and then apply a second layer, impose a veneer and try the iron from the middle to the edges through paper.
It is necessary to put a newspaper under the piece of furniture. If there are mirrors or overheads, remove them, and if we are talking, for example, about a chair, then cover its soft seat and the back of a film or a glued. Then remove the boxes from the closet, put on the floor face up, after removing the handle, and install the stained object on the wooden bars so that its legs do not touch the floor.
Protect the surface of the subject to the oil base for wood on an oil basis. The primer color should be a little lighter paint color, which you will apply from above. Instead of primer, you can use slightly tinted white water-emulsion paint. Then start priming the subject from the vertex, gradually moving on the sides and to the bottom. Give the primer to dry and walk along the dried primer thin sandpaper, and then wipe the surface with a soft cloth moistened in the turpidar.
If you want to get the perfect surface, cover the primer with a layer of shellac, diluted in half with the recommended solvent. Then go through the surface over the surface and again wipe it with a chipidar or methyl alcohol.
Now you need to apply the bottom layer of paint. If desired, it can be divorced to the consistency of the cream, but in any case, it should be well to bed on the surface. Give paint to dry. After that, clean the dried surface and make dust from it. Now the surface can be covered with any opaque coating.
It can be done easier. Okuring wood and, if necessary, lightening it, cover the surface with several layers of the finished synthetic primer - hesso. Unlike the primer and the lower layer of paint, Heso dries 30 minutes, and the whole process will take you only a few hours. Grind each new ashes as a layer of hesso fine sandpaper before applying the next layer of primer.
This is a budget option for quick interior change. Self-player waterproof, so suitable
for use in rooms with high humidity. Execution technique as follows.
It is necessary to carefully clean the surface from pollution: rub it with a cloth or a sponge with a rigid layer moistened in a suitable detergent.
Then remove the handles or other accessories, if it is located on the site that you plan to cover with a film.
Next, carefully examine the surface on the subject of roughness, chips, etc. If you have discovered irregularities, close it with putty and polish sandpaper. Wooden surfaces without a varnish layer Melt acrylic primer.
Then you need to remove the dimensions from the prepared surfaces of the furniture. Consider that self-keys rolls are of different widths. Pick up the appropriate option so that you do not have to keep the film without anything.
To postpone the specified dimensions on the adhesive film from the wrong side (centimeter markup is already applied to it) and draw the details of the pencil. Cut the elements can be scissors or painting knife according to a ruler.
Then you need to dial cold water into the sprayer and sprinkle the detail of the furniture with which you are going to start the salable. Self-adhesive film will slide on a wet surface. It will give you time to smooth her so that there is no wrinkle and bubbles. If the bubble has been formed on the glued part, pour it with a needle and immediately join the rag.
Next, you need to separate the film from the paper from one edge of about 10 cm, applied the adhesive surface to the furniture, take a dry soft cloth into one hand, and holding a roll with a different hand, smooth out the softening "Christmas tree" from the middle to the edges (while pulling the roll down and Drive out air and water drops from under the film). If a fold was formed, you need to care carefully for the nearest edge and, by rejoicing it, smooth the surface.
In this way, you need to glue all filled film parts for furniture.
Sometimes there are stains from burns on the wooden surface that you need to remove as soon as possible. First of all, it will be necessary to clean the damaged area of \u200b\u200bthe surface by sandpaper, rolled in a tight lump or attached to the tip of a three-millionth rod. Clean the burned wood, not the touch of adjacent surfaces of the surface, otherwise, after polishing, an ugly spot will remain. When the burnt particles of the tree are removed, drip into place of the burn a drop of a bleach for lightening the extended dark lower layer of wood. Fill out the deepening in the wood shellac and crumple a cotton cloth.
If the deepening on the spot of the burn turned out to be too big after stripping, try to fill it with sucks. Take 60-125 g of wax and suitable natural dye. Put the wax in the bucket and melt on a water bath, gradually adding a dye. Be careful with the dye and remember: the mixture is easy to make darker, but brighter - never. It is possible to simulate the color of the veneer you will need not one, but two different dye. Pour the wax into an empty clean bank and let it frost. After cooling, separate a piece of wax with a spatula and roll in the fingers to soften. Heat on the fire of the Mastichene blade, put on him a rolled piece of wax and, when he melts, drain into the deepening on the site of the former burn. Fill out the deepening until it is filled. When the wax freezes, carefully remove its surplus with a razor blade. If the burn was on the surface covered with shiny polishing, cross it with the entire surface, covering several layers of polishing.
Posy, like other defects, it is desirable to eliminate as soon as possible. First of all, try the easiest way - fill in a drop of hot water. Sometimes this happens enough - the fibers of the wood will swell and fill the pothole.
If boiling water did not help, cover with a wet cloth and join the hot iron to turn water into steam. It is necessary to heat only a damaged area, so small potholes heated not with the entire surface of the iron, but only its tip.
Small potholes and scratches can be filled with a joinery cement, which is also called shellac or furniture wax. Shellac looks like thick chalk and simply applied over scratches. In a deeper pothole, you can drop with a knife-masticine melted shellac and dissolve with matches. After filling the potholes, remove the excess shellac with a soft cloth. If desired, the shellac can be replaced by homemade wax spacing. Do not rush to close each thigh, remember: small scratches and shcherbinki are an indispensable piece of any old furniture.
Damage from bitch is usually only on poorly dried new wood, but sometimes they may appear and during the ridge of old paint from the subject. To "seal" such a hole with a liquid resin, dissolve 140 g of shellac and 28 g of Sandarak in 570 g of methyl alcohol. Strain through the iron or fill the hole with a bitch with an old brush with a mixture.
Little holes, cracks, labeling fibers should be eliminated with a putty, or finished, or self-made (from a dense mixture of very small wood sawdust and joinery glue). Apply a putty to the spatula so that it will fill in the pothole, slightly performed above the surface of the subject: when drying it decreases in volume. After that, you will be left to stick a screaming place. If a mixture of sawdust with glue looks too light, add a little coloring pigment into it in a powder - burning or raw umbra or siena. Especially thoroughly pick up the tone of putty when working with wooden objects covered with transparent varnish. You can contact the store - the industry produces tinted putty of the most consumed colors, and may be able to pick up ready.
For the repair of surfaces, which will later be painted, use a mixture from 1 part of the chalk with 3 parts of alabaster as a putty. If you wish, you can tint this mixture by any color pigment. Add water to put plastic putty, and apply it to damaged places with a masticine.
Furniture hinges and handles often remain without screws: they fly out of their increased nests due to loosening or because it gets damage to the scarlet wood. First of all, check if the array surrounding the loop has cracked. If necessary, remove the entire loop for this. If there is a crack in the wood, fill it with putty and let me dry. Sometimes it makes sense to sharpen not only the crack, but also an overwhelming hole under the screw.
If the hole for the screw loosened too much and became very large, the easiest way to go inside the match, and then screw the screw into place. Sometimes it is necessary to even further expand the hole. In this case, the hole is drilled by a thicker drill, glue a wooden plug, into which the screw is screwed.
If the cabinet door has become badly discovered, the reason for this can be too deeply asking for the loop. Remove the screws, remove the loop, move to a piece of cardboard and circle its edges with a pencil. Cut the cardboard on the pencil line, put under the loop and screw the screws into place. After that, the loop will slightly raise and will not interfere with the door open. If the loop pinches, check if the screws are flush with the loop, and if they stick together, drown them.
Retractable boxes most often start to open badly because of the swelling of the tree from dampness. Try to lubricate the outer edges of the walls of the drawer with soap or paraffin candle. If it does not help, you will have to remove some wood using sandpaper.
Sometimes the boxes are poorly nominated because they interfere with paint drops, which the guide is painted. With high humidity, old paint swells and prevents the box of the box of the drawer. In this case, remove the box and remove the swollen paint with a shabra.
The table and stools begin to swing in the event that not all of their legs get to the floor. Put a chair on a sheet of chipboard or on a flat board. If the chair is still swinging, it means that one or two of his legs are shorter than others. If the chair supplied on the stool stopped swing, it means that you have an uneven floor. One of two remains: either to repair and align the floor, or move the chair to a new place.
Determine how the leg of the chair is shorter than the rest, putting pieces of fine cardboard under it. When the chair stops swing, you will know how much long legs need to shorten. To do this, remove a stack of cardboard sheets from under the short leg and measure it with a thickness. Spile the ends of the long legs, trying to do it as careful. Collect the cutting surface with sandpaper and, if necessary, restore the coating.
If it is impossible to cut the legs for one reason or another, you will have to pick up pieces of veneer of the desired breed, thickness and textures and glue with joinery glue to a short leg.
The crack that appears on the leg should be repaired immediately until she went further. Spread the split ends with joiner glue, roll them and do not use the chair until the glue is completely dry.
When breakdown along the fibers, as well as on the oblique line in each piece, the coinciding holes are drilled in which round spikes on half of the length are inserted into the glue. After that, pieces tightly clamp.
Here are some ways to strengthen the legs of the table:
Fastening the feet of a table with a board: a wooden block with protrusions are tightly driven to the groove, which is specially cut into the table of the table, and the block itself is attached to the table with iron screws;
Fastening with a bent metal bracket: one end of the bracket is in the foot of the table, and the second is fixed with a screw to the board;
The simplest, but not very effective way: on the leg make a cut to give the desired direction of the screw;
A more reliable method of fastening the legs - with a cube (30x30x30 mm): one screw is carried out through the cube in the foot of the table, the other in the lid.