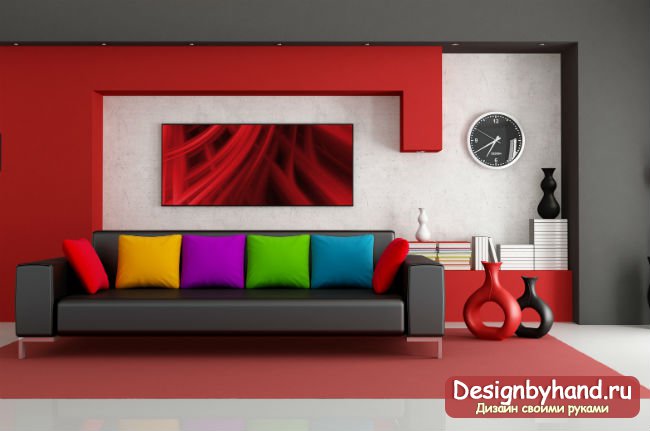
Which of us did not dream to put our own design decisions in the dwelling, thus expressing their individual style and preferences? Want to develop a private house design with your own hands, but so that at the same time he looked like a professional designer's hands? In this article, you will learn how to make the interior of a private house fabulous and functional, without resorting to the order of expensive services.
Our following tips, supplemented by inspirational photos and projects of private houses, will help you embody your dream into reality. But first let's collect the necessary tools.
For those who confidently use a computer, there is also a wide selection of software and online interior design applications: Floorplan, Apartama, Sweet Home, etc.
In general, the creation of a private house design with their own hands consists of several stages:
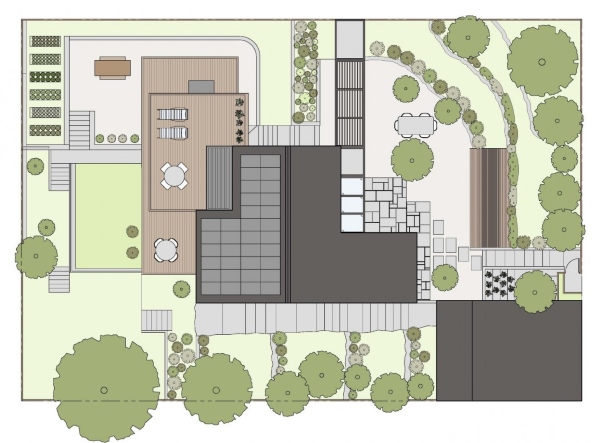
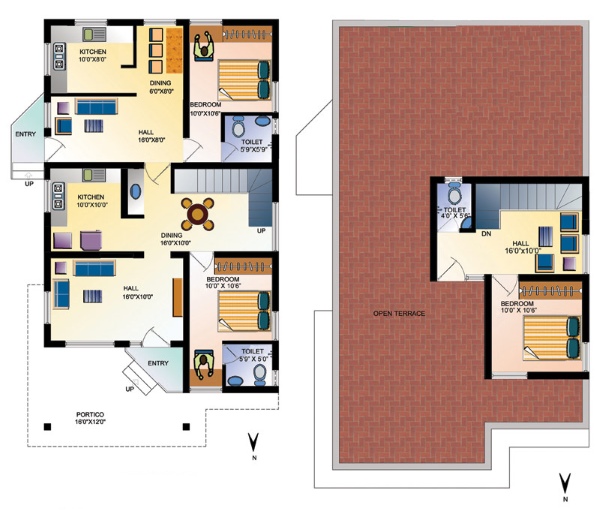
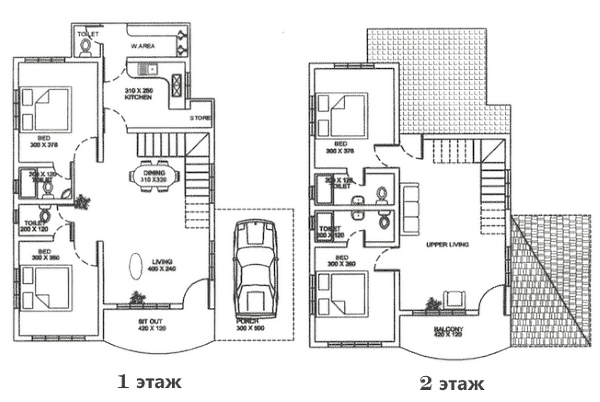
3. Sketch of room placement scheme. After creating the specification, you can already calculate the exemplary size of the premises - their length and width. Based on these data, draw the design of the private house with your own hands - the location scheme in the house relative to each other. For greater confidence in the figures, use a roulette to measure the size of spaces and objects in an existing home. Also write down that about 10% of the area of \u200b\u200bthe house will go on the so-called "circulation zones", i.e. Transitions between rooms and other spaces that are difficult to consider immediately.

4. Definition of relations of different spaces with each other. Create a simple drawing that will consist of separately arranged circles or rectangles (rooms) connected to each other with different dotted, solid and wavy lines. For example, the living room should be directly connected to the dining room (dotted line), as well as with a bathroom and main bedroom through doors (solid lines), etc. You can also schematically designate where windows and doors will be located, which rooms need to be inspired, etc.
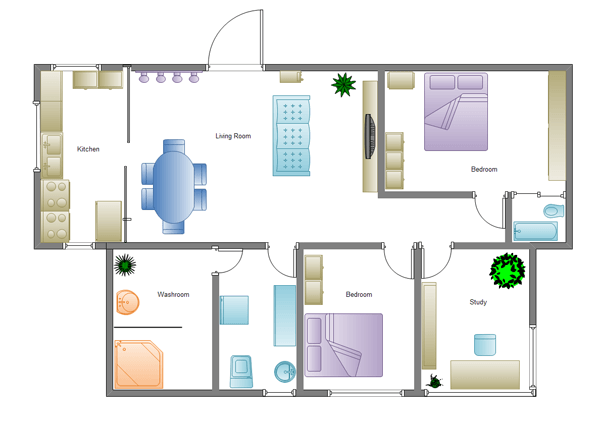
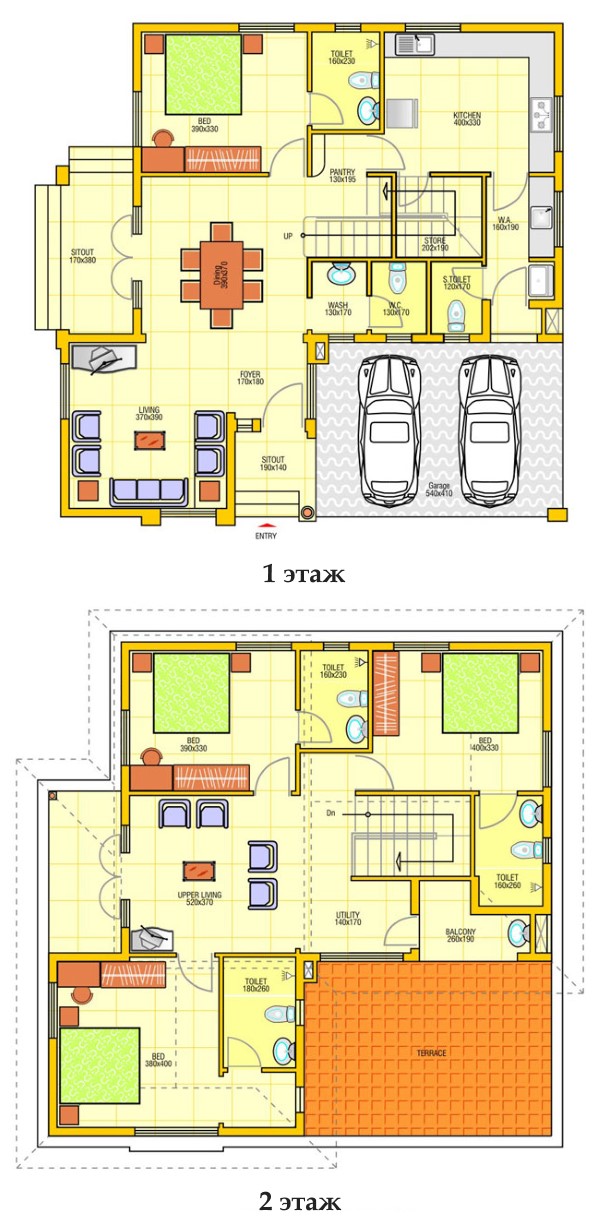
The item is optional to execute, but can help you deal with confusion in my head and supplement the gaps that you allowed creating a sketch of the house. According to the result, you can independently create a private house design, with your own hands sketching a similar drawing:
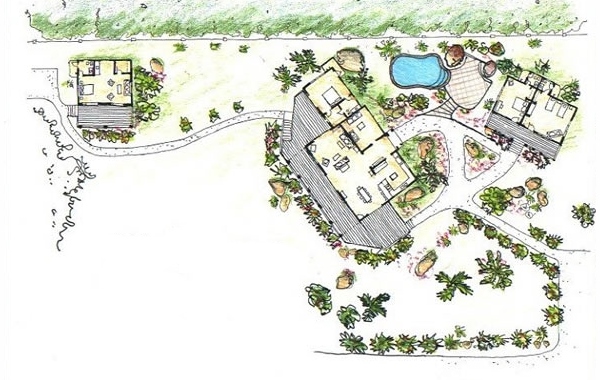
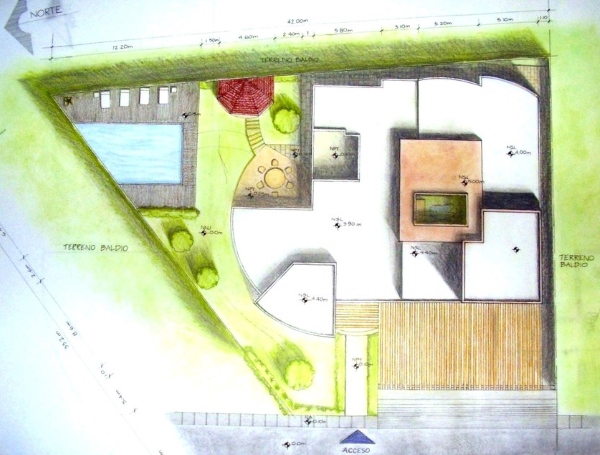
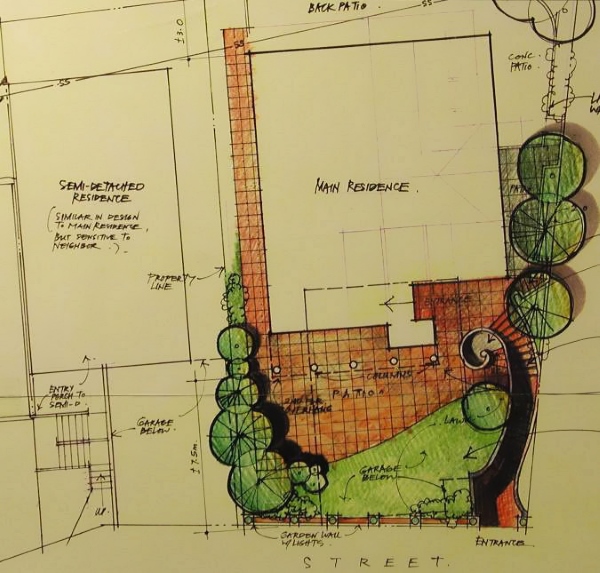
5. Drawing up a plot plan. This plan should display elements such as:
In addition, you will need:
Also at this stage it will be useful to talk to the neighbors about the sun, wind and temperature at different times of the year, which may affect the microclimate in the home.
This item is the most difficult thing in the design of a private house with your own hands, so it is better to apply to the help of professionals - topographers and geodesists.
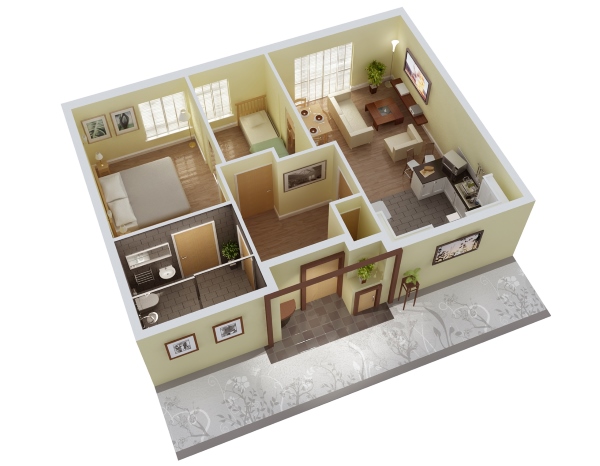
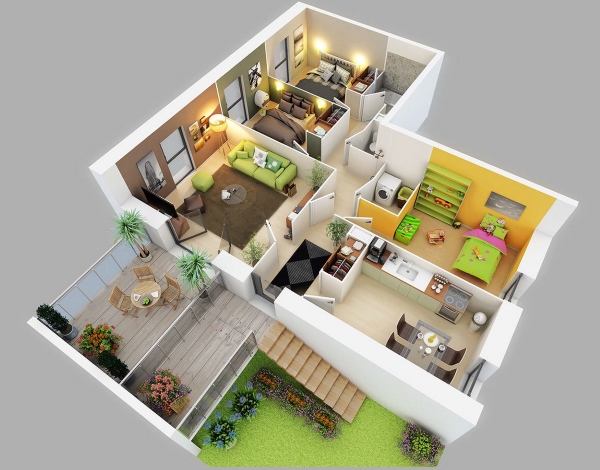
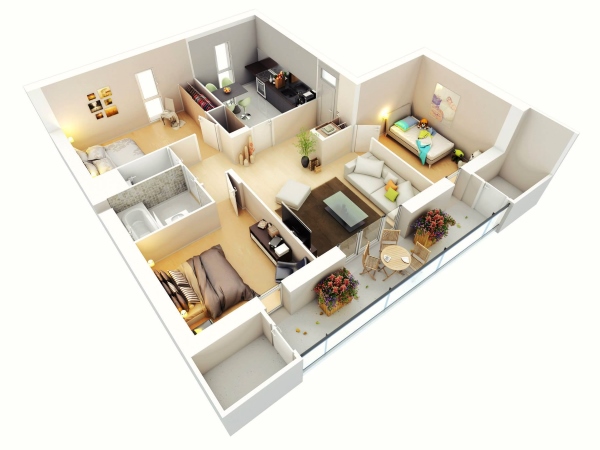
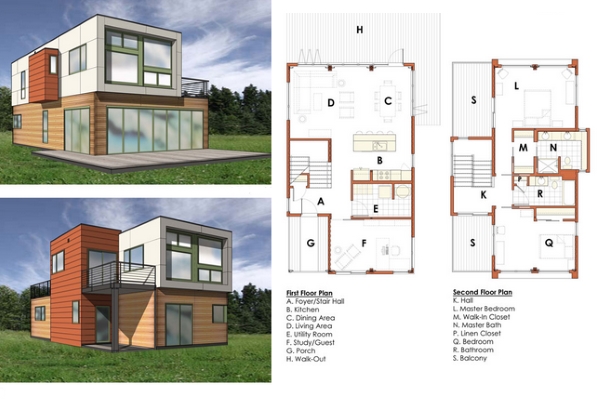
7. Design of a private house with your own hands. This stage is creative and combines all the requirements for the house. All the information collected now must appear as clear 3D schemes or drawings from hand. How do you imagine your home?
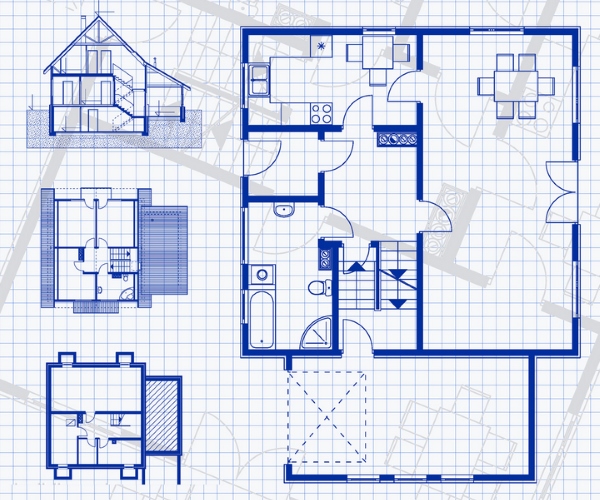
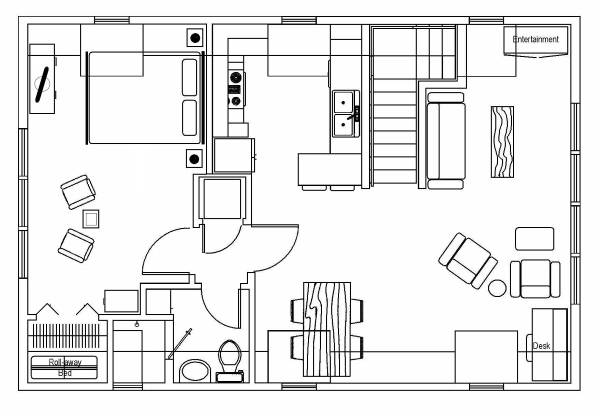
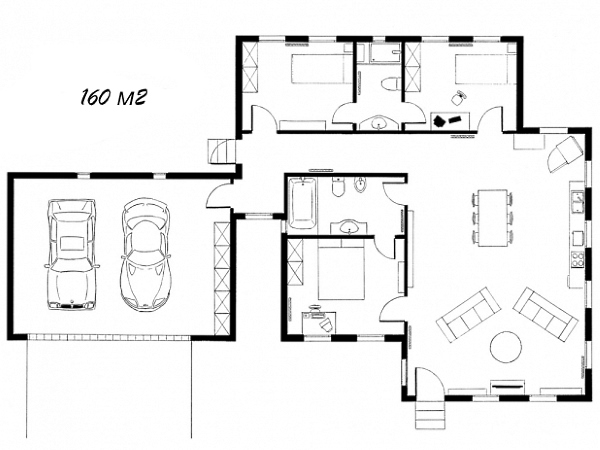
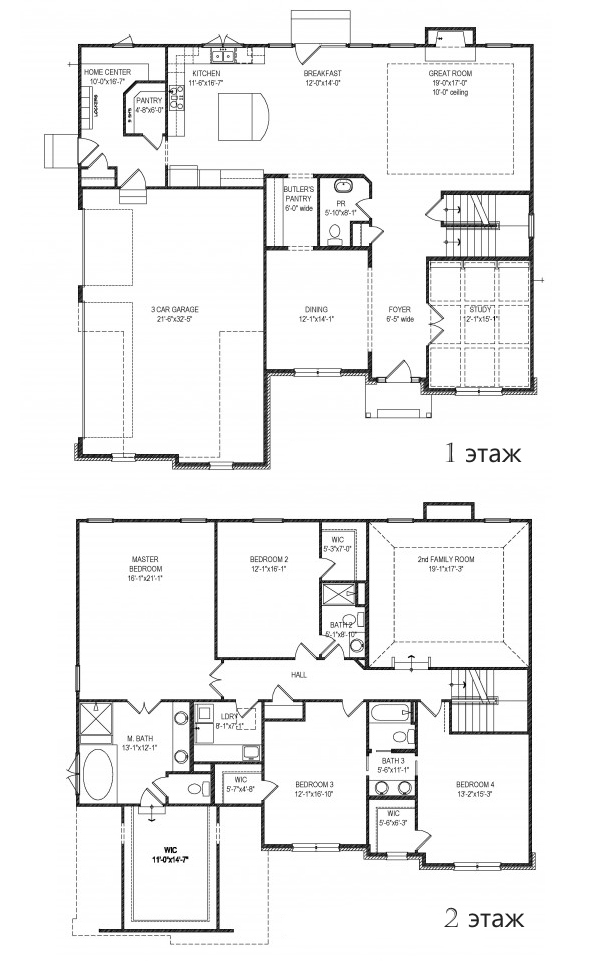
8. Creating a drawing of the house. Create final drawings of rooms with scale. Usually in this case, the scale of 1: 100 (1 cm \u003d 1 m) is used - large enough to draw parts, and a small enough to fit on A3.

The following steps shown above for the design of a private house with their own hands summarize the entire complex design process, which students are studying architects. Surely, the instruction seemed to you incomplete, but do not despair - here you just need a practice. At the very least, we hope that you have received enough knowledge about the construction of a private house, to confidently communicate with professional architects and designers, speeding up the process of creating a new home.