Bottle decor: 14 cute ways
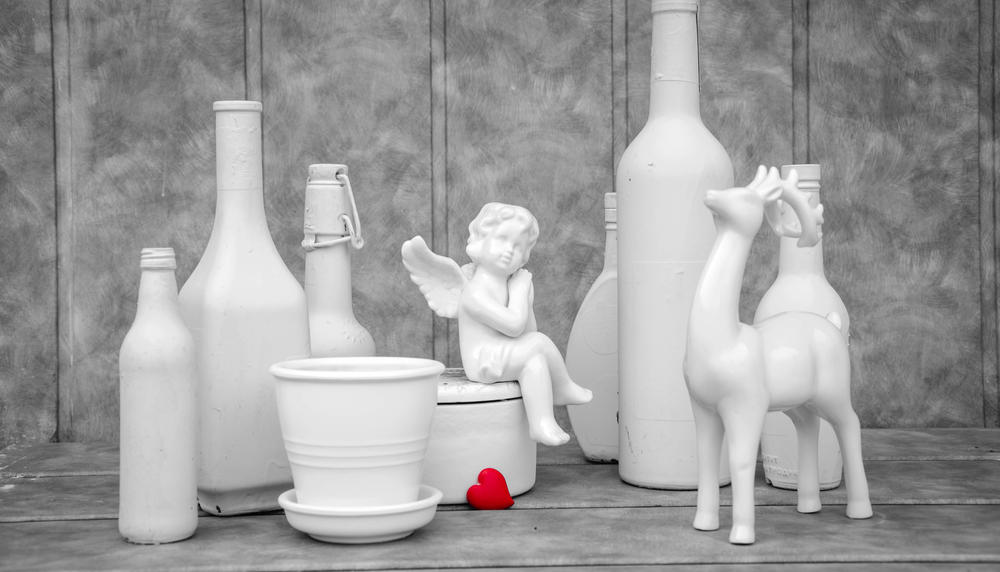
All this can be done from a regular bottle. Yes, the simplest bottle can be turned into a real exclusive. All that is required for this: a little time, a lot of desire, a little bit of material and, of course, creative imagination.
The simplest bottle can be turned into a real exclusive
When it comes to decorating a bottle, the first thing that comes to mind is ship models mysteriously placed inside. Of course, in order to create such a masterpiece, desire alone is not enough, you need skill and a certain skill, because this is a delicate and very painstaking work.

To create such a masterpiece, one desire is not enough O
But believe me, you can create an equally spectacular decorative bottle, and everyone can do it. To turn an ordinary vessel into a designer thing, you do not have to have an innate talent, and you will not have to spend fabulous money either. You can create a real masterpiece from a simple bottle quickly and practically for free.
Methods and styles of decoration
There are many different ways to decorate bottles, each of which is good in its own way. The choice depends on what you want to get in the end: a gift (for a birthday, a wedding or New Year), just an interior decoration, a useful and beautiful container for storing bulk products, and so on. Before starting work, you must choose the style in which the container will be framed. Here are just a few of them.
A bottle decorated in a classic style will be a great gift and can decorate any interior. It is better to use containers of simple clear shapes: square, rectangular, and so on.
You can decorate a bottle in a classic style using paints or.
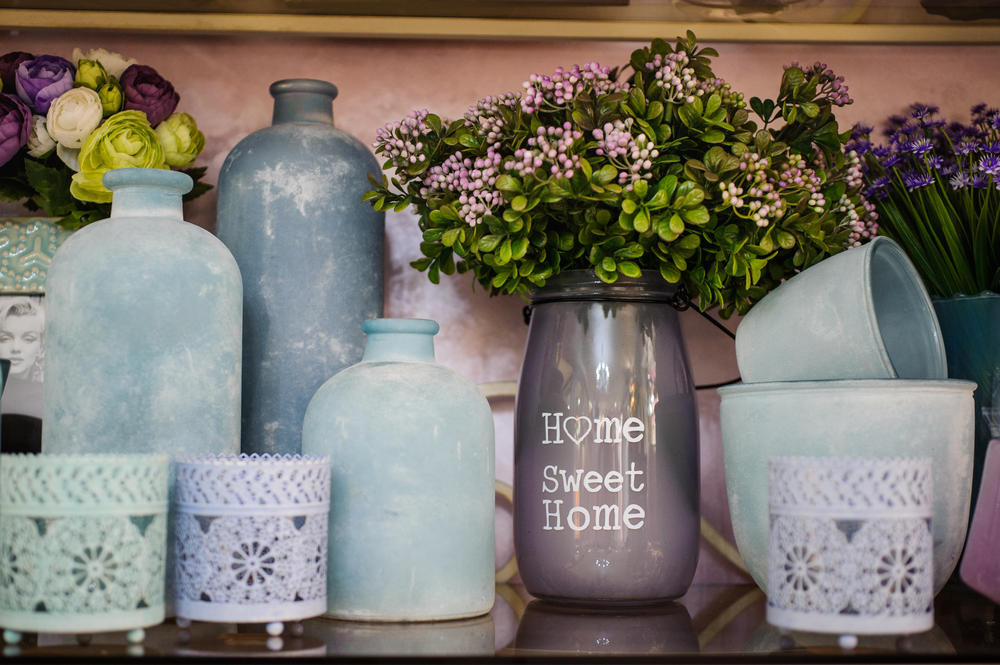
Vessels of various shapes are suitable. Moreover, it is not at all necessary to decorate the bottles themselves; in this case, spectacular contents will be quite enough. It is best to fill them with various natural materials: dried leaves or flowers, cereals (buckwheat, rice, lentils and others), small fruits and vegetables or beautifully chopped citrus slices, peeled garlic.
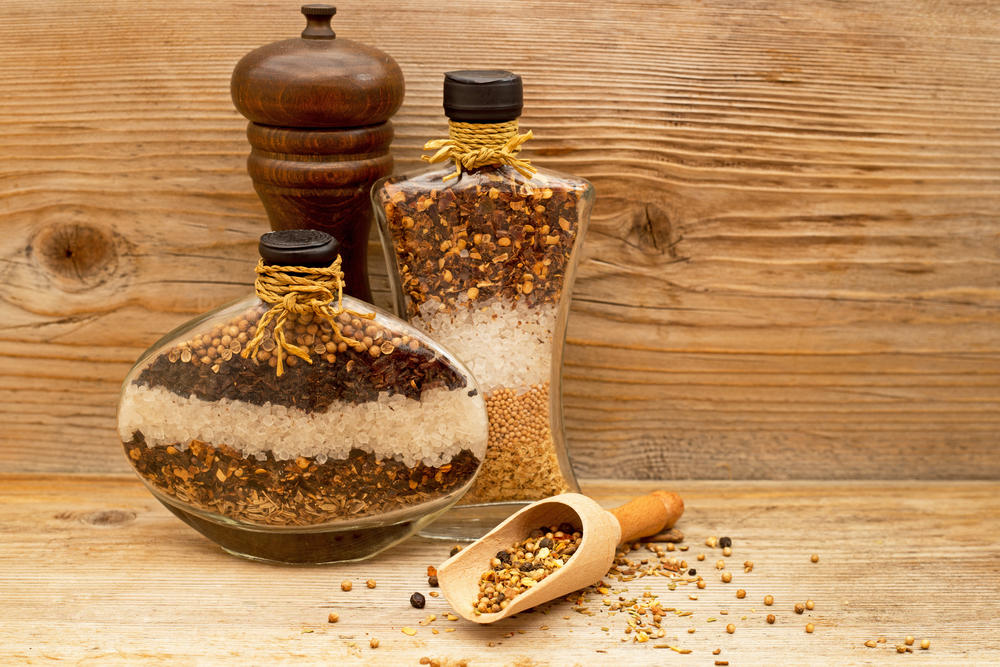
The neck can be decorated with a string of natural fibers (quite in style).
Such a vessel will look organic in a room decorated in the same style.
Bottles of both simple and unusual shapes are suitable. For decoration, you can use mirror and silver paint, old metal, buttons, invisibles and the like.
A bottle decorated in a glamorous style should be bright, spectacular, sparkling.
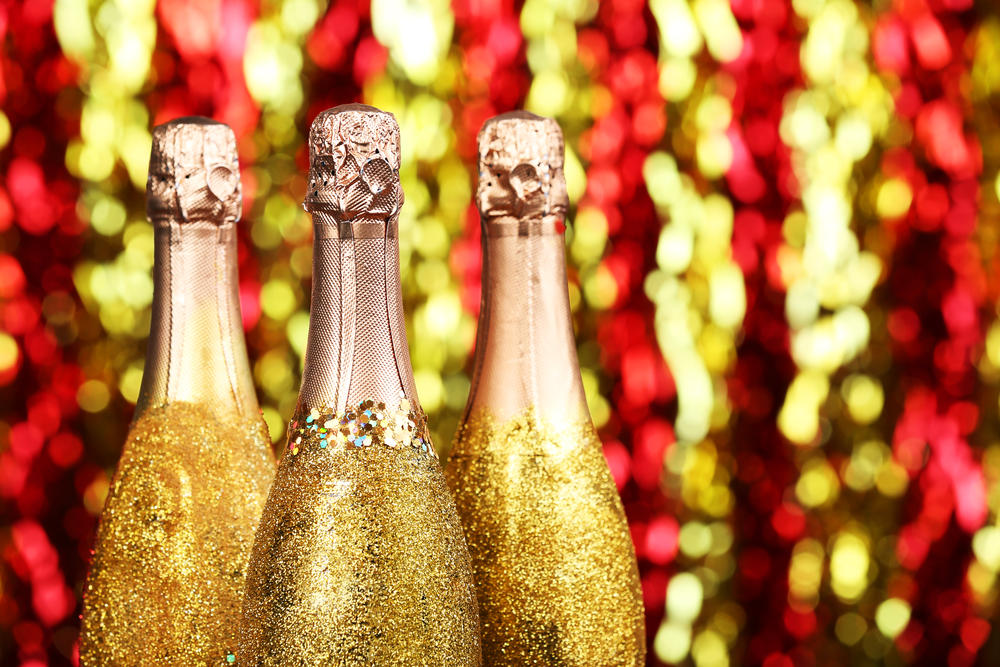
You can decorate it with golden or silver paint, lace and bows, rhinestones, bugles and pearls.
By the way, there is an amazing, beautiful and delicious way to combine glamor with practical benefits! How? Take a look at, you will surely like it!
When decorating a bottle, do not forget about decorating the cork.
It can be decorated no less impressively than the bottle itself.
What you can use: beautiful satin ribbons, natural twine and various cords of beautiful weaving, fabrics, beads, sequins and rhinestones.
For decoration, you will need a beautiful bottle, and it doesn't matter what it is made of: both glass and plastic containers will do.

Its shape is much more important: the more unusual it is, the more spectacular the craft will look. Do not forget about the exceptions - for the classic style, it is advisable to use bottles of simple shapes.
Materials for decoration are no less important than the shape of the bottle, so you need to be especially careful when choosing them.
What can be used: paints, cereals, salt, beads, fabric, leather, lace, ribbons, twine, cords, vegetables and fruits, napkins with a beautiful pattern, and so on. Ultimately, the choice of material will depend on three components: in what style the bottle is supposed to be decorated, with what technique you decide to decorate it, what exactly you want to get as a result.
First you need to thoroughly prepare the container for decoration:
- remove labels and glue residues;
- wash well;
- degrease the surface with alcohol or acetone.
Having decided on the style, choosing the right materials, preparing the container for work, you can proceed directly to decorating. Here are just a few examples of how to decorate bottles using different techniques.
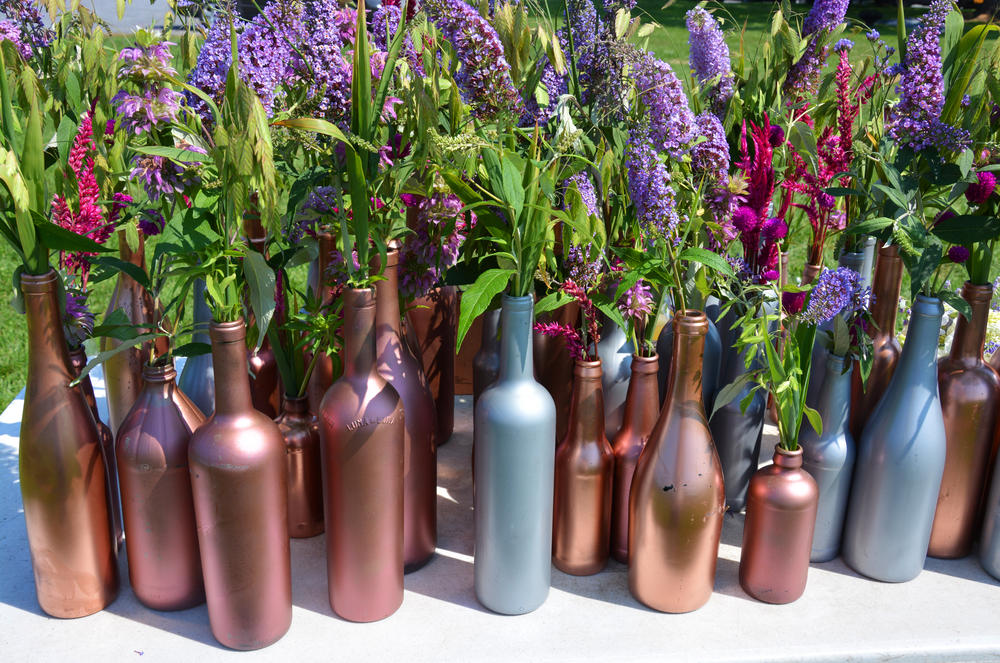
Perhaps the easiest way to decorate a bottle is to simply paint it. This can be done with acrylic or stained glass paints, followed by coating the surface with varnish.
Advice: When choosing paints, it is necessary to take into account their properties: acrylic - opaque, stained glass - transparent.
There are two ways to decorate a bottle with paints: from the inside or outside.
You can quickly paint the inside of the bottle, and it is very easy to do it, because no special skills are required.
For decor you will need:
- bottle;
- acrylic paints of one or more colors.
Operating procedure:
- The bottle is cleaned of the label and glue residues, and then boiled for 5 minutes.
- The paint of the selected color (or several paints of different colors) is poured into an absolutely dry vessel.
- The bottle is shaken well, twisted at various angles so that the paint covers the entire inner surface completely.
- Then it is turned upside down and securely fixed in this position.
- Leave this way for a while - until the excess flows out and the paint inside the bottle dries out.
- As soon as the first layer of paint dries, the staining procedure can be repeated (if desired) and dried again.
- When the finishing coat of paint has dried, the bottle decor is complete.
Using this technique, you can depict almost anything on the bottle: a landscape, a still life, a portrait, exquisite patterns, a dedication, and so on. There is only one limitation - the area of the vessel)
For decor you will need:
- beautifully shaped bottle;
- acetone or alcohol (to degrease the surface);
- small washcloth (sponge);
- acrylic paints of various colors;
- brushes;
- stencil (optional).
Operating procedure:
- The labels are removed from the bottle, washed thoroughly, allowed to dry.
- The dry surface is thoroughly degreased with acetone (alcohol).
- Using a washcloth (sponge), they are evenly painted with the selected color (most often white is used for the base).
- As soon as the applied layer of paint is completely dry, its surface is painted with multi-colored acrylic paints, depicting the desired pattern.
- Wait until the paint is completely dry.
- Lightly sand the surface with the finest emery paper.
- The final layer is varnish. If there are several layers, please note: each subsequent one is applied only after the previous one has completely dried.
If you don't feel like drawing by hand, you can resort to using a stencil.
- The stencil is applied to the product and fixed with tape.
- A wide brush (or sponge) is dipped in paint and a drawing is applied.
- When the paint dries, carefully remove the stencil. Then the work specified in clauses 5,6,7 (see above) is repeated.
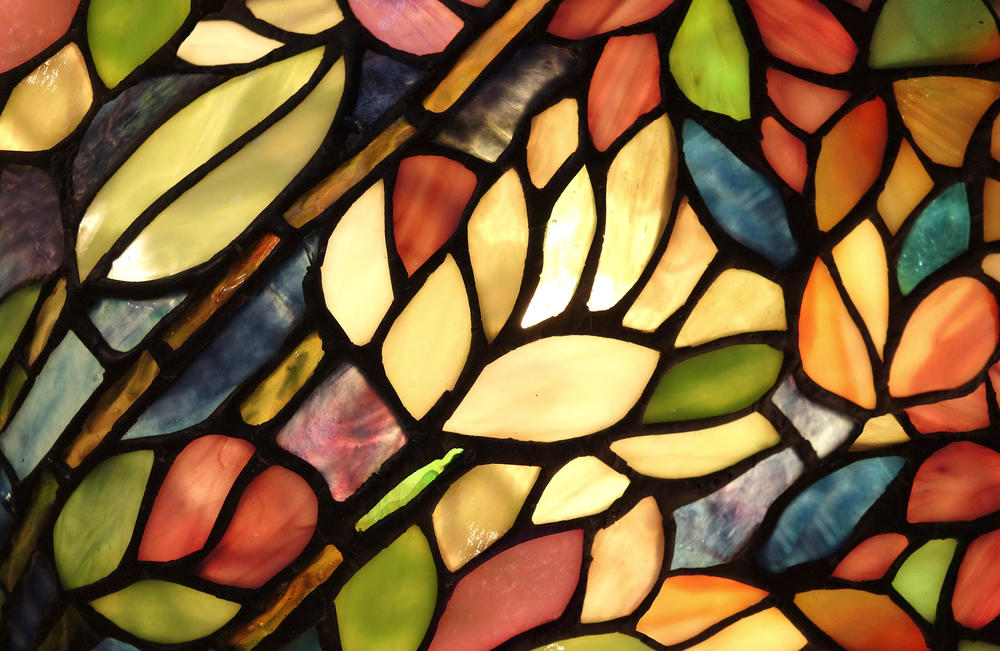
For painting a bottle, it is advisable to take alcohol-based paints, they will last longer and better hold than water-based paints. You also need to choose the type of stained glass paints: non-fired, for fixing which does not require heat treatment, or fired, which can only be finally fixed by subjecting them to heat treatment. The first option (non-fired paints) is preferable for painting decorative bottles, but keep in mind that they will dry for about 3-5 days.
For decor you will need:
- a transparent bottle of an unusual shape;
- circuit;
- stained glass paints of various colors;
- beautiful drawing (sample);
- acetone or alcohol (to degrease the surface of the bottle).
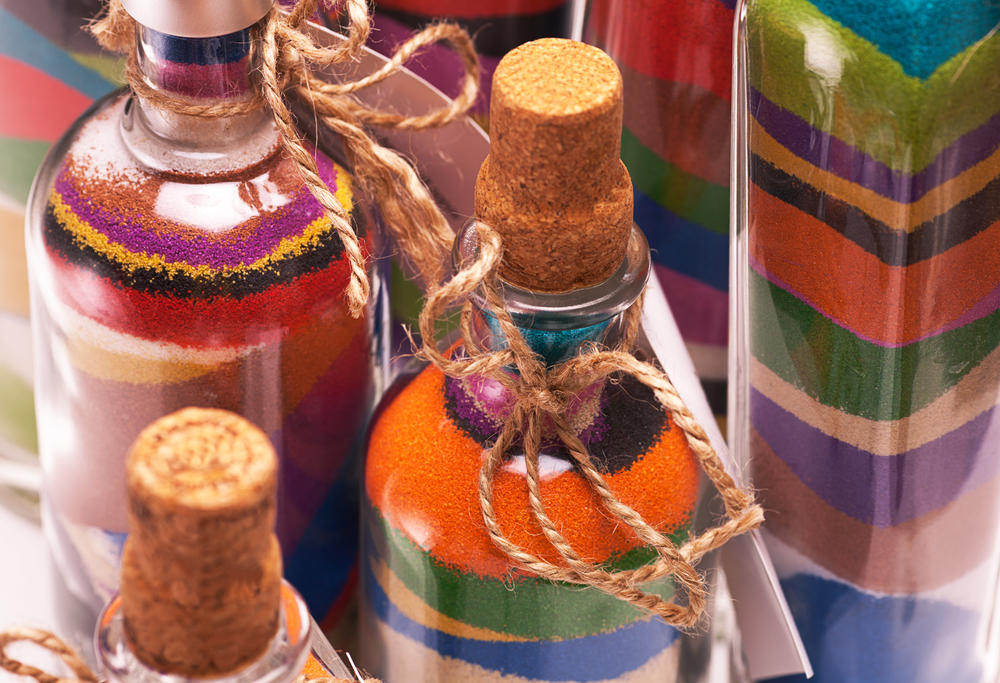
Even children can fill a bottle with colored salt, so they can be safely involved in joint creativity, creating a masterpiece.
For decor you will need:
- bottle;
- coarse crystalline salt;
- paints of various colors (acrylic or gouache).
Operating procedure:
First you need to paint the salt in several different colors. For this:
- a small amount is poured into a heat-resistant dish;
- literally a few drops of acrylic paint or gouache are added directly to the salt (if the color is not enough, you can always add);
- mix well so that the salt is completely colored;
- the mixture is placed in an oven at a temperature of 100 ° C for an hour;
- after a specified time, the salt is taken out, thoroughly kneaded and sifted through a sieve.
As a result of such simple manipulations, colored salt is obtained, but the material of one color is not enough to decorate the bottle, therefore, according to the same principle, it is necessary to make it in several shades. Once you have the right amount of colored material, you can pour salt into the container. The easiest way to do this is with a funnel.
The thickness of the layers and the combination of colors are determined according to their tastes. You can fill in salt of each color in turn, using the stock of material without residue. For example, all green, then yellow, and then red. Or you can often alternate different colors in any sequence that you like.
The bottle filled with colored salt is sealed and, if desired, its cork is decorated with foil or burlap.
Products decorated with salt on the outside are refined and elegant.
For decor you will need:
- Glass bottle;
- solid salt or different colors;
- acrylic paint;
- PVA glue;
- washcloth (sponge) and brush;
- elastic band about 0.5 cm wide.
Operating procedure:
- A pre-cleaned container is wrapped with an elastic band in a spiral, rings, criss-cross or arbitrarily.
- Then the entire surface of the bottle is covered with acrylic paint using a washcloth and allowed to dry.
- After the paint dries, the surface of the vessel is covered with PVA glue.
- Paper is spread on a flat surface, colored salt is poured onto it in random order (or pattern).
- Roll the bottle so that the salt adheres to the glue, evenly covering the entire surface of the vessel.
- After the glue is dry, remove the gum.
- The bottle, decorated with colored salt on the outside, is ready.
And you can make the simplest option: apply PVA glue on the bottle (clean and fat-free), and sprinkle it with salt at random.
Decor with cereals
In order to give the bottle a decorative look, you can also use ordinary cereals. For such a case, buckwheat, rice, pasta of various shapes (letters, shells, bows, numbers), semolina and so on will do.
For decor you will need:
- beautifully shaped glass bottle;
- cereals (pasta) of one or more types;
- acetone or alcohol for surface degreasing;
- PVA glue;
- a brush for applying glue.
Operating procedure:- The previously washed and degreased surface of the bottle is evenly covered with PVA glue, on which the selected cereals (pasta) of one or several types are attached.
- If the cereal is small, you can sprinkle it on a sheet of paper and gently roll the bottle over it in different directions.
- As soon as the entire surface is covered with the cereal, the bottle is set aside until the glue is completely dry.
- Then the decorated surface is again covered with PVA glue (you can use acrylic varnish).
- After the glue is dry, the bottle can be painted with, for example, golden spray paint, or left as it is.
Very beautiful products are obtained when decorating with cereals using stencils.
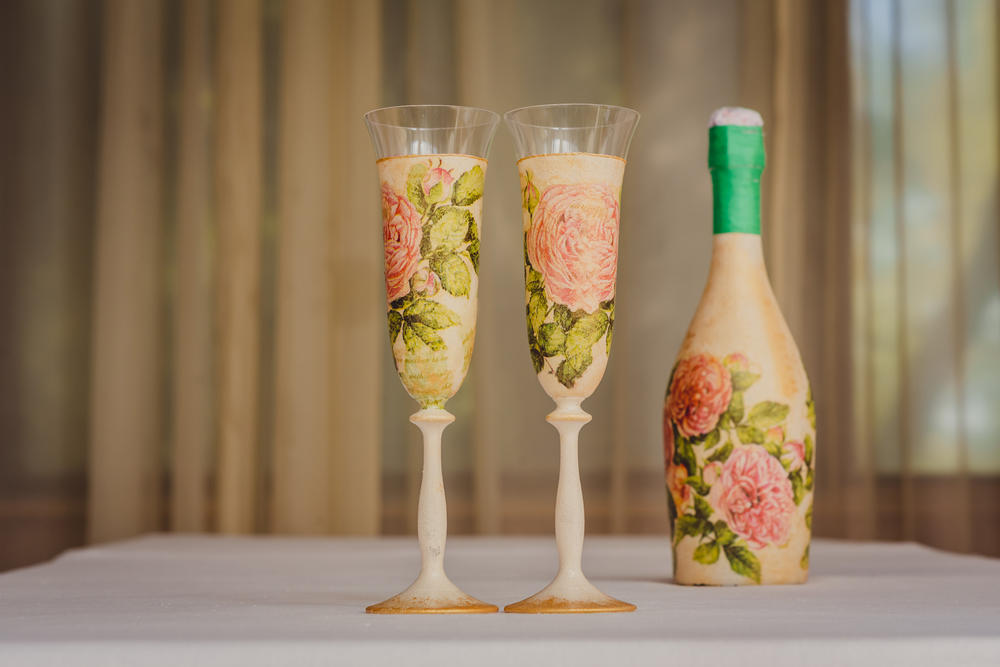
It is used to decorate bottles most often, and there is a simple explanation for this - this technique is universal. A wedding or an anniversary, or - absolutely any topic can be successfully played.
For decor you will need:
- beautifully shaped bottle;
- a small piece of tissue;
- PVA glue;
- acrylic paint in white and basic colors;
- sponge for applying paint;
- acrylic lacquer;
- a napkin with a beautiful pattern;
- nail scissors.
Operating procedure:
- A thoroughly washed and degreased bottle is pasted over with a piece of cloth, which is pre-soaked with PVA glue.
- The fabric is spread over the surface of the bottle evenly or by giving it an arbitrary shape.
- The bottle, covered with a cloth, is allowed to dry, after which, using a sponge, its surface is covered with white acrylic paint. And dried again.
- While the paint dries, with the help of nail scissors cut out the fragment of the napkin you like, separate the top layer. This must be done very carefully so that the loose paper does not tear.
- The cut out piece of napkin is applied to the bottle (face up) and very carefully, so as not to move the picture, cover its surface with acrylic varnish. This must be done quickly and carefully, avoiding the formation of bubbles and folds.
- As soon as the varnish dries, the entire space around the napkin is covered with acrylic paint of the base color, slightly capturing the edges of the picture.
- After the paint dries, the surface of the bottle is covered with acrylic varnish, decorated if desired (with small sparkles, beads, lace, and so on) and dried again.
- A bottle decorated using decoupage technique can be additionally decorated with a beautiful bow by tying it on the neck.
Advice: Instead of fabric, you can use a nylon stocking. A bottle covered with it will already look decorative. A container decorated with burlap will also look spectacular.
This method of decoration is quite laborious, but it is worth it: as a result, the bottle will look like a real work of art.
For decor you will need:
- a beautiful bottle of an unpretentious shape;
- fabric or leather;
- PVA glue;
- acetone or alcohol (for degreasing);
- decorative elements for decoration: beads, sequins, bows and so on.
Operating procedure:
- The bottle is cleaned of labels and glue residues, washed and degreased with acetone (or alcohol).
- Fabric (or leather) on only one side (seamy side), generously coated with PVA glue and immediately fixed on the bottle. You can smoothly flatten the material, or you can create beautiful folds on the surface in any order. Then the glue is allowed to dry completely.
- As soon as the glue has dried (not before!), The bottle is decorated with the selected decorative elements.
Advice: After the glue is completely dry, the surface of the fabric or leather (if desired) can be painted with a water-based paint of the selected color and covered with acrylic varnish.
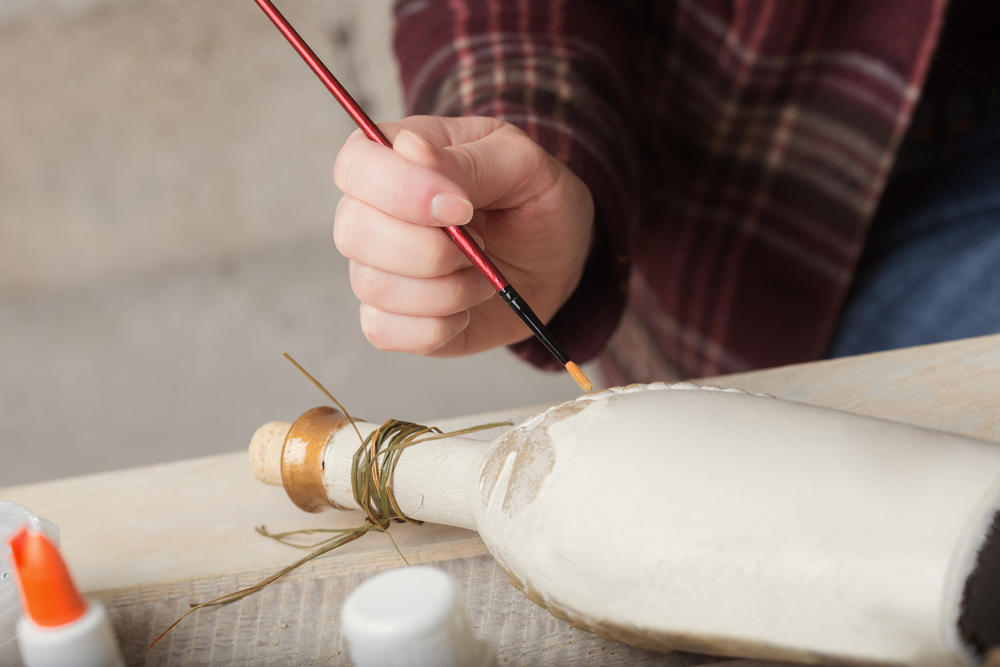
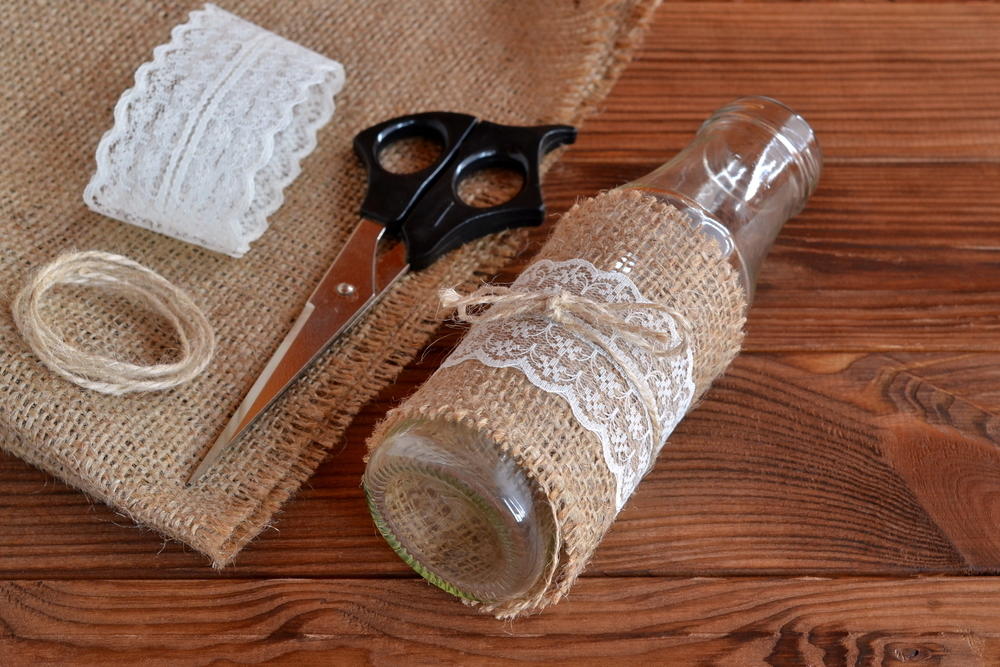
Transforming any bottle with twine is easy enough. It will look quite original and impressive.
For decor you will need:
- Glass bottle;
- alcohol or acetone (for surface degreasing);
- PVA glue;
- several meters of twine.
Operating procedure:
- The glass bottle is freed from glue and labels, washed thoroughly, dried and degreased with alcohol (or acetone).
- The twine, moistened in PVA glue, is tightly wrapped around the bottle (from bottom to top).
- Once the glue is dry, the decoration can be continued by gluing coffee beans, lace, beads, and so on over the twine.
- The neck of the bottle is not decorated at all or decorated with the same twine or burlap.
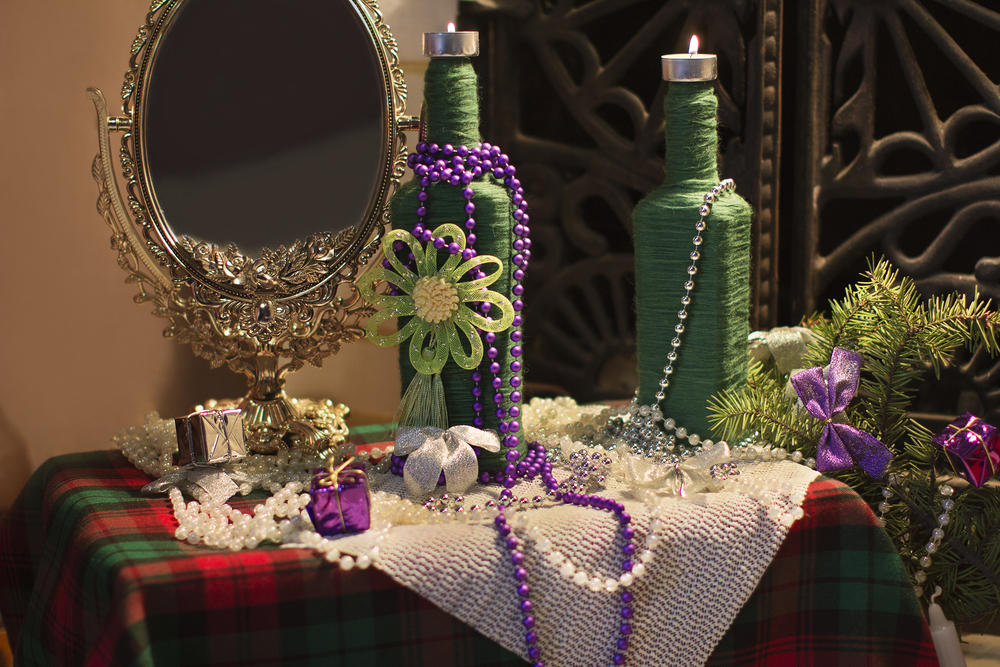
It is easy and simple to work in this technique, the result is excellent: simple things become a work of author's art! If you like to make New Year's gifts with your own hands, you will probably come in handy
preservative. As a preservative, you can use: 9%, acetic acid, strong saline solution, 70% ethyl alcohol or medical formalin.
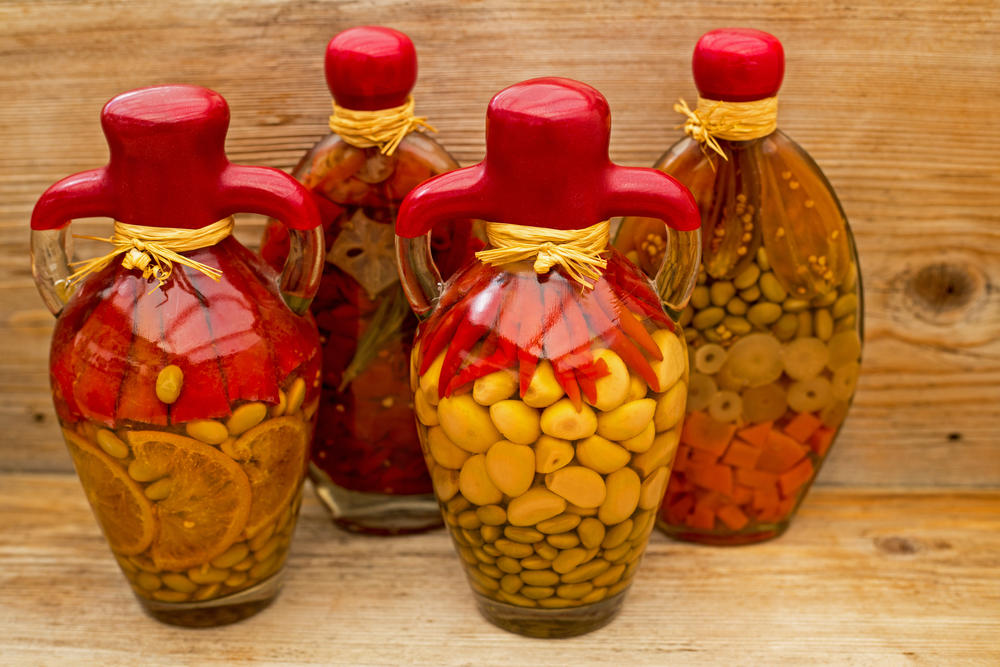
Operating procedure:
- A transparent bottle of a beautiful shape is freed from labels, glue residues and thoroughly washed, then sterilized for at least 5 minutes.
- Thoroughly clean, wash and, if necessary, grind the selected ingredients.
- They are randomly placed in a bottle.
- As soon as the container is filled to the desired level, fill it to the top with the selected preservative.
- To exclude air access, the neck can be filled with wax melted in a water bath, after which the bottle is closed with a cork.
- That's it, the stylish decoration is ready!
Important! Whichever preservative you choose for decorative canning, keep in mind that each of them has its own disadvantages:
- vinegar (9%) changes the color of food. In addition, it must be brought to a boil (in a glass or enamel bowl), and only then poured into a bottle. The filled container is immediately closed with a lid and removed for two weeks in a dark place;
- acetic acid also affects the color of the raw material, making it dull, with a greenish or yellowish tint;
- ethyl 70% alcohol does not change the color of the products initially, but over time they will become faded.
- medical formalin is a rather dangerous substance. When working with him, it is imperative to use personal protective equipment and observe fire safety measures.
The bottle will help preserve the incredible beauty of the flowers.

Operating procedure:
- A beautifully shaped vessel is thoroughly washed and sterilized. Dry well.
- Flowers are placed inside the prepared bottle, so as not to damage the petals. When there are enough of them (in your opinion), formalin is poured into the bottle, thanks to which the flowers will not only be preserved, but will also look weightless.
In conclusion, I would like to give a few illustrative examples of thematic bottle decoration. Such crafts will not only be an excellent present, but also help to effectively emphasize the importance of any celebration.
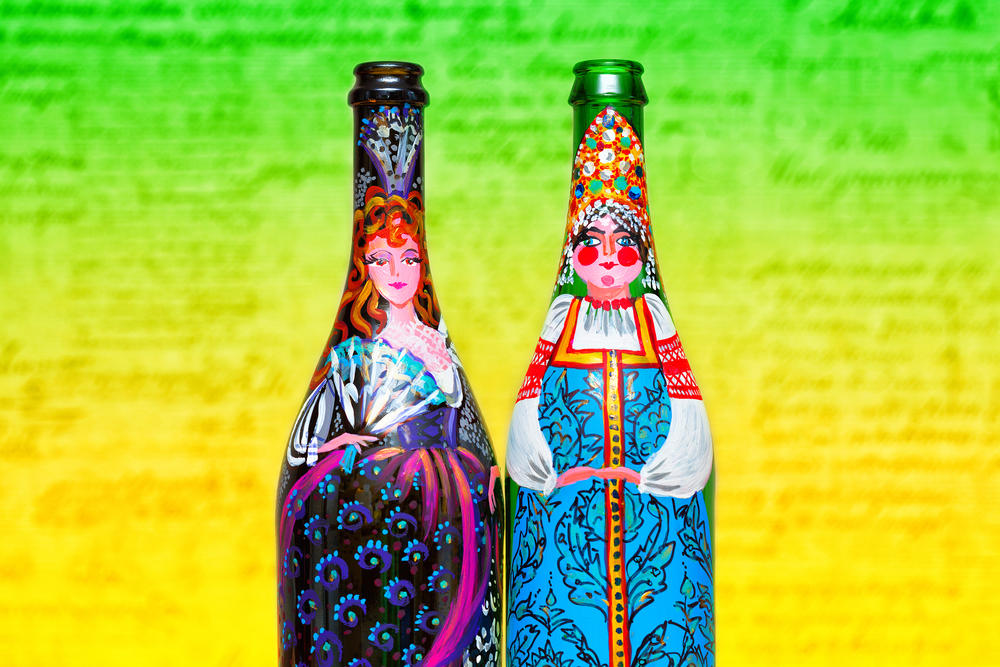
Wedding decorations
As a rule, wedding bottles are designed in the form of a bride and groom or in a general style of celebration. The spectacularly decorated bottle will be a wonderful memento for newlyweds or just beautiful ones. They can be drawn, pasted and even made voluminous.
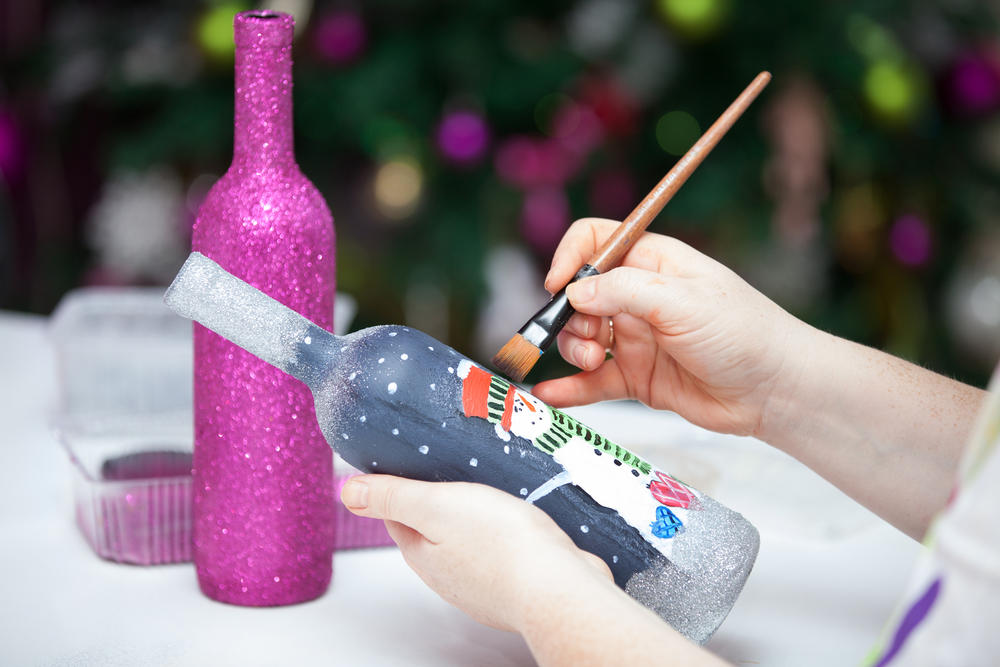
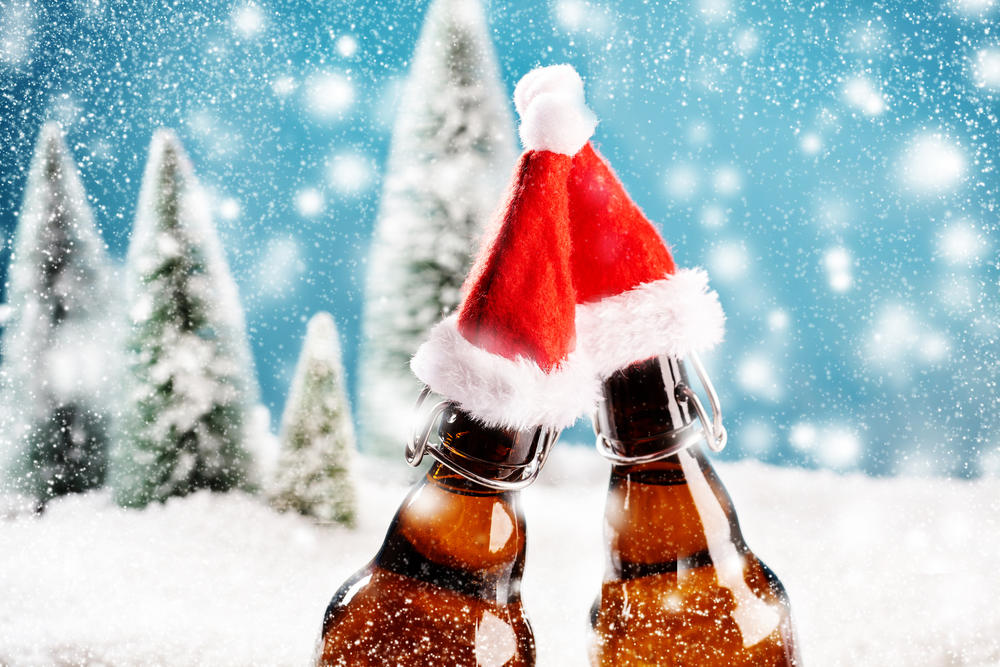
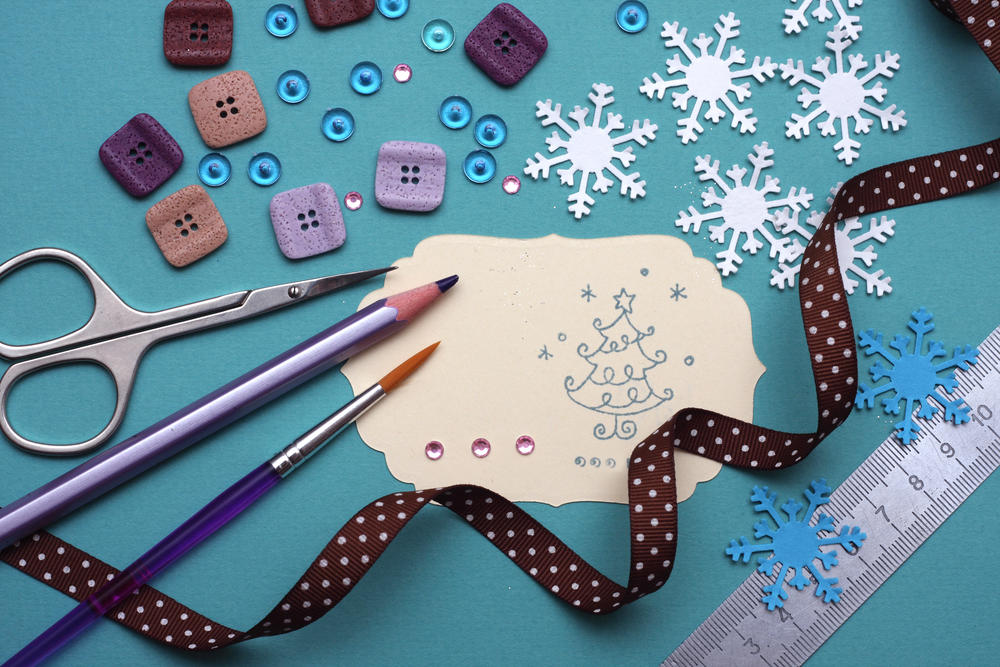
For the New Year theme, you can (and even desirable!) Use sparkles and artificial snow, natural spruce twigs, nutshells and beautiful cones. The colors are white, blue, blue, red and green.
If you enjoyed working with this technique, you don't have to stop at the bottle decor! how beautifully you can paint Christmas balls with your own hands - a fairy tale!
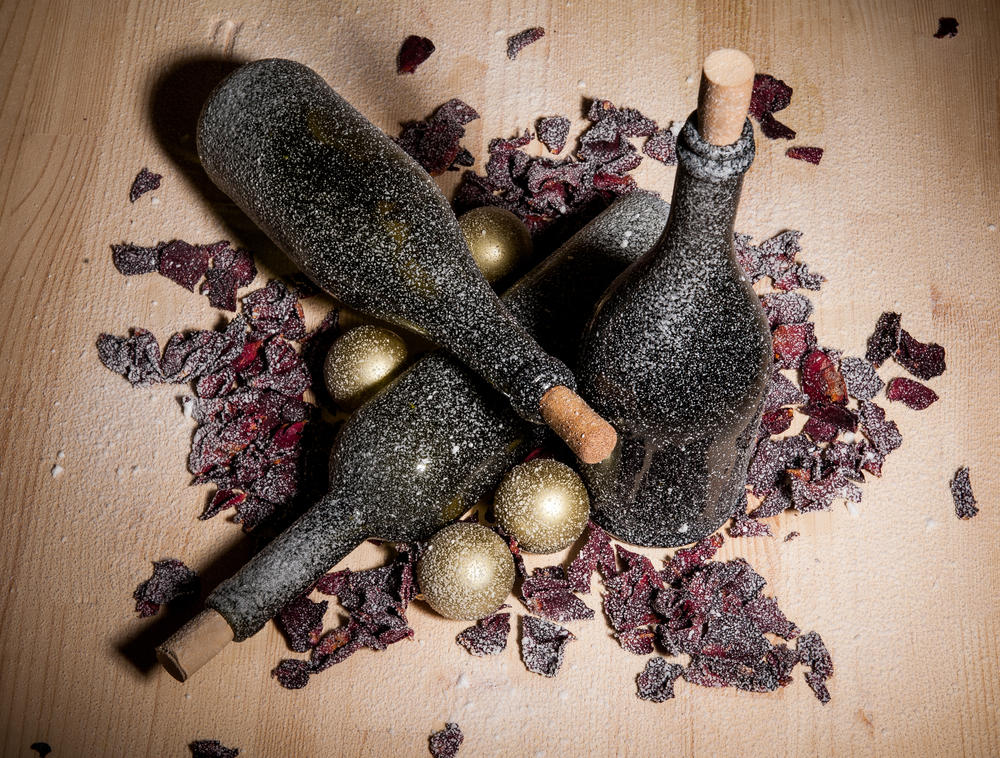
Why not turn an ordinary bottle into a creepy candlestick for Halloween home decor. The work will take only a few minutes, and you will need a minimum of materials for the craft.
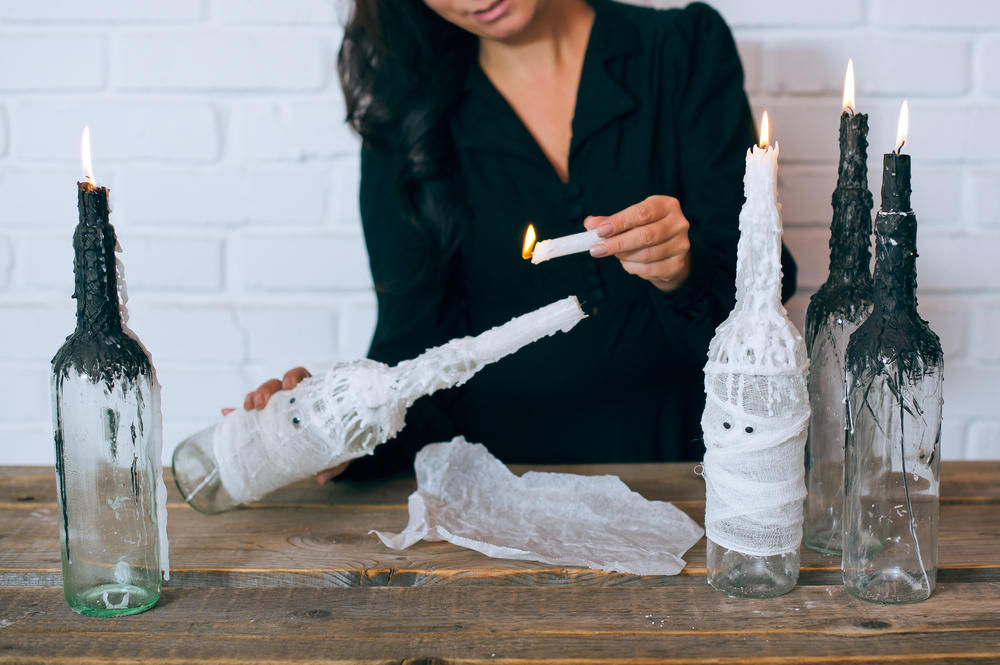
To “transform” it is enough to wrap part of the bottles up to half with a bandage or ordinary gauze and on top, using white candles, make drips of paraffin. The second part of the bottles can only be decorated with paraffin, but this time black, as shown in the photo above.
As you already understood, there are many techniques and ways with which you can decorate bottles, the article describes only a few of them. Surely you have your own secrets of bottle design) We hope you share them in the comments to this article. And if bottle decoration is new to you, feel free to try, create and, of course, share the results with us.