Transform your bathroom from expressionless to nothing, not representing to the bathroom, which is a pleasure to be in.
I would like, with pleasure, to show the process of how it is being transformed.
So, let's go to see how the bathroom renovation was done in a private house "Before and after" photos and learn about the project.
Bathroom before renovation
Well, let's get started ... There is a lot of work, but as the proverb says, you can willingly hammer a nail into a stone.
We remove the bath, cut off the battery.
We breed water supply and heating pipes from polypropylene (for a heated towel rail)
Instead of a bathtub will be made do-it-yourself shower, so we lay out a podium made of brick and install a sewer with a drain in it. At the same time, a heating pipe will pass through the floor, which will serve as a kind of warm floor during the heating season.
We install three sockets. For water heater, washing machine and next to the mirror. When installing outlets and working with electrical wiring, you must observe safety measures; given the high humidity of the room, the electrical wiring should only be hidden, and all wire connections should be carefully insulated. The sockets themselves must be waterproof.
In addition, we separately pull the wire on electric fan ceiling-mounted
Light in the bathroom. There is never a lot of light.
To determine the amount of materials, you can use the program for calculating drywall structures
We cover the walls moisture resistant plasterboard... We putty the joints. We install a new door.
Now you can install the washing machine for the duration of the wash. But you will have to clean and put it back several times during the repair until we put the tiles and paint the walls
We glue glass wallpaper on moisture resistant glue
We install a ventilation duct with a diameter of 125 mm under electric fan... Thoroughly foam the gaps with foam and silicone sealant and mount the ceiling made of plastic panels of color along the wooden frame white gloss.
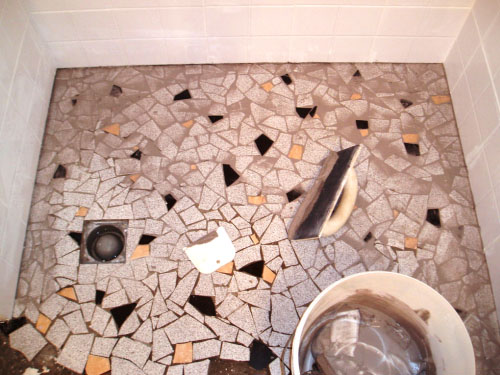
In the shower, it was decided to make mosaic floor from the remains of ceramic tiles.
Before laying the tiles, be sure to: priming and waterproofing
We put the coating waterproofing higher on the wall.