February 22nd, 2016
To make a bird feeder, you need to have a few simple things and tools. You can make a feeding trough with your children, but keep in mind that you need to watch every step, since during the construction process sharp things are used - scissors, knives, screwdrivers and even, sometimes, a saw. There are many options for feeders - made from plywood, plastic bottles, tin cans or cardboard.
Here are the most interesting, popular and original ideas for creating a feeder:
You will need:
1 toilet paper roll
Peanut butter
Small bowl
Plate
A couple of branches
Strong thread or fishing line
Knife (dull or plastic).
1. Connect two branches or sticks together using hot glue or string. You can skip this point if you make 4 holes in the sleeve (see below).
2. Make holes in the toilet paper roll so that you can thread two branches or sticks through them. It is better to make 2 holes: a little higher and 2 slightly lower (see image). This item is not required, because The sleeve can be put on differently.
3. Place the peanut butter in a small bowl and use a plastic knife to spread the butter onto the surface of the cardboard toilet paper roll.
4. Sprinkle the food over the peanut butter sleeve.
5. Repeat steps 3 and 4 for 4 more bushings.
6. Tie a strong thread to the connected branches so that the structure can be hung.
7. Hang all the cardboard tubes on the branch structure, and then hang everything on the tree.
You will need:
Any plastic bottle
Ribbon, thread or fishing line
Awl or drill (for making holes in the bottle and plastic cap)
Bolt and nut
Stationery or simple knife (if necessary)
Deep plastic plate.
1. Prepare a plastic bottle. Remove the label from it, wash it well and dry it.
2. Make a hole in the middle of the lid and plastic plate.
3. Attach the lid to the plate using a bolt and nut.
4. Make a hole in the bottom of the bottle (bottom).
5. Make several holes on the side (4-5), near the neck of the bottle, so that the food can spill out when you turn the bottle over. Holes can be made with a stationery knife if the bottle is not too thick.
6. Take the ribbon, fold it in half, and tie the ends in a knot. Thread the ribbon through the hole at the bottom of the bottle.
Now you can pour food into the bottle, screw on the cap and turn it over. The ribbon will allow you to hang the feeder on a branch.
You will need:
Plastic bottle
Plastic container
Strong thread or fishing line
Screwdriver or nail
Knife (simple or stationery).
1. Remove the cap from the bottle and the cap from the container.
2. Place the bottle cap on the container cap (in the center) and trace with a pen, felt-tip pen or pencil.
3. Using a utility knife, cut a hole in the lid of the container. The hole can be made slightly smaller than the diameter of the bottle cap.
4. Make one hole along the edges of the container lid.
5. Make a hole in the center of the bottle cap. The hole should be large enough to allow bird food to spill out.
6. Place the cap on the bottle and then insert the bottle into the hole in the container cap.
7. Tie a strong thread to the bottle and put the cap on the container.
Now you can pour food into the bottle or pour water and hang the feeder on a tree.
You will need:
Polymer clay
Rope
Thick wire or piece of aluminum
Baking bowl or any other utensil that can be placed in the oven
A small piece of fabric.
1. First roll out the clay on a flat surface until it is about 6mm thick.
2. Carefully place the rolled out clay inside the baking bowl. Trim off any excess pieces so that the clay lies flat. Make 3 large holes in the clay for the rope.
3. Place the bowl of clay in the oven. Read the clay instructions carefully to know how long it takes for the clay to harden in the oven.
4. When the clay has hardened, carefully remove it from the bowl, tie three pieces of rope to it - tie a knot at one end of each rope, and insert the other end into the hole of the clay plate.
5. Tie all ends of the rope and secure them with wire.
6. It is advisable to place a small piece of fabric inside the plate so that the birds do not accidentally peck the clay along with the food.
You will need:
Small pumpkin
Wooden crossbars (even branches can be used)
Thin wire.
1. You need to cut off the top part of the pumpkin.
2. Using a knife or screwdriver, make 4 holes in the pumpkin to insert branches or wooden slats into. Make 2 opposite holes at the same height and two other opposite ones slightly lower - this way you will have one branch slightly higher than the other.
3. Take a thin wire and wrap it around each end of the branches so that the feeder can be hung on the tree. Connect all the ends of the wire so that the feeder can hang evenly. Twist them into a hook.
This feeder is suitable for sub-zero temperatures.
You will need:
Large plastic bottle
Small plastic bottle or small plastic container
Scissors
Coniferous branches
Berries (optional)
Seeds
1. Cut off the bottom of a large and small plastic bottle. First you can make a hole with a knife and then cut with scissors. You will have the base of the feeder.
2. Place spruce branches, berries and seeds in a circle in the cut-out bottom of a large bottle.
3. Place the bottom of a small bottle or small plastic container in the center of the base.
4. Pour earth, sand or pebbles into a small container.
5. Tie strong threads or fishing line to the feeder so it can be hung.
6. If you put the feeder in the freezer overnight, and then take out and remove the plastic parts, you will get an ice feeder.
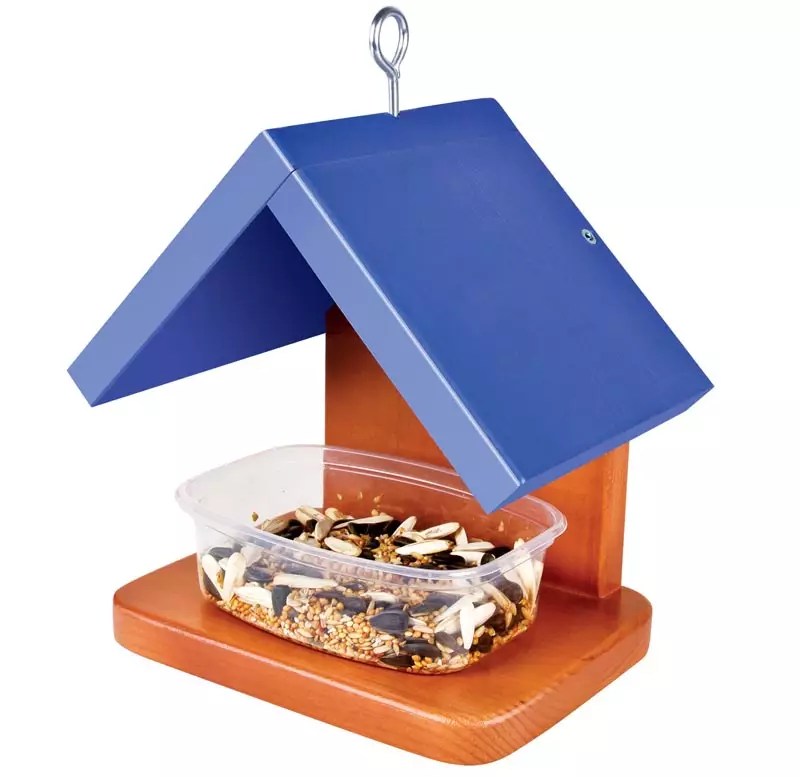
You will need:
Small glass or plastic bottle (preferably with a cap)
Small saucer or bottom of a plastic bottle
Wire
Saw (if necessary)
Screw half ring (hook).
1. Using screws, connect two small pieces of plywood. In this example, the dimensions of the plywood are 11 x 15 cm and 31 x 15 cm.
2. Using the bottle that you will later attach to the stand, mark the places where you will need to attach two pieces of wire - one at the neck, the other at the bottom of the bottle.
3. The neck of the bottle should be approximately 3-4 cm above the base.
4. Drill holes for the wire, insert your wire through the bottom, wrap it around the bottle and secure it to the back of the plywood (you can twist the wire or secure it with a stapler).
5. Fill the bottle with seeds, screw the lid on so as not to spill the seeds, turn it over and insert the bottle between the wires, place a saucer under it and remove the lid.
6. Screw a half-ring screw into the top of the plywood to hang the feeder.
You will need:
Tin can (preferably with a lid)
Sisal rope (sisal rope) or thick rope
A piece of thin plywood, a branch, or any small metal piece
Hot glue.
1. If you have a jar with a lid, then the lid needs to be bent in half.
2. Take a small branch, piece of plywood, or other small piece that birds can perch on and glue it to the jar.
3. Insert the bent lid as shown in the image (slightly inside the jar and over the metal part) and secure it with glue.
4. Take a thick rope or rope about 80 cm long and start wrapping the can so that the long ends of this rope (30 cm) remain at the beginning and at the end. Use glue to secure the rope to the can.
5. Cut the rope, tie the ends in a knot and secure with glue.
You will need:
3/4 cup birdseed
1/4 cup water
1 packet of gelatin
Twine or strong thread
Cookie pans
Baking paper.
1. Mix gelatin with water (1/4 cup) and bring to a boil, stirring. Make sure the gelatin is completely dissolved.
2. Remove from heat and let cool.
3. Add 3/4 cup birdseed. You can add more if it fits.
4. Place the cookie cutters on baking paper and fill them with the resulting food mixture.
5. Cut a piece of thread and tie its ends into a knot. Partially insert the thread into the mixture.
6. Leave the mixture to dry overnight, making sure to turn it occasionally when you have time.
7. Remove the molds and hang the food on the tree.
You will need:
3 cans of paint or cans
A piece of branch or wooden stick
Hot glue
Paints (if desired).
You can paint the jars, or you can leave them as is.
1. Glue a piece of branch to a jar for the birds to land and eat.
2. Wrap strong thread or ribbon around the jar and tie the ends in a knot. You can secure the tape with glue so that it sticks better to the jar.
3. Fill the jars with food and you're done!
You will need:
Plastic bottle (1.5 l or 5 l) or canister
Sharp scissors or utility knife
Hello dear readers and subscribers of our blog!
I want to dedicate today’s article to parents and their children, as well as people with a kind heart who do not remain indifferent to the misfortune of our little brothers. This applies not only to dogs and cats, but also to birds. It's winter now and it's especially difficult for birds. Thick snow cover makes it impossible to reach the seeds remaining on the grass and small bushes since the fall.
But it is in our power to help them. A simple bird feeder is the way to go!
Boys in the past, and now grown men and fathers, I invite you to remember your school years. Surely during the craft lesson you made a bird feeder with your own hands, and even out of wood! Of course, you can make a complex version, but I want to offer some of the simplest ways to make a bird feeder from practically scrap material.
However, the girls, now grown women and mothers, probably did not lag behind the boys and at least made at least one feeding trough in childhood.
Moms and dads, connect your kids, call your grandparents! I declare the master class called “DIY bird feeder” open!
It's so fun and exciting to get everyone together and do one thing. There will be so many conversations here, grandfather will definitely share the experience of his youth, dad will offer his innovative way of making a table for birds, and mom and grandmother will add a touch of beauty and grace. I promise that your children will remember the time spent together for a long time, and in the future they will want to pass on the acquired knowledge to the next generation.
To make it we will need:
Milk carton, empty;
Stapler (you can do without it, replacing it with glue or tape);
Scissors;
Pencil (you can also do without it);
Band-Aid;
Wand;
Rope.
Step 1. According to the contour marked in advance, we cut out two windows in the bag opposite each other (on opposite sides). This is to make it convenient for birds to fly in and out. We cover the bottom of the window with adhesive tape so that the birds' feet do not slip.
Step 2. Under the windows we make cuts in the form of a cross and insert a stick. It will serve as a pole.
Step 3. We fasten the top part of the bag with a stapler or tape, or glue. We make a hole in it and thread a string.
For this we will need:
Plastic bottle;
Scissors;
Band-Aid;
Wand;
Rope.
Step 1. Just like in the first option, we cut out two windows in the bottle. We stick an adhesive plaster on the bottom part. In this case, it serves as protection. The sharp plastic edge can injure birds' feet.
Step 2. We insert a stick into the cross-shaped slot under the window.
Step 3. We make a hole in the lid and use a knot to fix the rope in the form of a loop.
Don't forget to make several small holes at the bottom of the plastic bottle. They will serve as drainage. Melt water will flow down them, so the food will not freeze.
Necessary materials:
Baby food or coffee tin;
Scissors;
Band-Aid;
Wand;
Rope;
Step 1. We use scissors to make a window in the lid of the jar. On the lower part, as in the two previous options, it is advisable to stick an adhesive plaster.
Step 2. Insert a stick into the slot under the window. We secure the inside of the stick with an adhesive plaster so that it does not move.
Step 3. Using an adhesive plaster or tape, we fix the rope to the can so that the can hangs horizontally or at a slight angle.
These are some simple ways to make a simple bird feeder. Just a little time spent, but what a big benefit!
I made all the feeders in the photo myself. Maybe somewhere a little crooked, but with enthusiasm and love! I have no doubt that your creations will be much cuter!
Very imperceptibly, from the question of “do-it-yourself bird feeder”, we got to an equally important question than filling this very feeder.
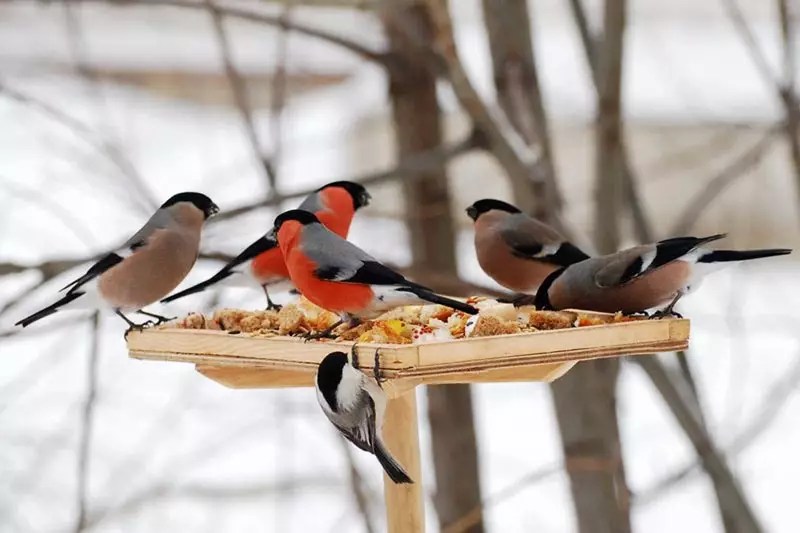
The main types of birds that will feed from your feeder are sparrows, pigeons and tits. For pigeons, a specially prepared mixture or wheat is ideal. They tolerate barley and pearl barley very well. But with white bread you should be careful, use it in small quantities. Oat flakes are also suitable for feeding. Only you need to take NOT QUICK-COOKING oatmeal, but simple oatmeal. Pigeons also really like sunflower seeds, unroasted.
Sparrows eat the same things as pigeons. Additionally, you can add millet to the feeder for them. But pearl barley will be a little rough for them.
Tits love unroasted sunflower seeds, grated hard-boiled eggs, and finely chopped apples. They will not refuse unsalted lard and butter. You can also put cottage cheese in the feeder for tits, after mixing it with breadcrumbs.
Anything fried and salty is harmful food for birds. Rancid grain, missing products, any spoiled food are very harmful. Brown bread along with millet is also completely unsuitable for poultry diet.
Very often, with a constantly filled feeder, birds are too lazy to look for food in other places. What for? And the food is good here. In this case, the birds are at risk of overeating, the worst outcome of which could be the death of the birds.
To prevent this from happening, fill the feeder 1-2 times a day. In this way, you will save the birds from overeating and accustom them to a feeding regime.
By following these simple rules, you will help birds survive snowy, cold winters without harming their health.
Dear friends, I really want to believe that this article “do-it-yourself bird feeder” will push you to do a good deed, or at least make you think.
Of course, such a feeder, like one made from a milk carton, will not last long - it will get wet. Therefore, if you want to make a feeder that will last a longer time, I suggest watching a small video clip.
If you find this material useful, please leave a review. I will be glad to see all your comments and will definitely answer them.
Sincerely,
Evgenia Ponomareva.
A milk carton is a versatile craft material! There are so many things you can do with it. Let's make a bird feeder out of it today.
Ready! All that's left to do is pour food for the birds and go for a walk!
A feeder is not only a great way to feed our bird friends. If you approach the issue of making it creatively, you can create a real one. We offer a selection of ideas that will tell you how to make a bird feeder with your own hands. And master classes from the editors of HomeMyHome.ru will help you learn the intricacies of manufacturing and reveal the secrets of constructing drawings.
Depending on what goals you pursue when making a feeder, the following types of its design differ.

Making such a “bowl” is not difficult, especially if you have a regular clothesline and clothesline on hand. One of the disadvantages is that in strong winds, such structures tip over, and all the food ends up on the ground.

1 of 6


Inspired by ideas for creating simple feeders? If yes, then our small master classes are for you.
Related article:
How to make a birdhouse yourself, how to decorate it and install it correctly, photo examples of creative houses - read in our publication.
As we have already seen, feeders can be made from completely different materials - literally, everything that is at hand. It's a little more difficult to work with wood. But nothing is impossible, the main thing is that there is a desire. Let's look at different options for bird feeders.
We offer step-by-step instructions on how to make a beautiful bird feeder house yourself, as in the photo below.

The main material is small logs, which can be cut from ordinary cuttings for or rakes. Fast, cheap and original. All other parts are also made of wood. To bring such a masterpiece to life, in addition to raw materials, you will need a special wood drilling machine and. It will be possible to do it without them, but it’s not a fact that it will turn out just as neatly and beautifully.
| Illustration | Description |
 | We cut logs 30 cm long from the cuttings. You should get 36 pieces in total. 24 pieces - for the walls, and parts from the logs for the pediment. Remains are spare parts in case of damage to the main elements. |
 | We are preparing a machine with a wood crown of a suitable diameter to make recesses in the logs that will serve as fastenings for the future feeder. |
 | To ensure that the parts are similar and that the fastening recesses fit each other perfectly, it is best to make paired holes. To do this, we fasten the two blanks together with tape on both sides for better fixation and measure 3 cm from both ends. |
 | We make holes on the machine in the logs secured to each other at both ends. |
 | To assemble the house you will also need round wooden sticks. Sushi chopsticks are ideal, but not flat, but round. In accordance with their diameter, we make a hole in each recess of the log. And we begin to assemble the walls of the house. |
 | When you are finished with the construction, make sure that all the walls are even and glue the logs together. |
 | We cut out a template for the future roof from plywood. The size and slope depend on the design of the resulting house frame. |
 | Using the template, we cut the logs obliquely on both sides. We make a hole in the middle for the stick and glue the resulting structure. On the front side, if desired, we make a hole in the “attic”. Also, to give the structure rigidity, we put in a transverse beam and glue it. |
 | The roof can be made from any available sheet material. In our case, we used moisture-resistant plywood. Small parts were cut out to fit the resulting house. |
 | Let's start decorating the house - doors, canopy, attic. All this is done by hand from leftover plywood. In handicraft stores you can purchase various decorative items, such as a door lock. In our case, the door is simply glued to the wall. |
 | We make a pallet for the house from ordinary ones. |
 | It is best not to twist them together, but to glue them together, as shown in the photo. |
 | We paint the house, make sides on the pallet so that the food does not spill out, and you can hang the resulting food in the garden. |
If you have any questions, you can find answers to them in the video provided.
To make a feeder out of plywood, you will need special tools to work with it, such as a jigsaw, wood glue, tape measure, pencil, construction angle and glue. Let's make a small hopper-type feeder, approximately as in the drawing below. They simplified it a little by placing only two walls, which will be held together to form a triangle shape.

All work takes place in several stages. Use a jigsaw to cut out the necessary parts. Their sizes and shapes are shown in the photo below.

We attach small blocks along the edges of the bottom so that their total height is approximately 5-7 cm.
Attention! We mount the blocks along the 27 cm long side so that there are small indentations along the edges - no more than 7 mm.

To the side where the indents are made, we mount the side walls. To make the entire structure stable, we reinforce it along the connection of the side parts with a block.


Treat the resulting feeder with impregnation so that the plywood does not deteriorate as long as possible under the influence of precipitation and temperature changes.
A bird feeder made from a cardboard box is an option for those who want to do everything as quickly and simply as possible.

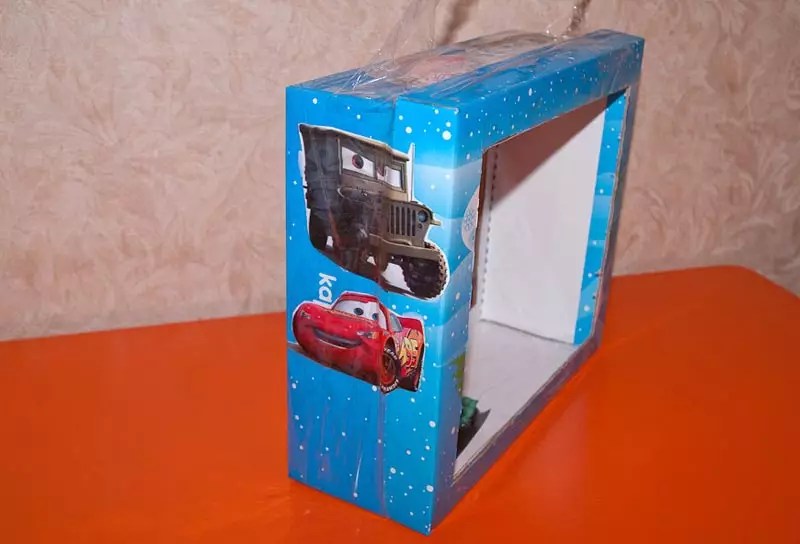

All that remains is to choose a stronger box, cut a hole in it for the birds, work out the mounting method - and the design is ready. It's a pity that it will lose its shape very quickly. But this is a fixable matter and costs practically nothing.
Plastic bottles are one of the most common recycled materials, suitable for making all sorts of useful things with your own hands. Feeders are also no exception. We offer step-by-step instructions for making a cute and durable feeder. For this you will need:

| Illustration | Description |
 | We cut out the bottoms of three two-liter bottles. To make it look more interesting, you can cut out the edges with petals and burn them with a lighter, getting a wavy edge. |
 | We make a hole in the middle of the bottoms and string them on a wire. |
 | We cut off the top of a one and a half liter bottle and, like the bottoms, we process the edges with a lighter. |
 | We string the neck onto a wire and paint the resulting structure with paint. |
 | Use a swab to paint the edges with a contrasting color. |
 | We cut out the bottom part of a one and a half liter bottle, cut a hole and also singe it with a lighter. |
 | We connect the lower and upper parts with a glue gun. |
 | We cut out the weed from the remains of the bottles. And use a glue gun to attach them to the bottom. |
The bird feeder is ready. We pour more food there and watch the growth of the bird population in your garden.
During the cold season, it is difficult for birds to find food, especially when everything around is covered with snow. It often happens that a child needs to make a bird feeder during a craft lesson at school or for some project. If you have never done this before, then a few important tips on how to do it yourself will not be superfluous.
It is difficult to imagine the world around us without these beautiful creatures, and some of them have beautiful singing. In order for them to please you more often, it is worth understanding the issue of how to make a bird feeder.

In addition to the aesthetic pleasure from the sounds they make, it will be very interesting to observe at least a little how they live and behave. This applies to how they behave with others like them, and how they react to people and even the weather. If you believe folk superstitions, you can predict the weather by the behavior of birds.


Despite the fact that the materials can be very different, there are some interesting points to consider. To begin with, it is worth understanding that we are making a feeder not for ourselves and our pleasure, but so that the birds can use it. Therefore, it should not be difficult for them to get to the food that is placed inside.

You may have previously seen photos of homemade feeders that were completely open and consisted of something similar to a simple shelf suspended from a tree.

So, it’s better not to do this. It is better to make the roof a little larger so that rain and snow do not fall on the food, and the sides will not be superfluous so that the wind does not blow out this same food.

As for the material, it is better to either immediately choose one that reacts well to moisture, or simply additionally treat the parts with a primer, and then either varnish or paint the entire structure.

If you do not pay due attention to this issue, then in fact it may turn out that your feeder will not survive autumn and winter.

In terms of design convenience, it would be a good idea to go over the entire area of the feeder with sandpaper to remove all protruding and prickly chips and the like. It would also be good to round the corners a little so that they do not interfere with guests.

The most common places for feeders were and are trees and buildings. As for the first option, here you can either hang it or attach it to the base of the plant.

This is also suitable in the case of a human building, because, as in the case of trees, it is enough to attach a feeder at a height of up to two meters, so that it is not difficult for you to add food and check its condition, and animals such as cats do not interfere with birds.


If you can’t decide what you can make a bird feeder from, then you simply forgot about such a simple material as plywood. You can buy it in almost any construction supermarket, despite the fact that many may simply have it lying around at home and lie idle.

This material is perfect for a wide variety of feeders; in addition, it can be coated with paint or varnish without any problems.

It is best to look for ready-made drawings on the Internet, since most often they come with step-by-step instructions describing how to make a feeder from start to finish.

As for size, you need to think about which birds are most common in your region, or even better, roughly imagine which ones are near your house or other feeder location.

Wood is one of the best solutions in this situation, because, with the right approach and processing, such a feeder will last a very long time without losing its quality.


For it, you will again need a drawing, all in order to save a huge amount of time, which may take to create them if you have never had to do something like this.

In addition, you will need fairly simple tools, including a hammer, sandpaper, a hacksaw and nails. With just this and the materials, you can make a simple but high-quality animal feeder, and it doesn't just end with birds, because squirrels can be fed too.

Creating the simplest wooden feeder will require a square piece for the bottom, four slats for the sides, two more to support the roof, several sheets of plywood for the roof and three more slats for its horizontal posts.

All this can be nailed down, you can add glue in some places, then it will be good to cover it all with varnish or paint, and that’s it - you can hang it on a tree or attach it in any suitable place.


There are also unusual options for feeders made from scrap materials, which are much more common in yards than those described above. These include a container that can be made from a bag that you have left over from dairy products or juice. All you need is the bag itself, wire or thick cord and a knife.

First, let's start cutting - we need holes on different sides. This is best done on the front and back sides. The lower parts of these holes can either be cleaned a little, or simply sealed with adhesive tape.


We will need to make several additional holes on top, through which the fastening of the structure will pass. This is necessary in order to hang our feeder.

When the necessary holes are present, you need to thoroughly wash the bag to remove any traces of juice and let it dry. Next, we glue a patch or tape to the lower parts of the large holes, and draw a cord through the small ones at the top.

It will be best if you attach it either very tightly to a branch or directly to the tree itself, since very strong winds will easily carry the feeder in all directions. That's all - a fairly simple, but at the same time interesting and funny feeder is ready.

A master class that describes how to make a feeder with your own hands cannot be called one unless you remember such a simple type of feeder as those made from commonplace plastic bottles. They are very easy to make, and there may be several options for such feeders. Depending on this, they may differ in their design and complexity of manufacture, although more on this later.

The first type of such feeder is very similar to those made from a simple juice carton. They can be placed vertically or horizontally. In any case, you will need to make two large holes on opposite sides of the bottle. They need to be made in such a way that, in its normal position, it is convenient for the birds to get to the food, even if there is not much of it inside.

It would also be a good idea to process the edges of the resulting holes at least a little. After all, cut plastic can turn out to be very sharp, which is not at all desirable.


If you are a more creative person, you can not completely cut out the sides of the bottle. You can make three cuts: bottom, left and right, after which you simply bend the edge up, and then you can even fix it at a certain level. This can protect the food and birds during rain or snow.

It is placed in exactly the same way as the version from the package, however, in a horizontal position, and with sufficient availability of food, it will not be swayed by the wind, which can play an important role in certain conditions.

In the second case, a bottle or eggplant feeder can be placed vertically. The creation proceeds in exactly the same way as before, only you need to do everything with the final position of the feeder in mind. You also need to make holes, and the bottom should not be much lower than the bottom edge of the hole, and it would also be good to seal this edge with tape or tape.

There is a slightly more complicated option. To do this, you will need the same eggplant as before, only add a simple bottle to it. The holes will be made in the same way, there will simply be an inverted bottle inside, from which food will gradually pour out.
It will need to be placed tightly enough inside so that its cut bottom, which protrudes at the top in this case, reaches the top of the eggplant, through the neck of which the food will be poured.
The bottle will reach the bottom of the main container, and food will pour out of it, but this will happen until the food is level with the neck of the bottle.

Thus, the food will be replenished only when there is much less of it in the feeder itself. This option is perfect for placing in places where you cannot often add food to birds, but you are worried that a large pile may simply spill out or be blown away by the wind. Thanks to the additional food, the entire structure becomes heavier, and therefore it can be safely hung even on a branch.


